.png)
.png)
.png)


.jpg)
For further questions,
check out our FAQs.
We hope that our step-by-step guides have helped you with using Kia Connect, but for more information you can visit our FAQ website page.
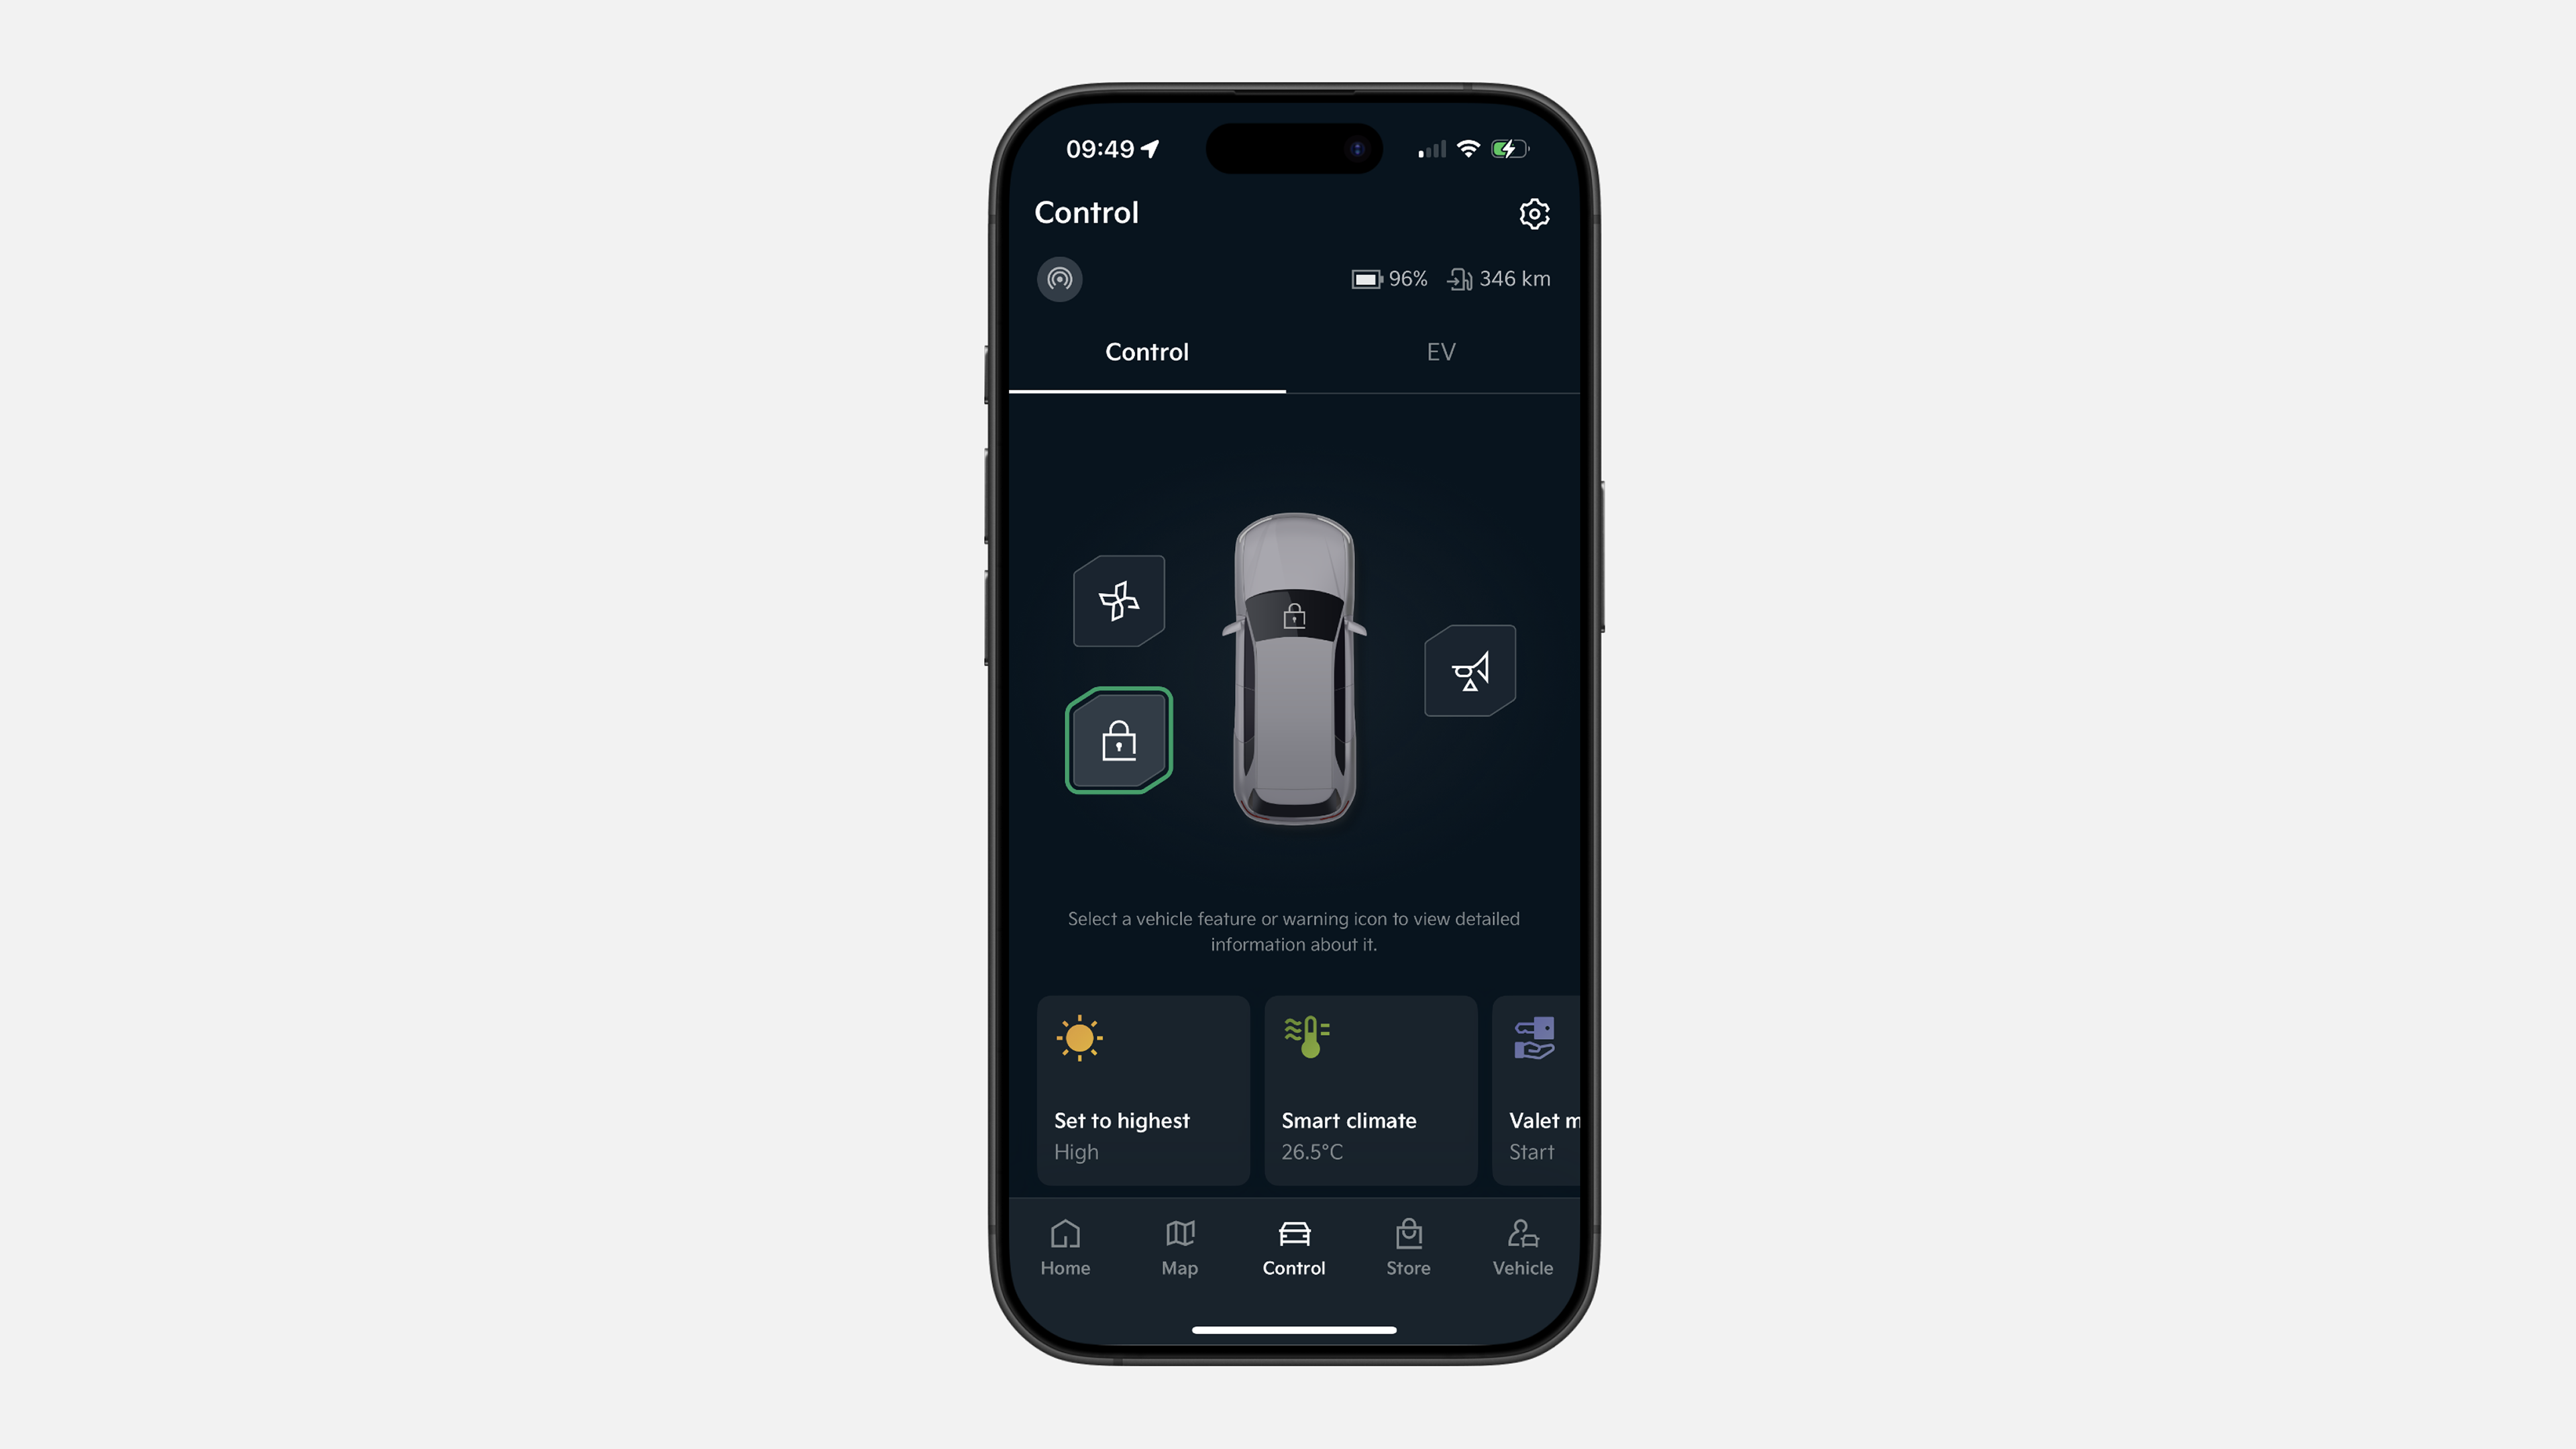
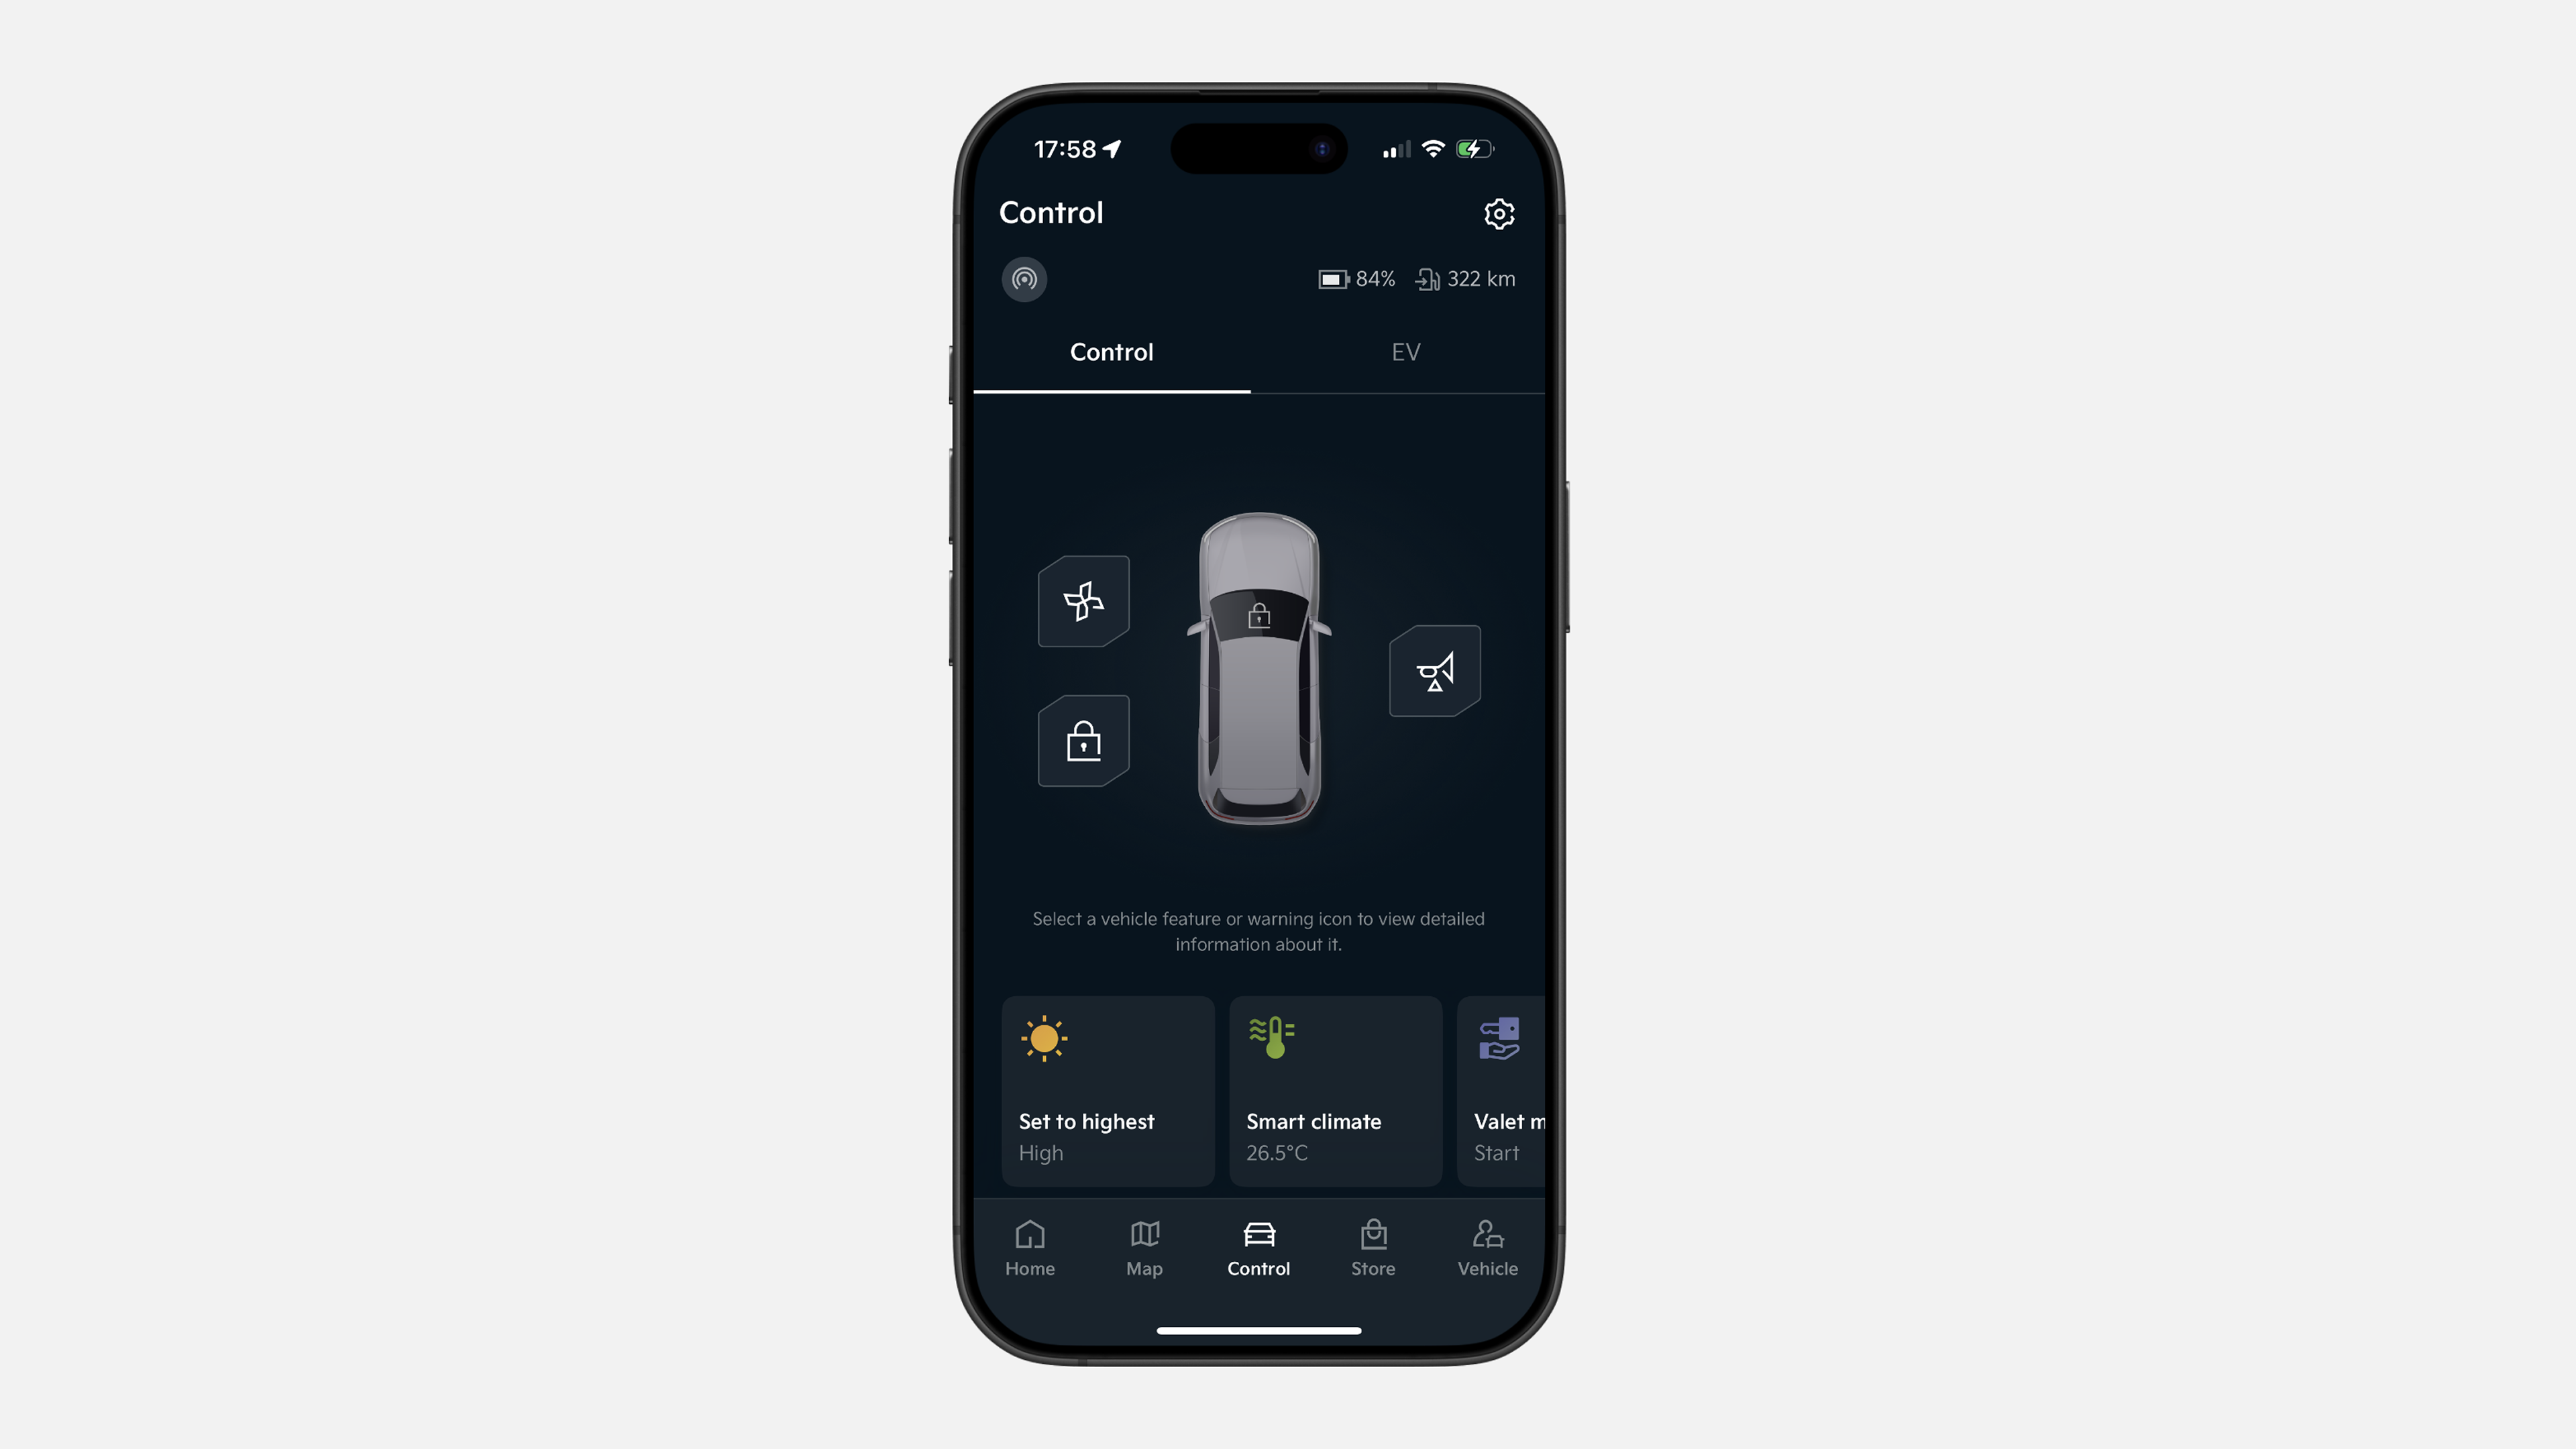
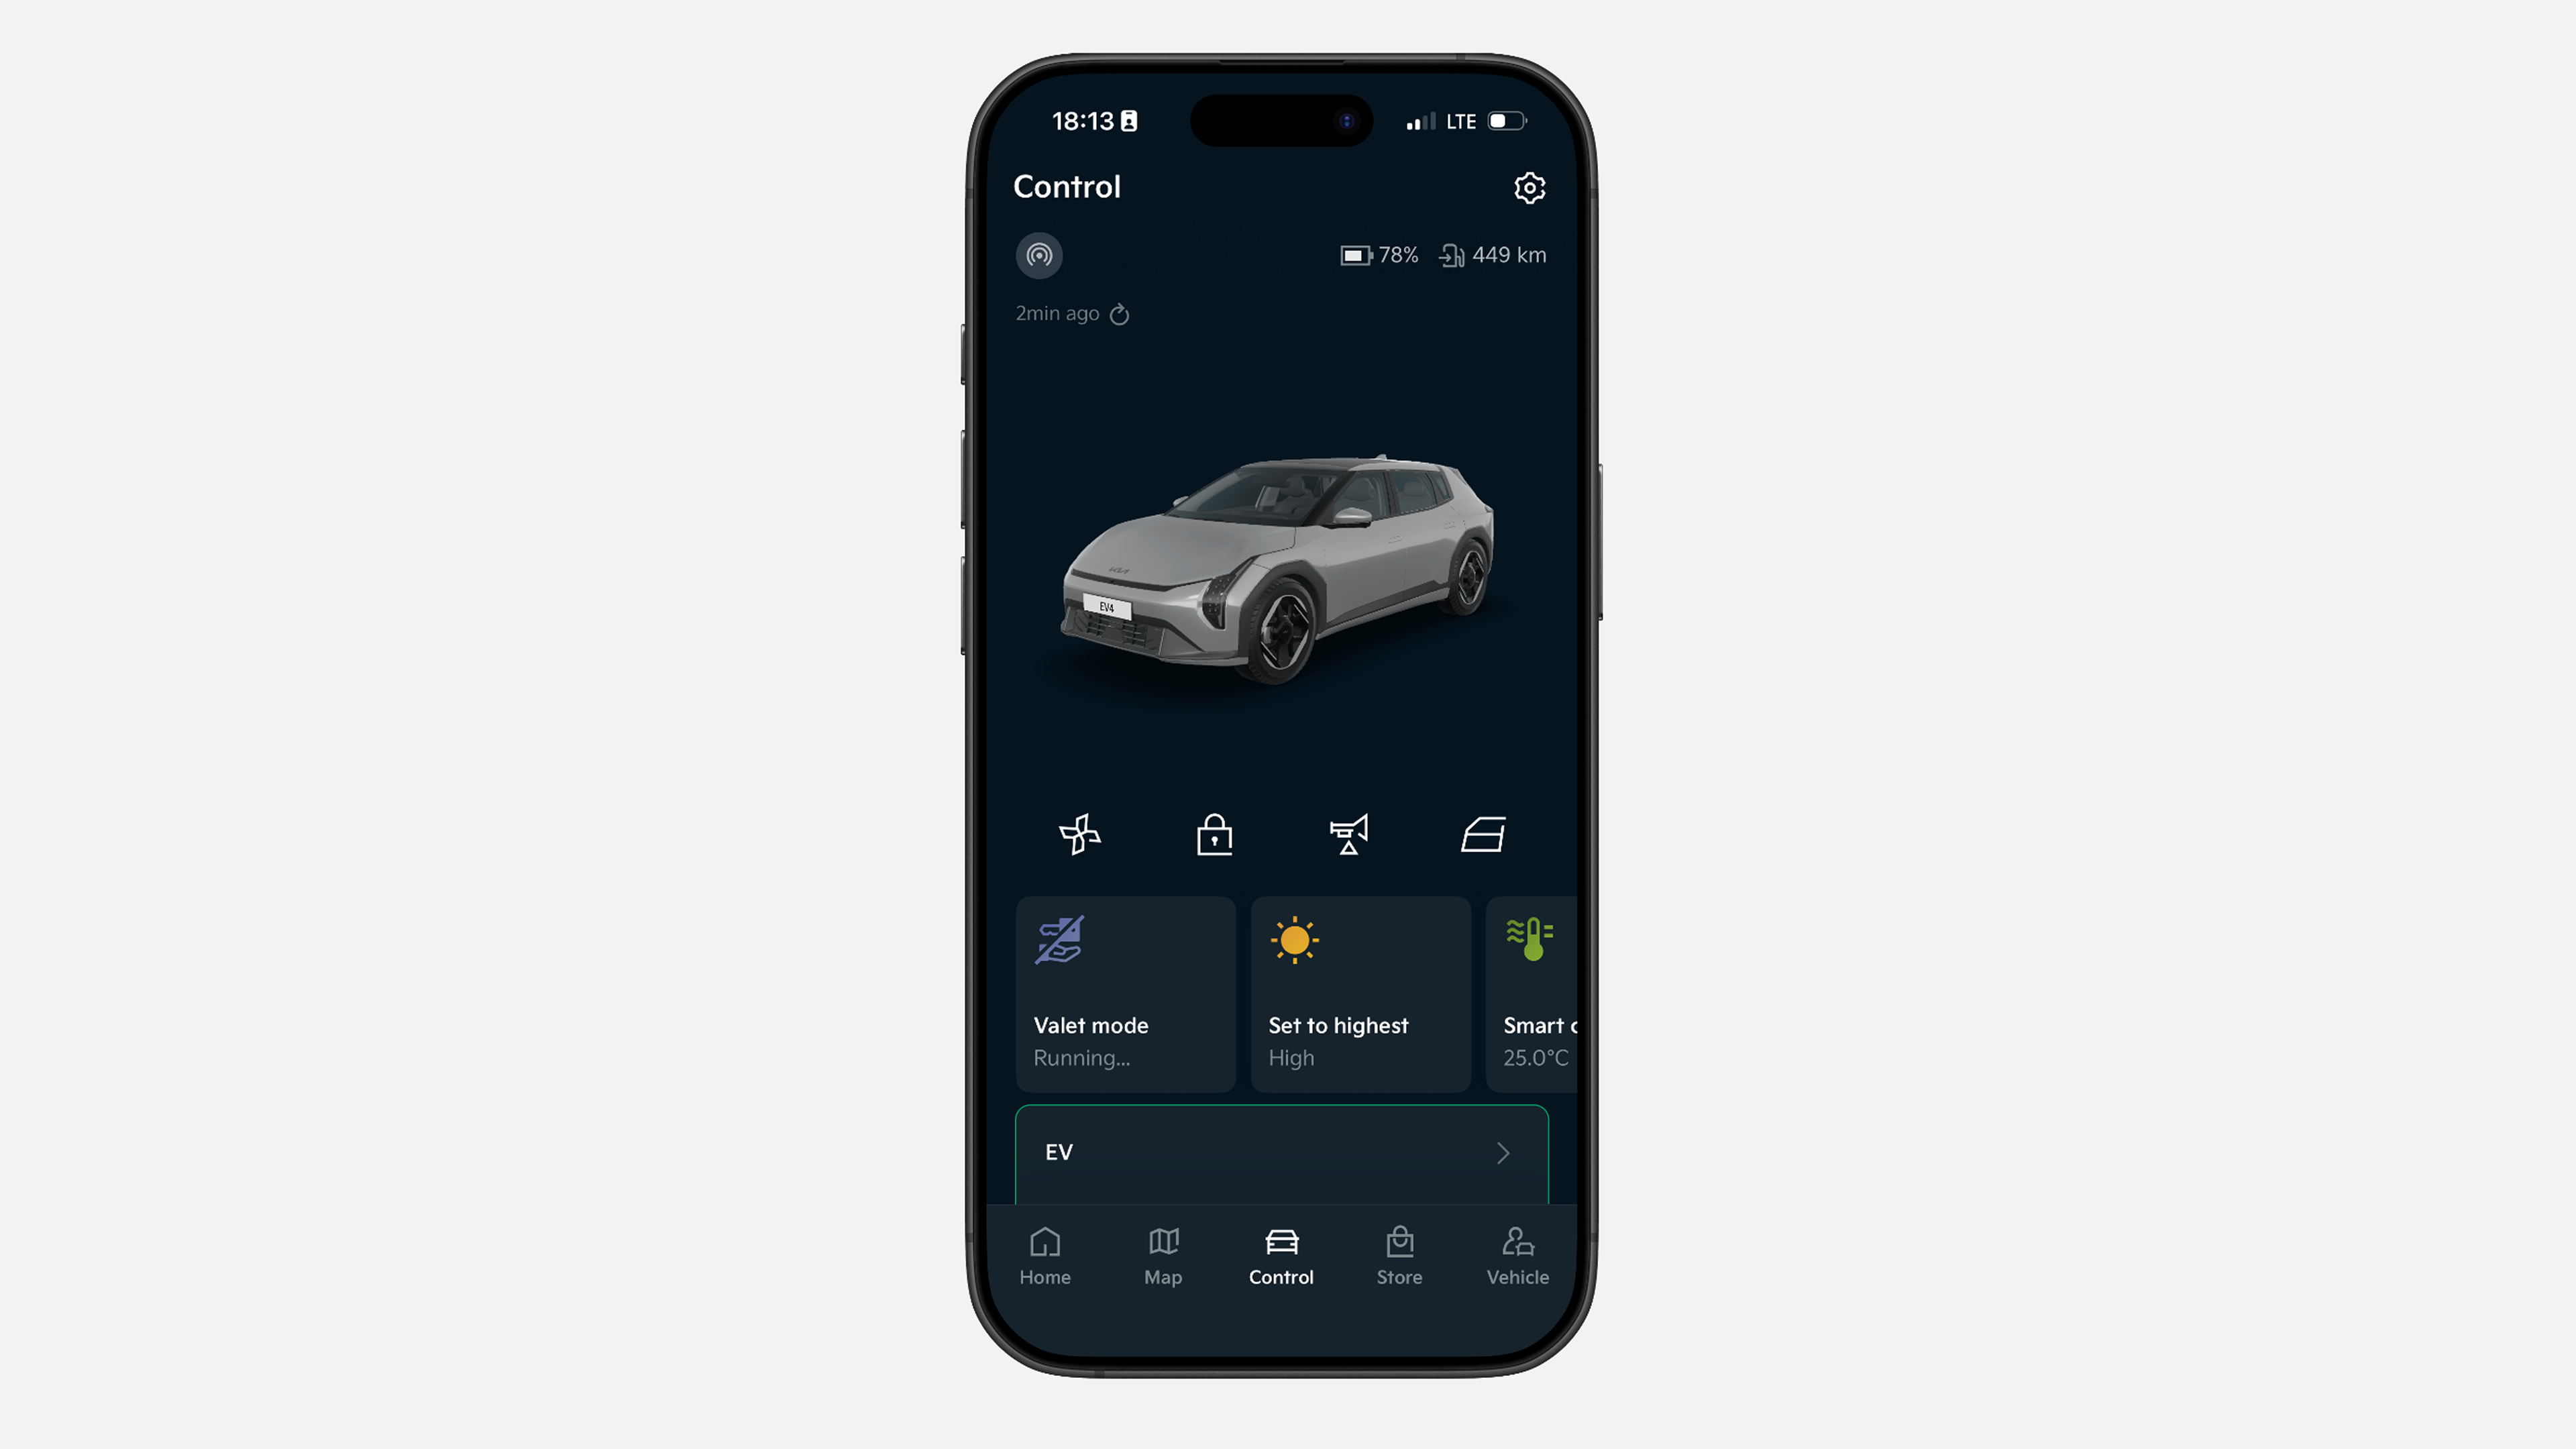
✔ In the lower menu bar, click Control
✔ Press & hold the lock icon for 1 second to lock
✔ The doors will now lock themselves
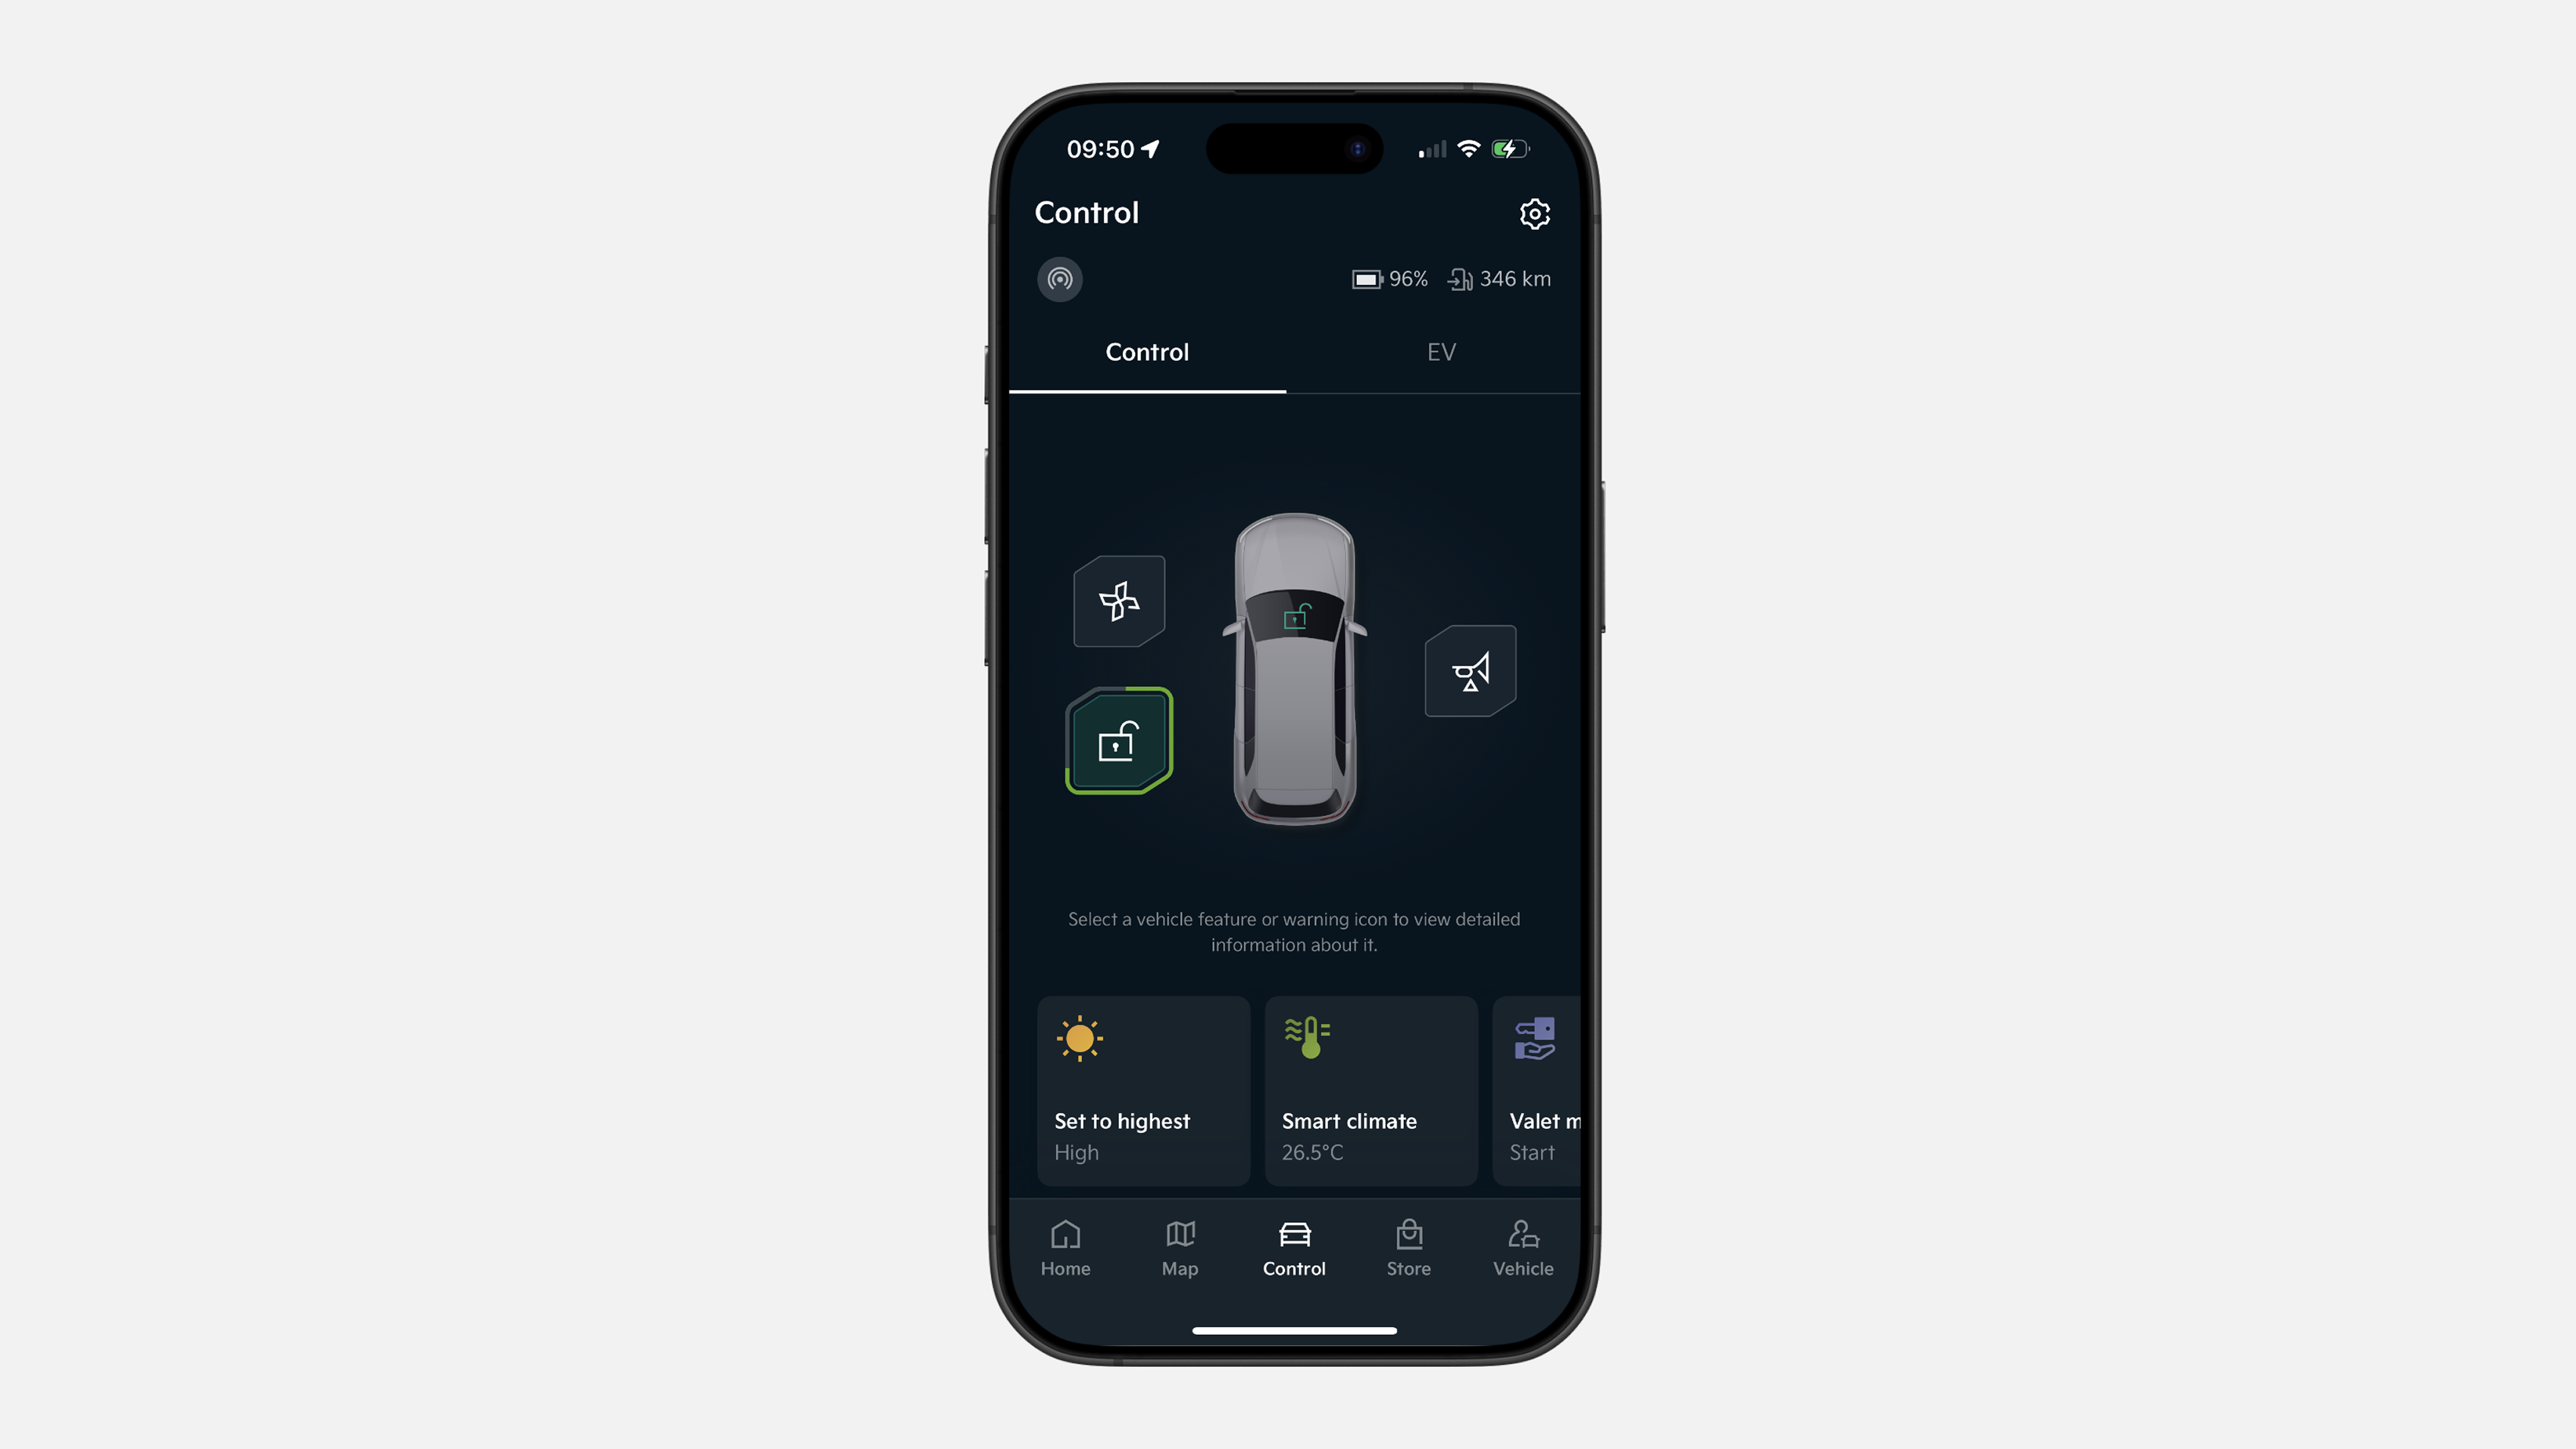
✔ Click on the Control icon on the menu below
✔ Press & hold the lock icon for 1 second to unlock
✔ The doors are now unlocked
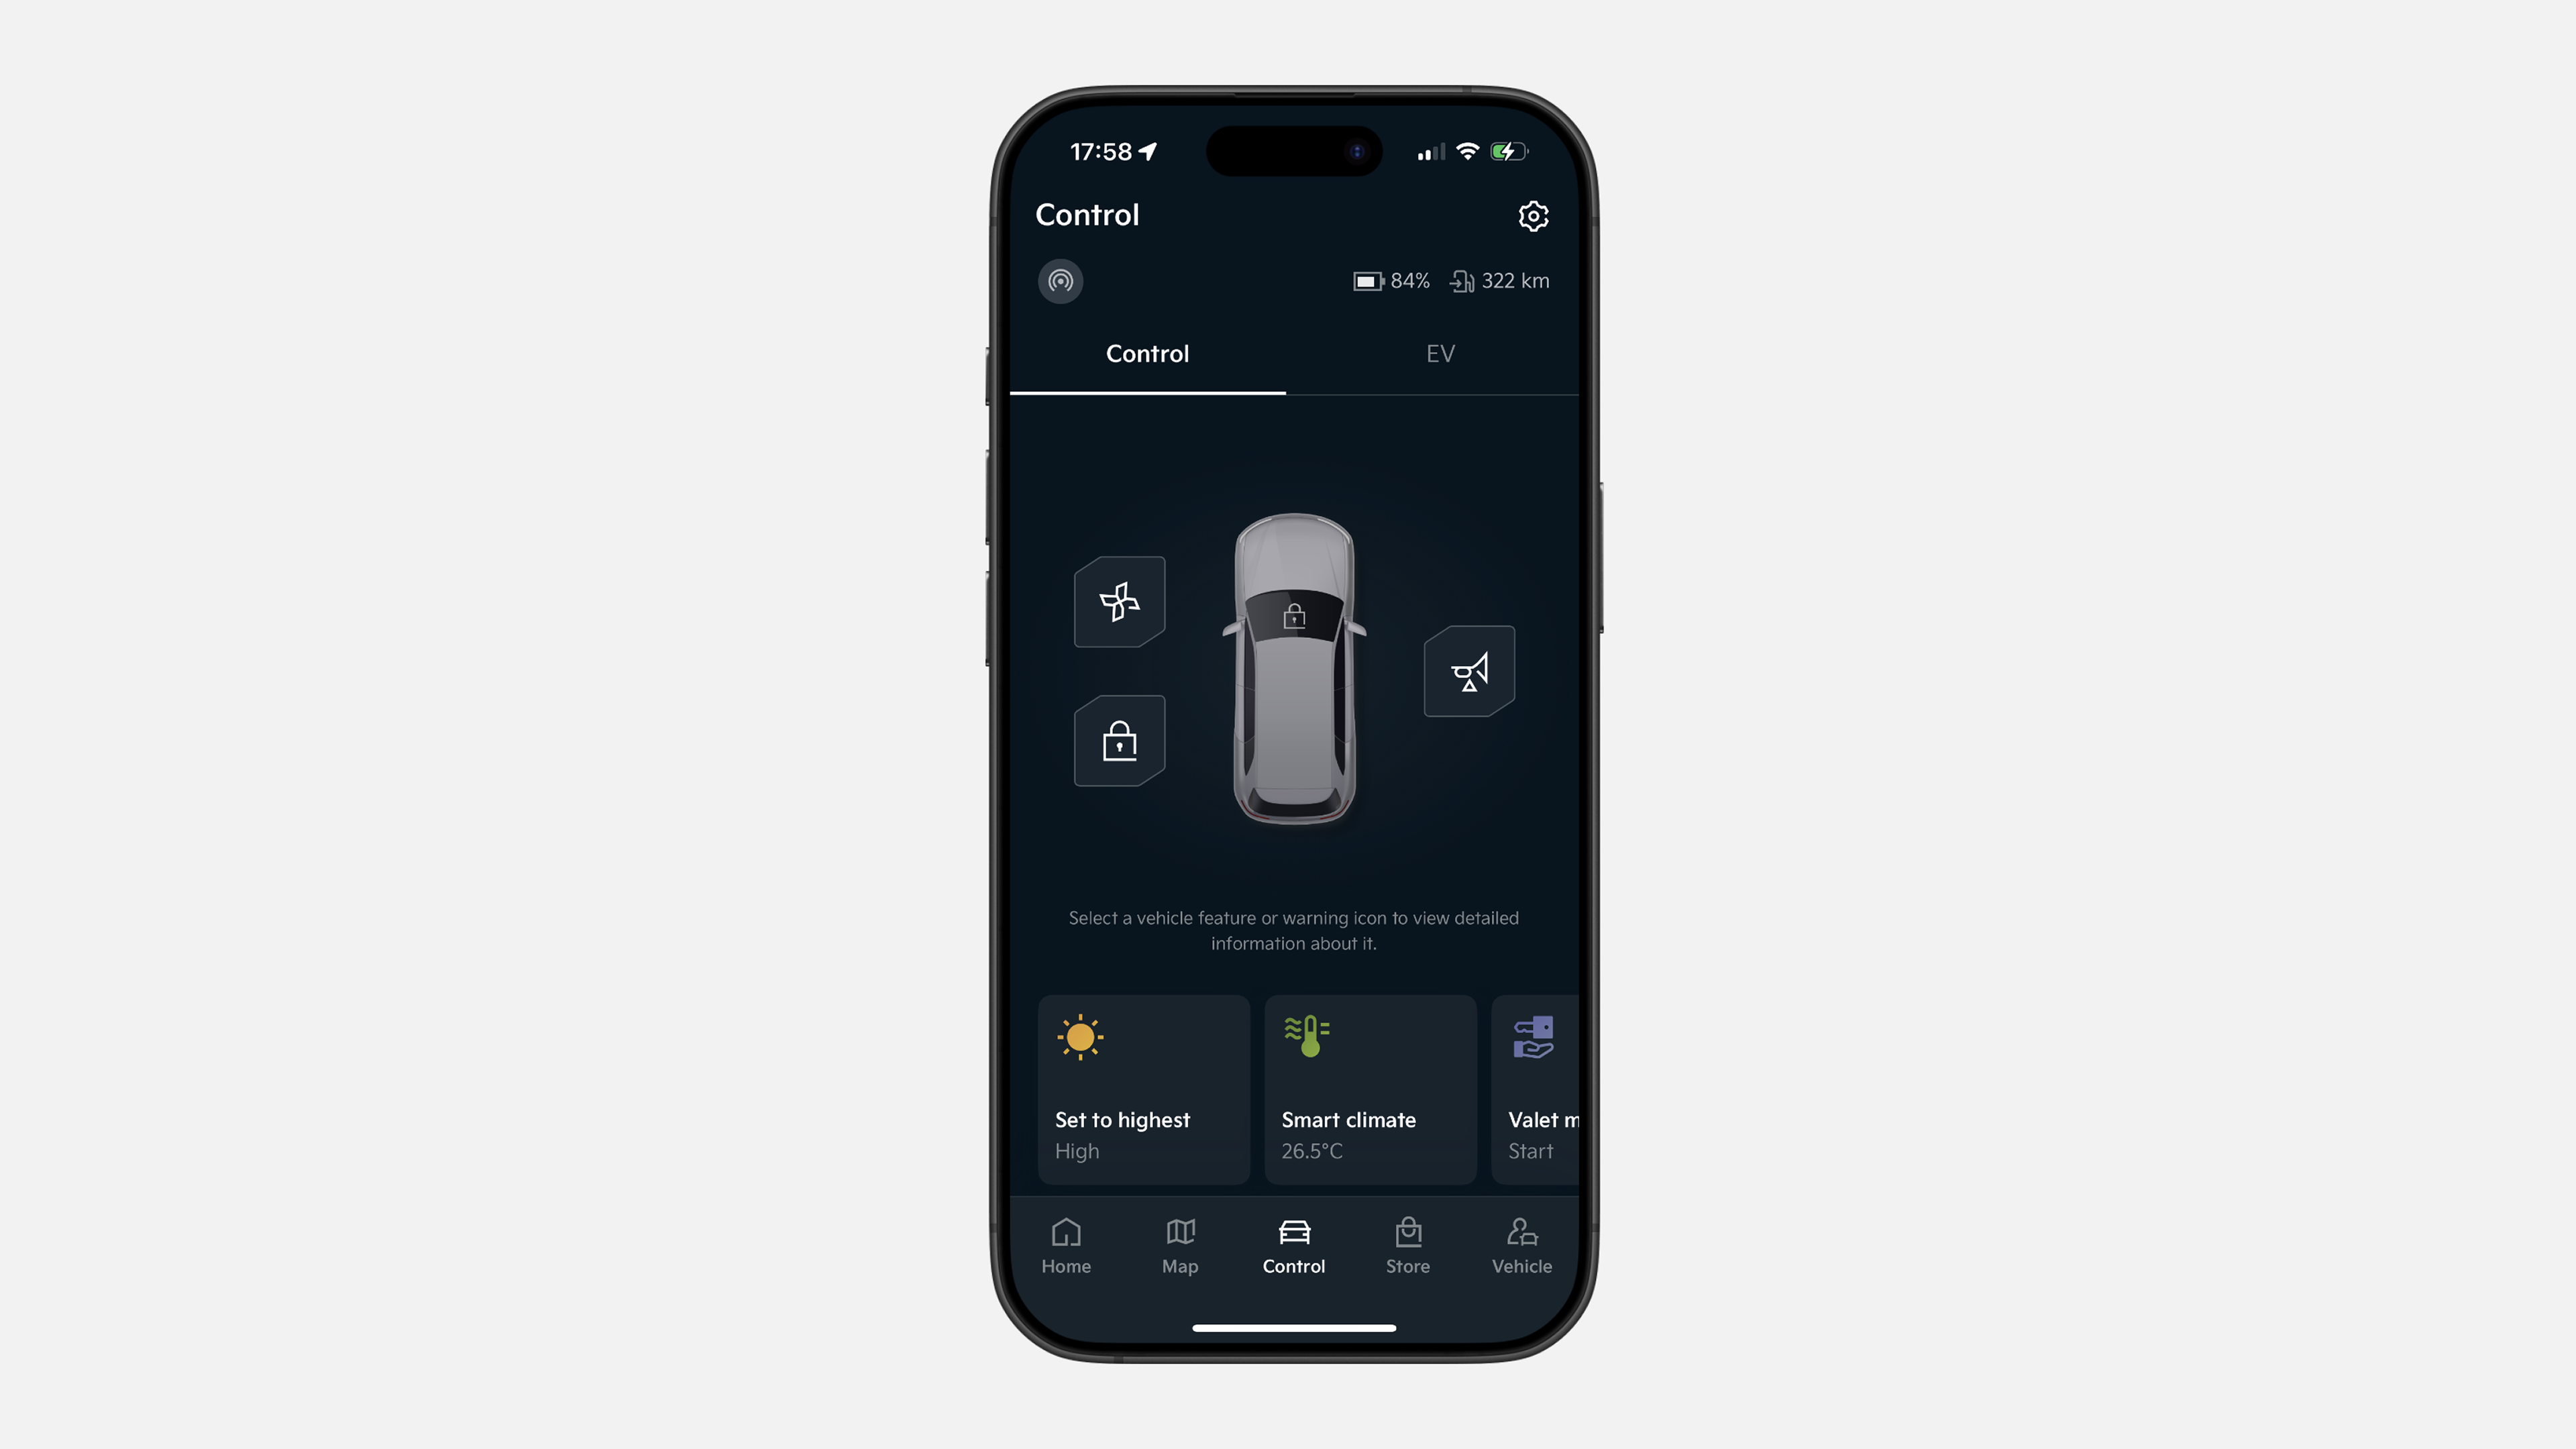
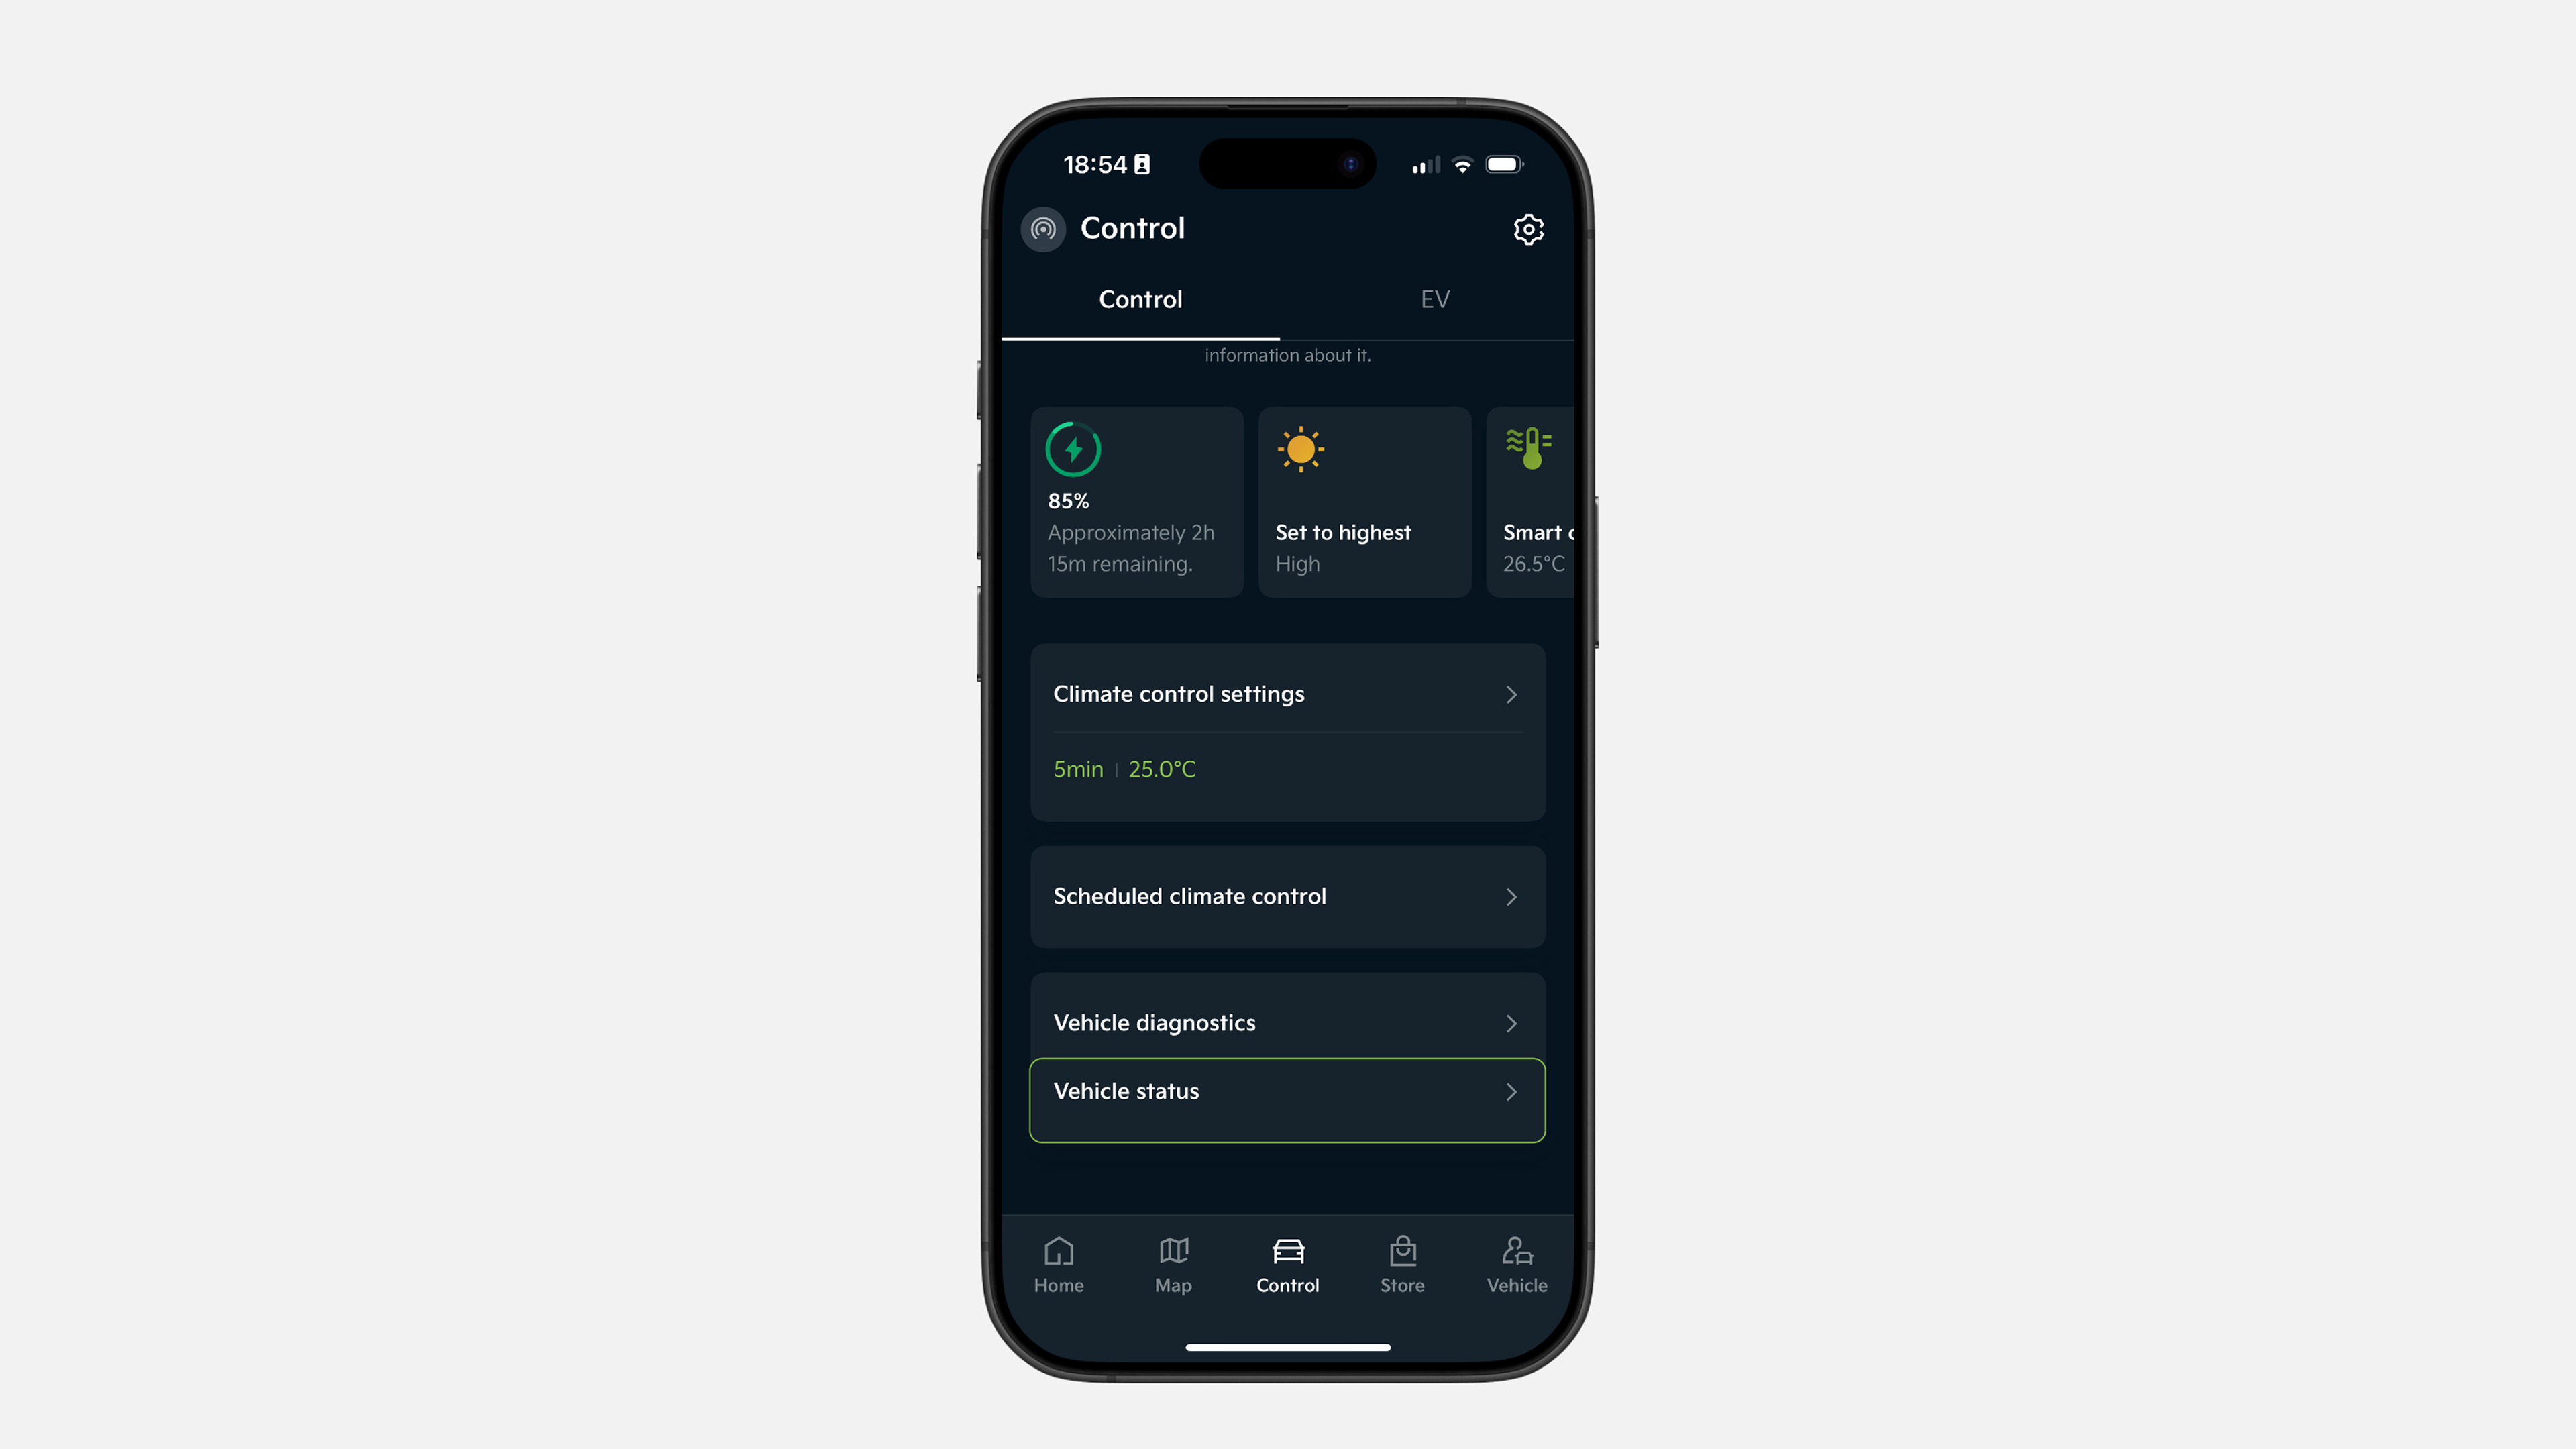
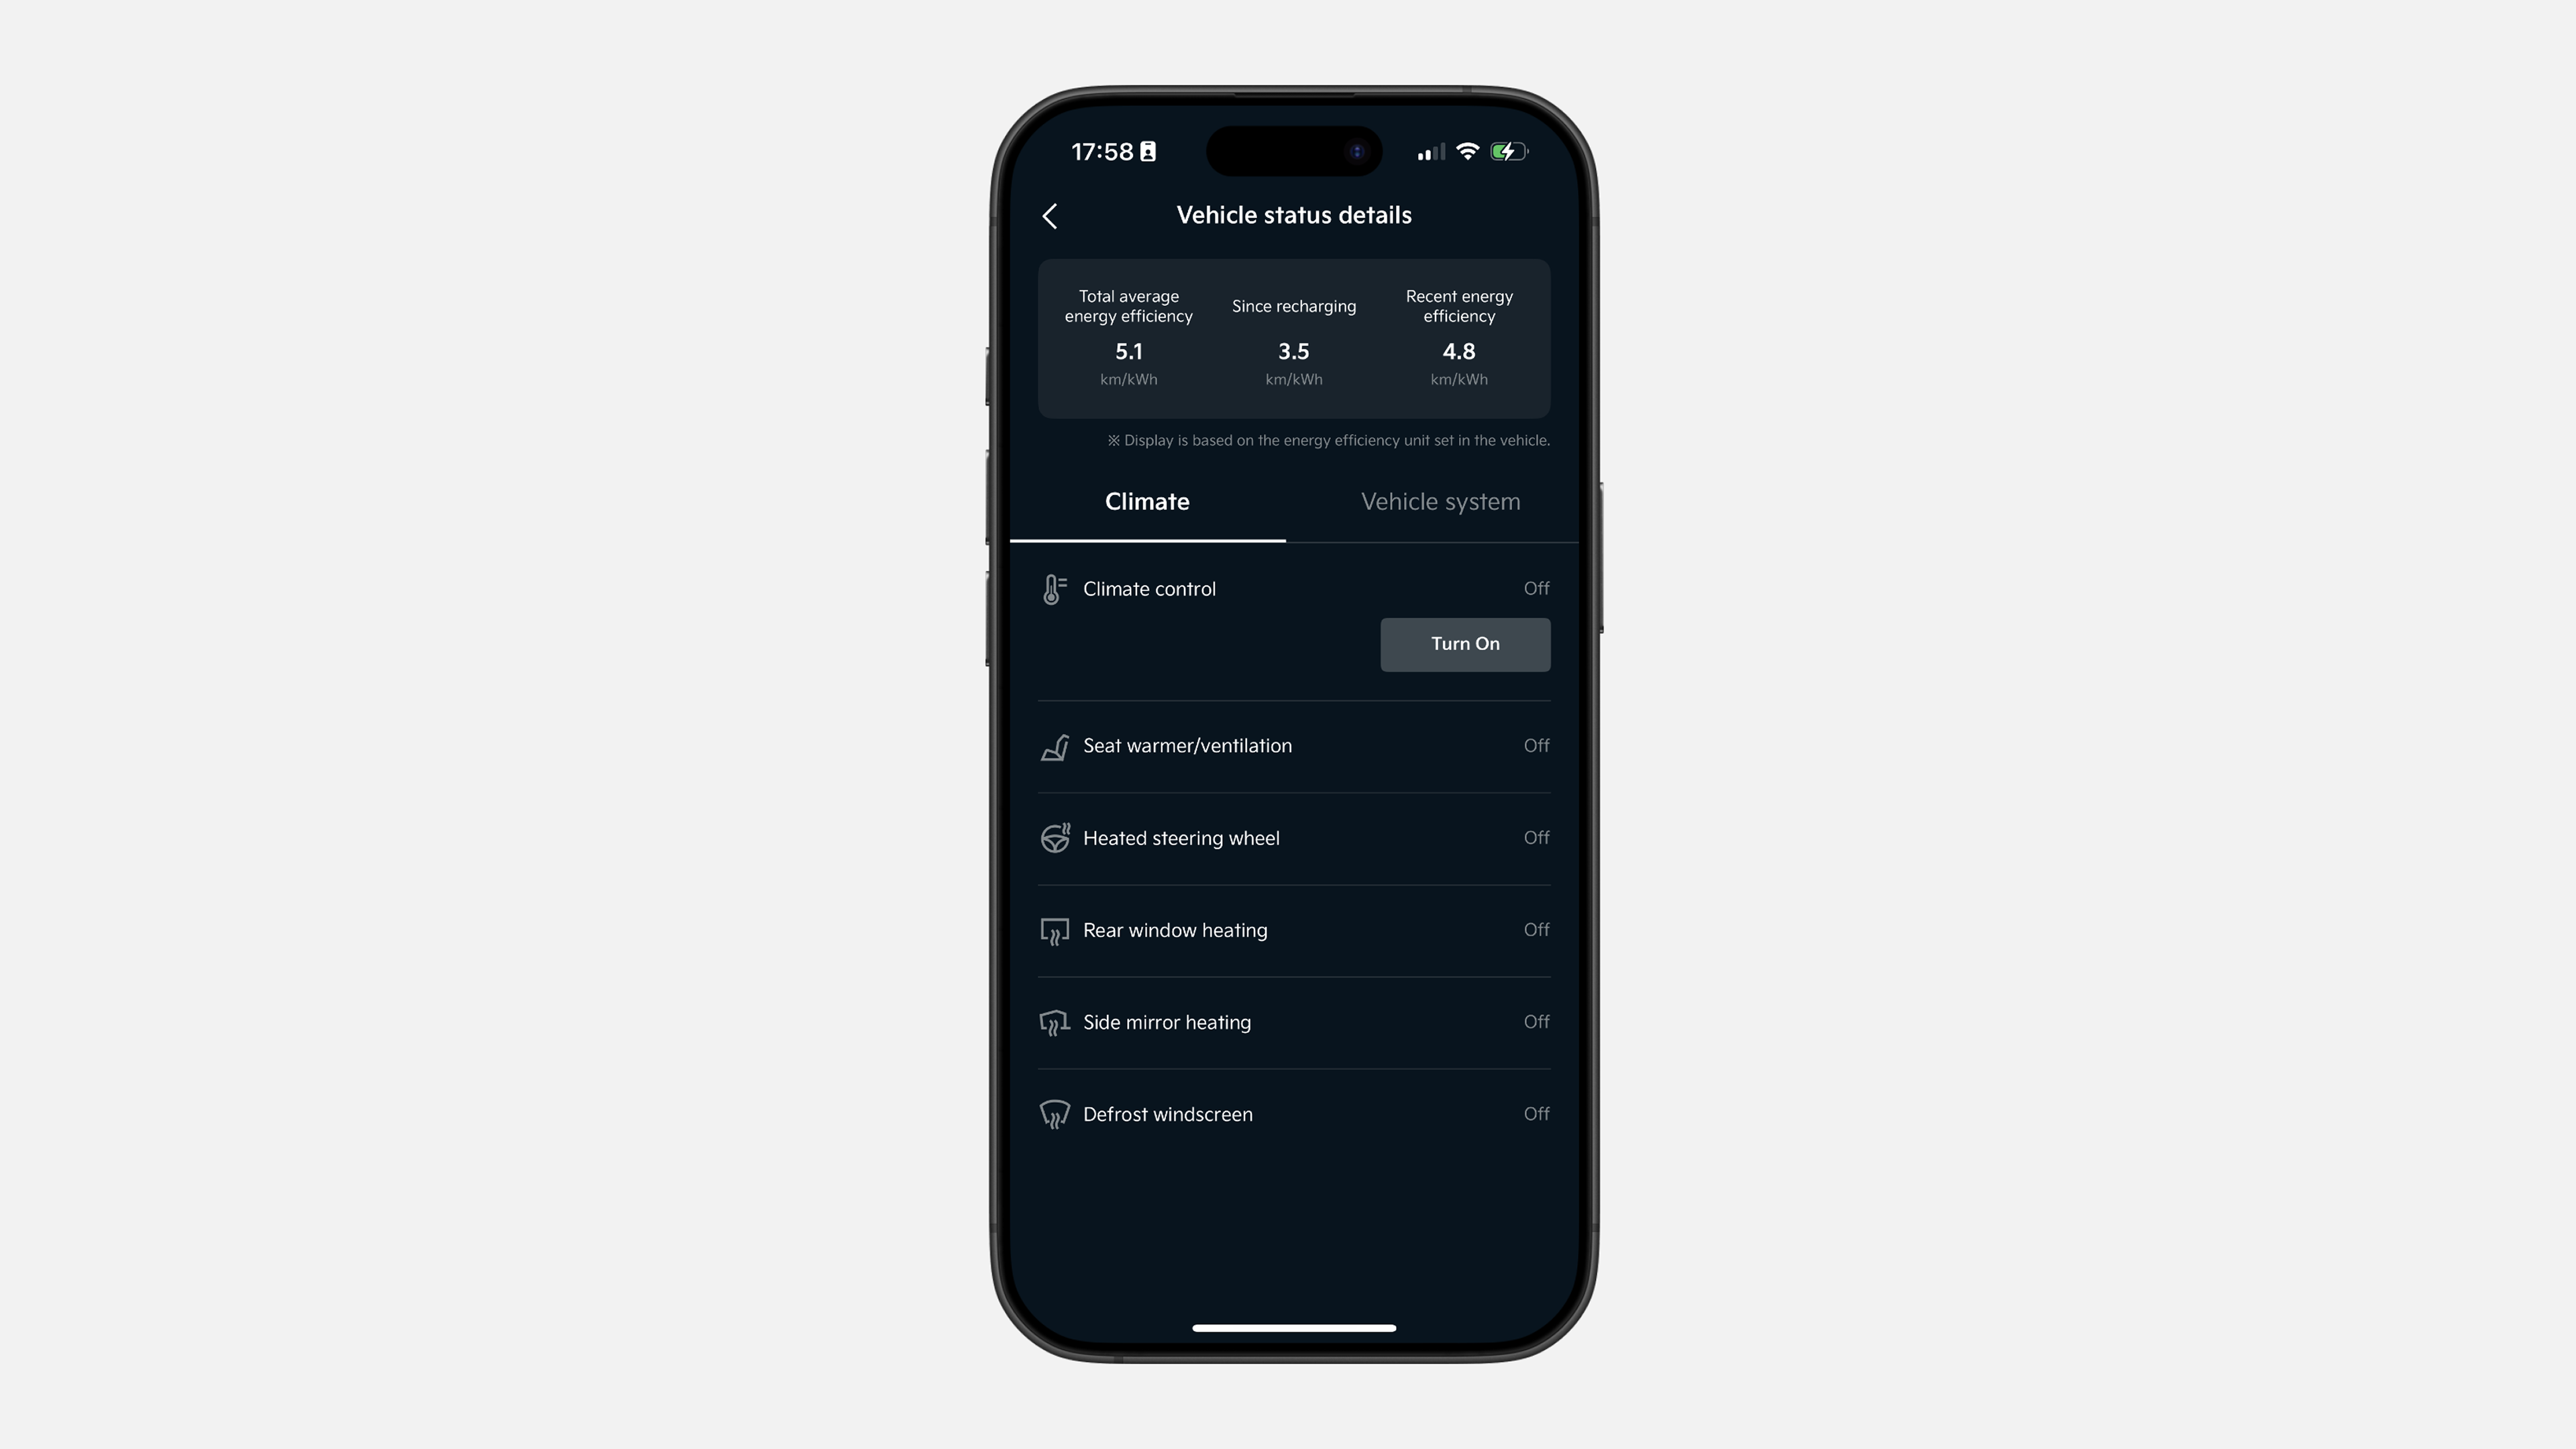
✔ In the lower menu bar, click Control
✔ In the Control section, scroll down and tap Vehicle Status
✔ View the status of different Climate and vehicle systems.
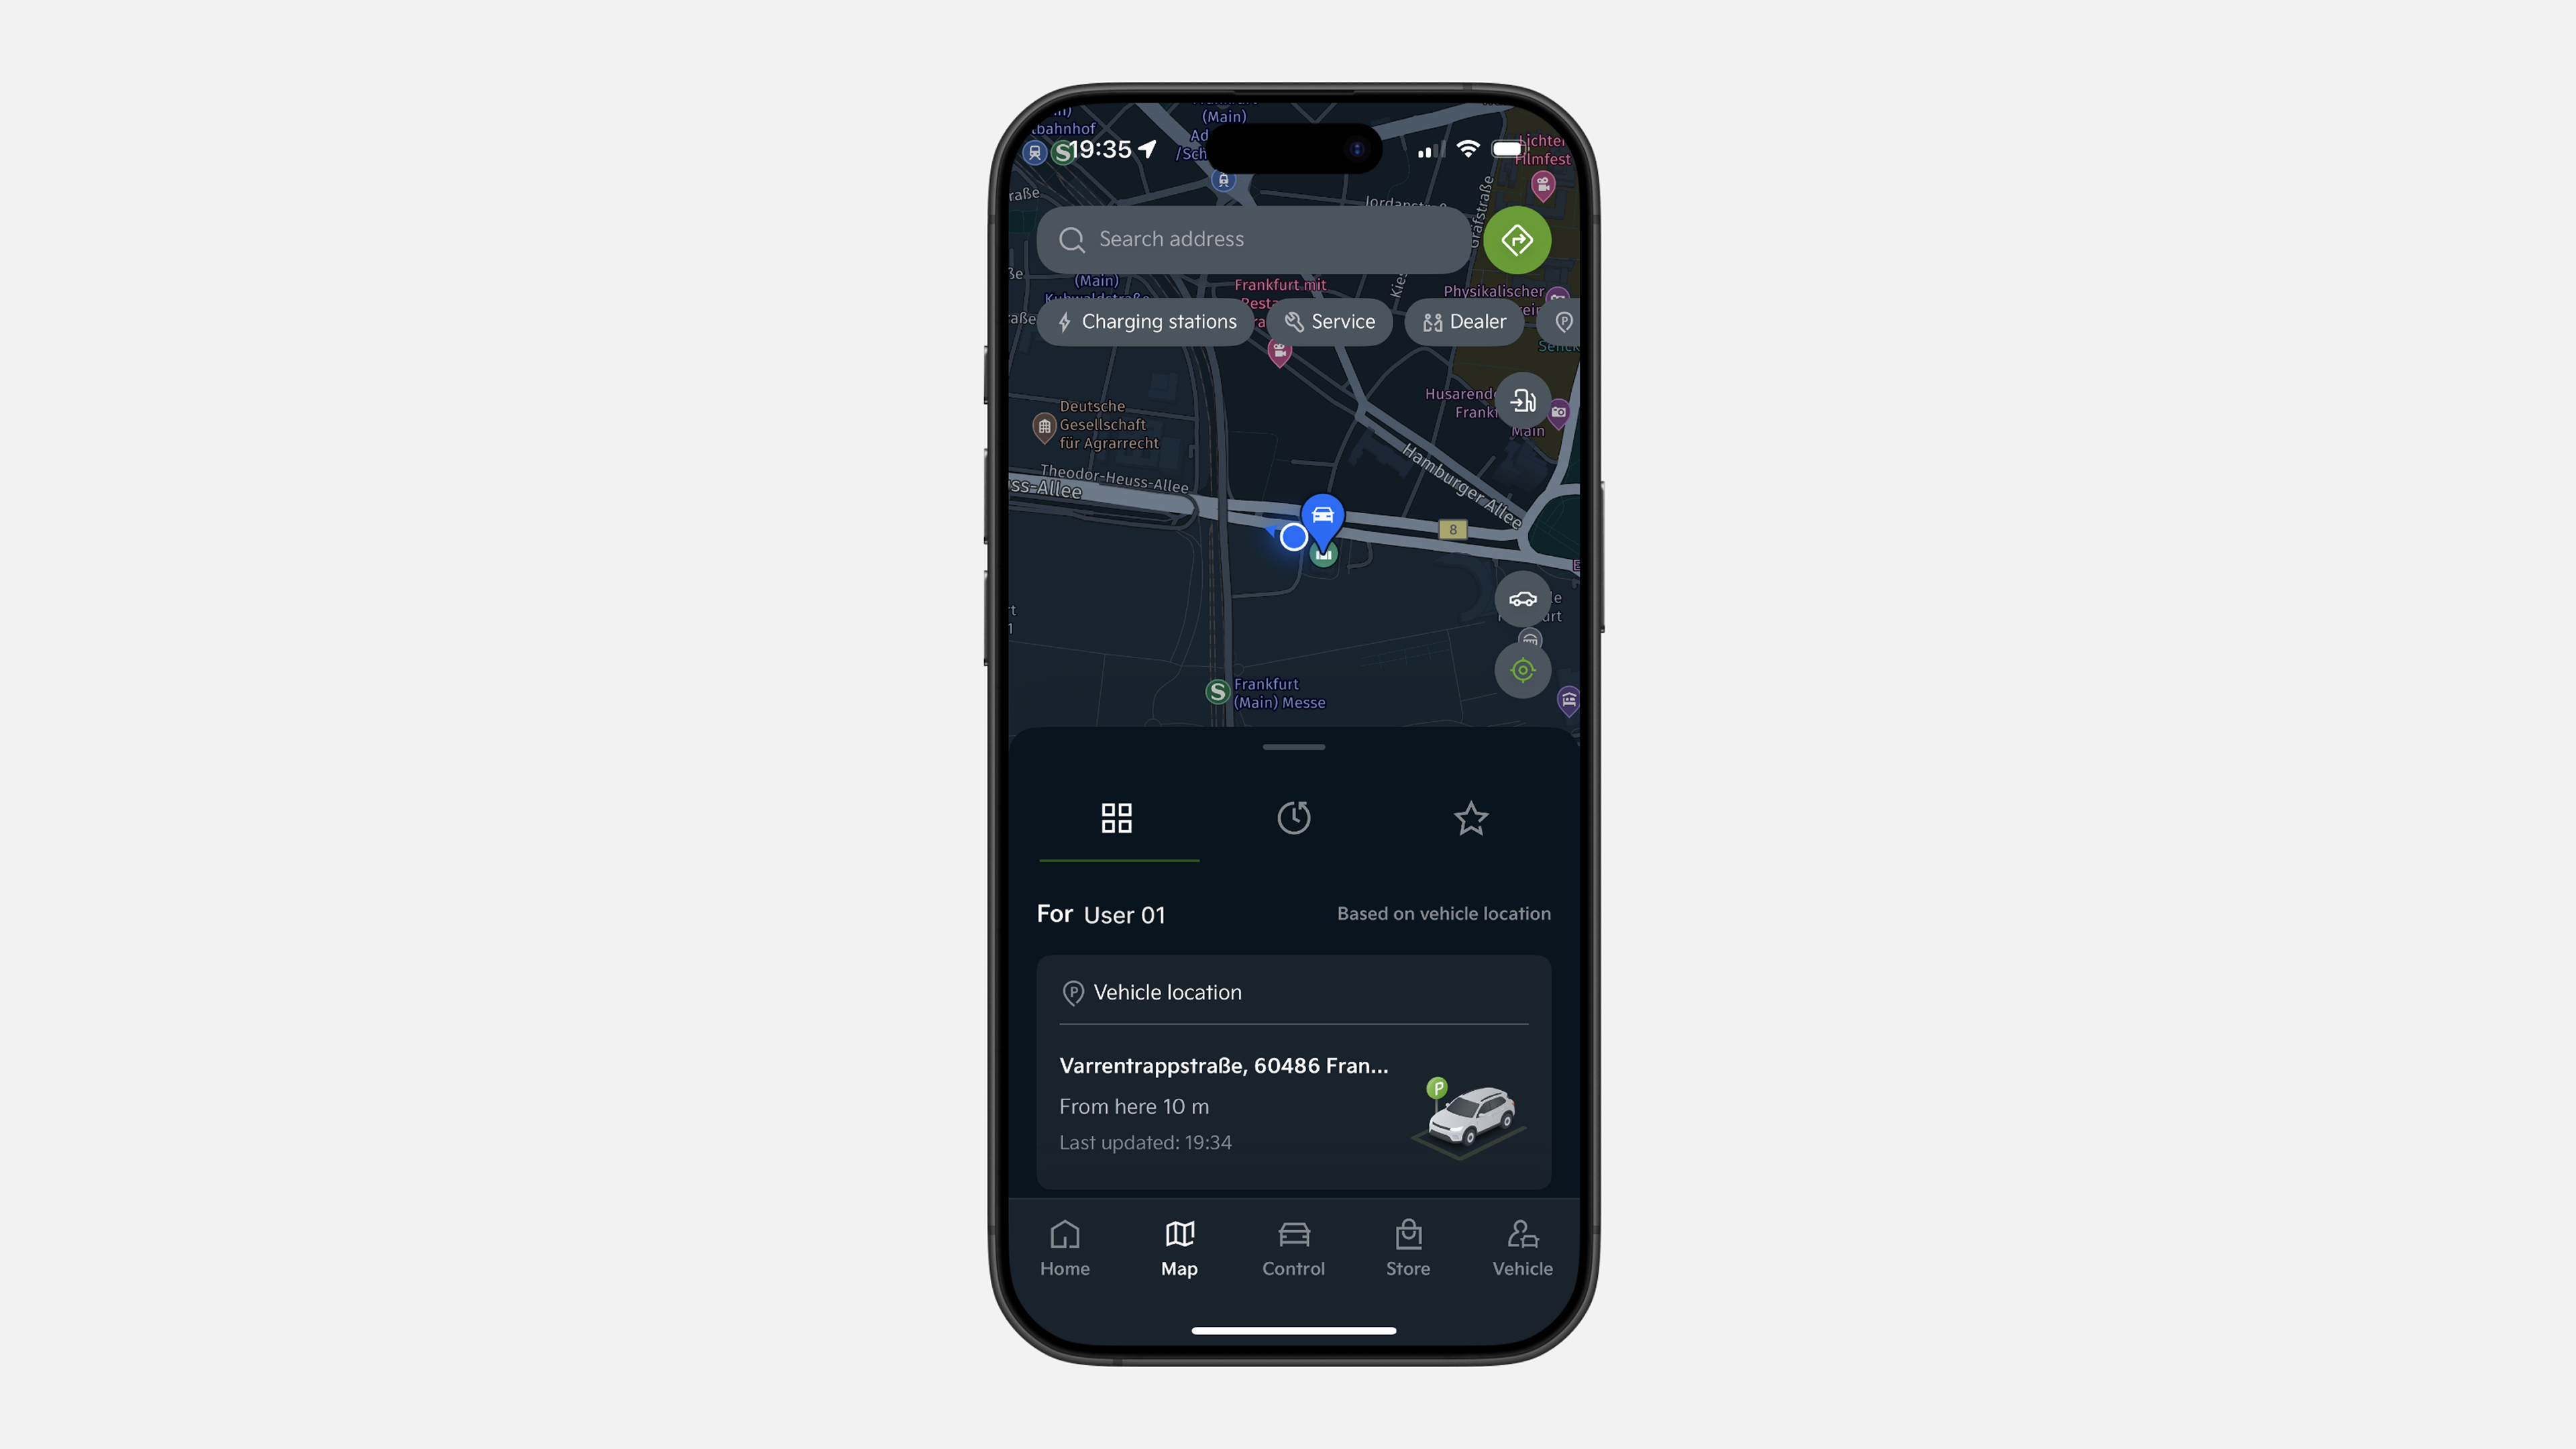
✔ In the lower bar menu, tap on Map. Click on the upper search bar. Type the address of your choice and confirm.
✔ A pop‑up window will appear. Tap Send to car, then tap Send 1 to set it as the first (primary) destination.
✔ The entered address will appear on your car display.
Click on Set as Destination.
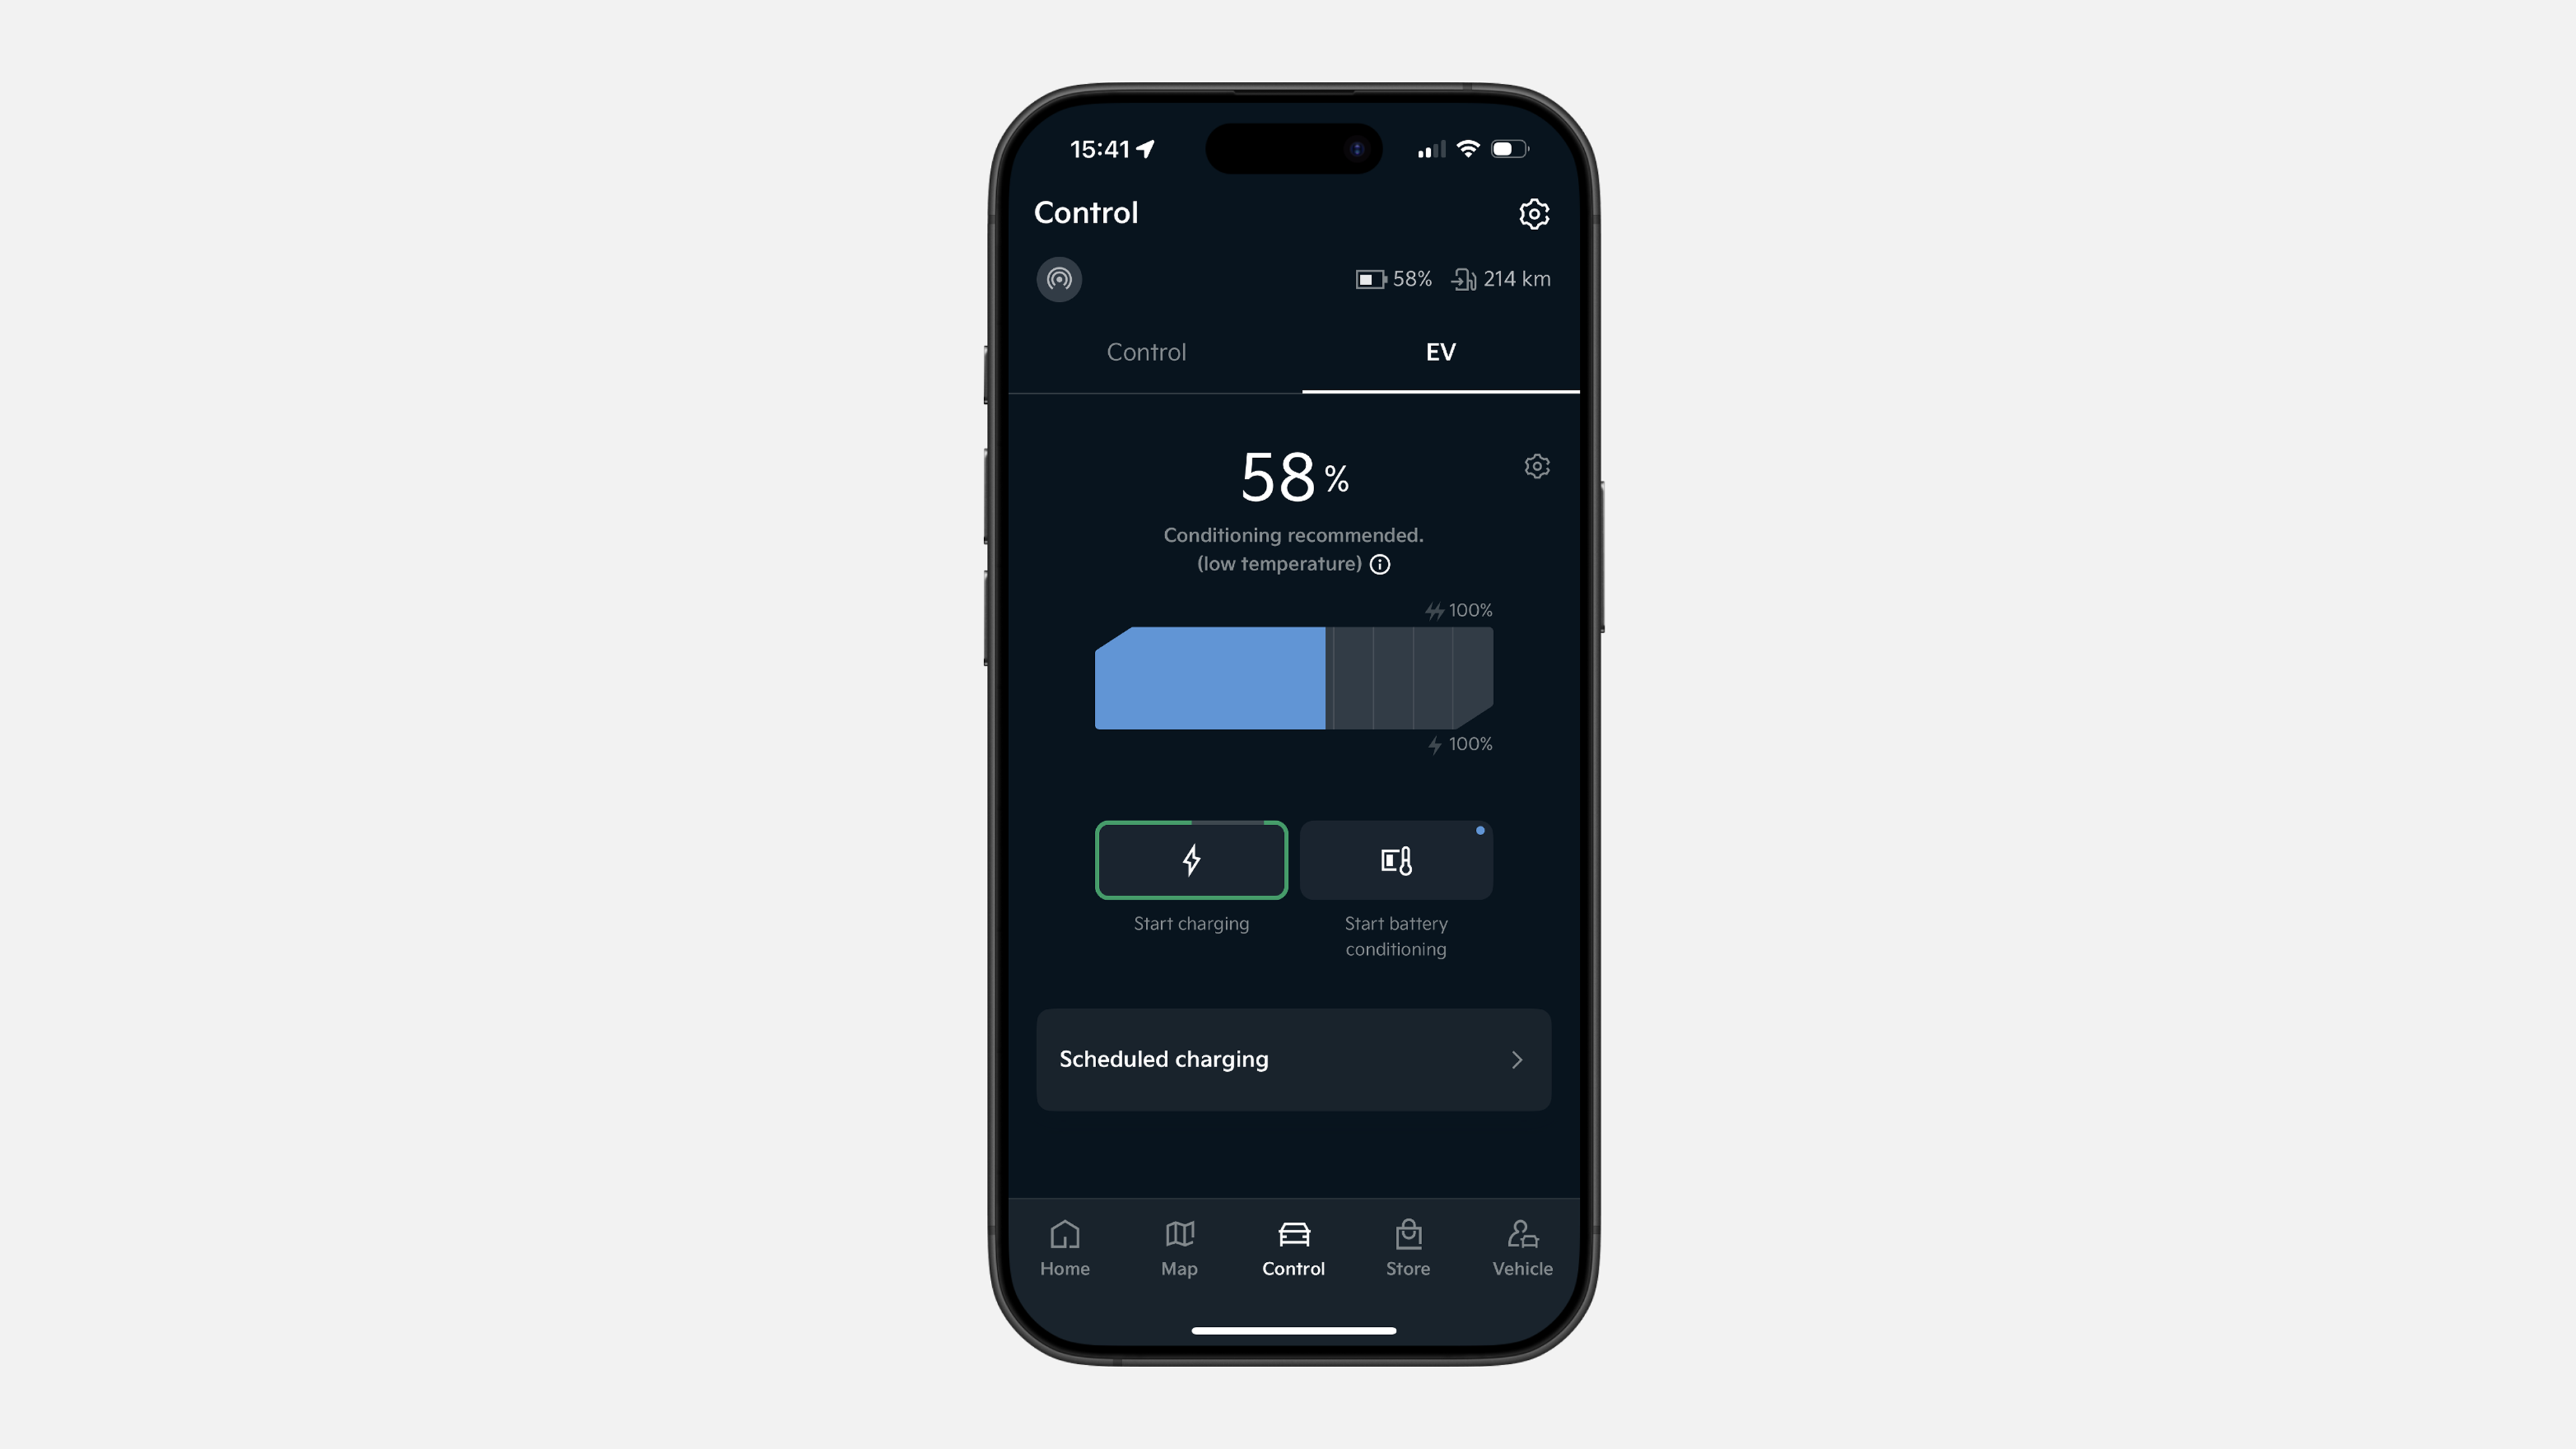
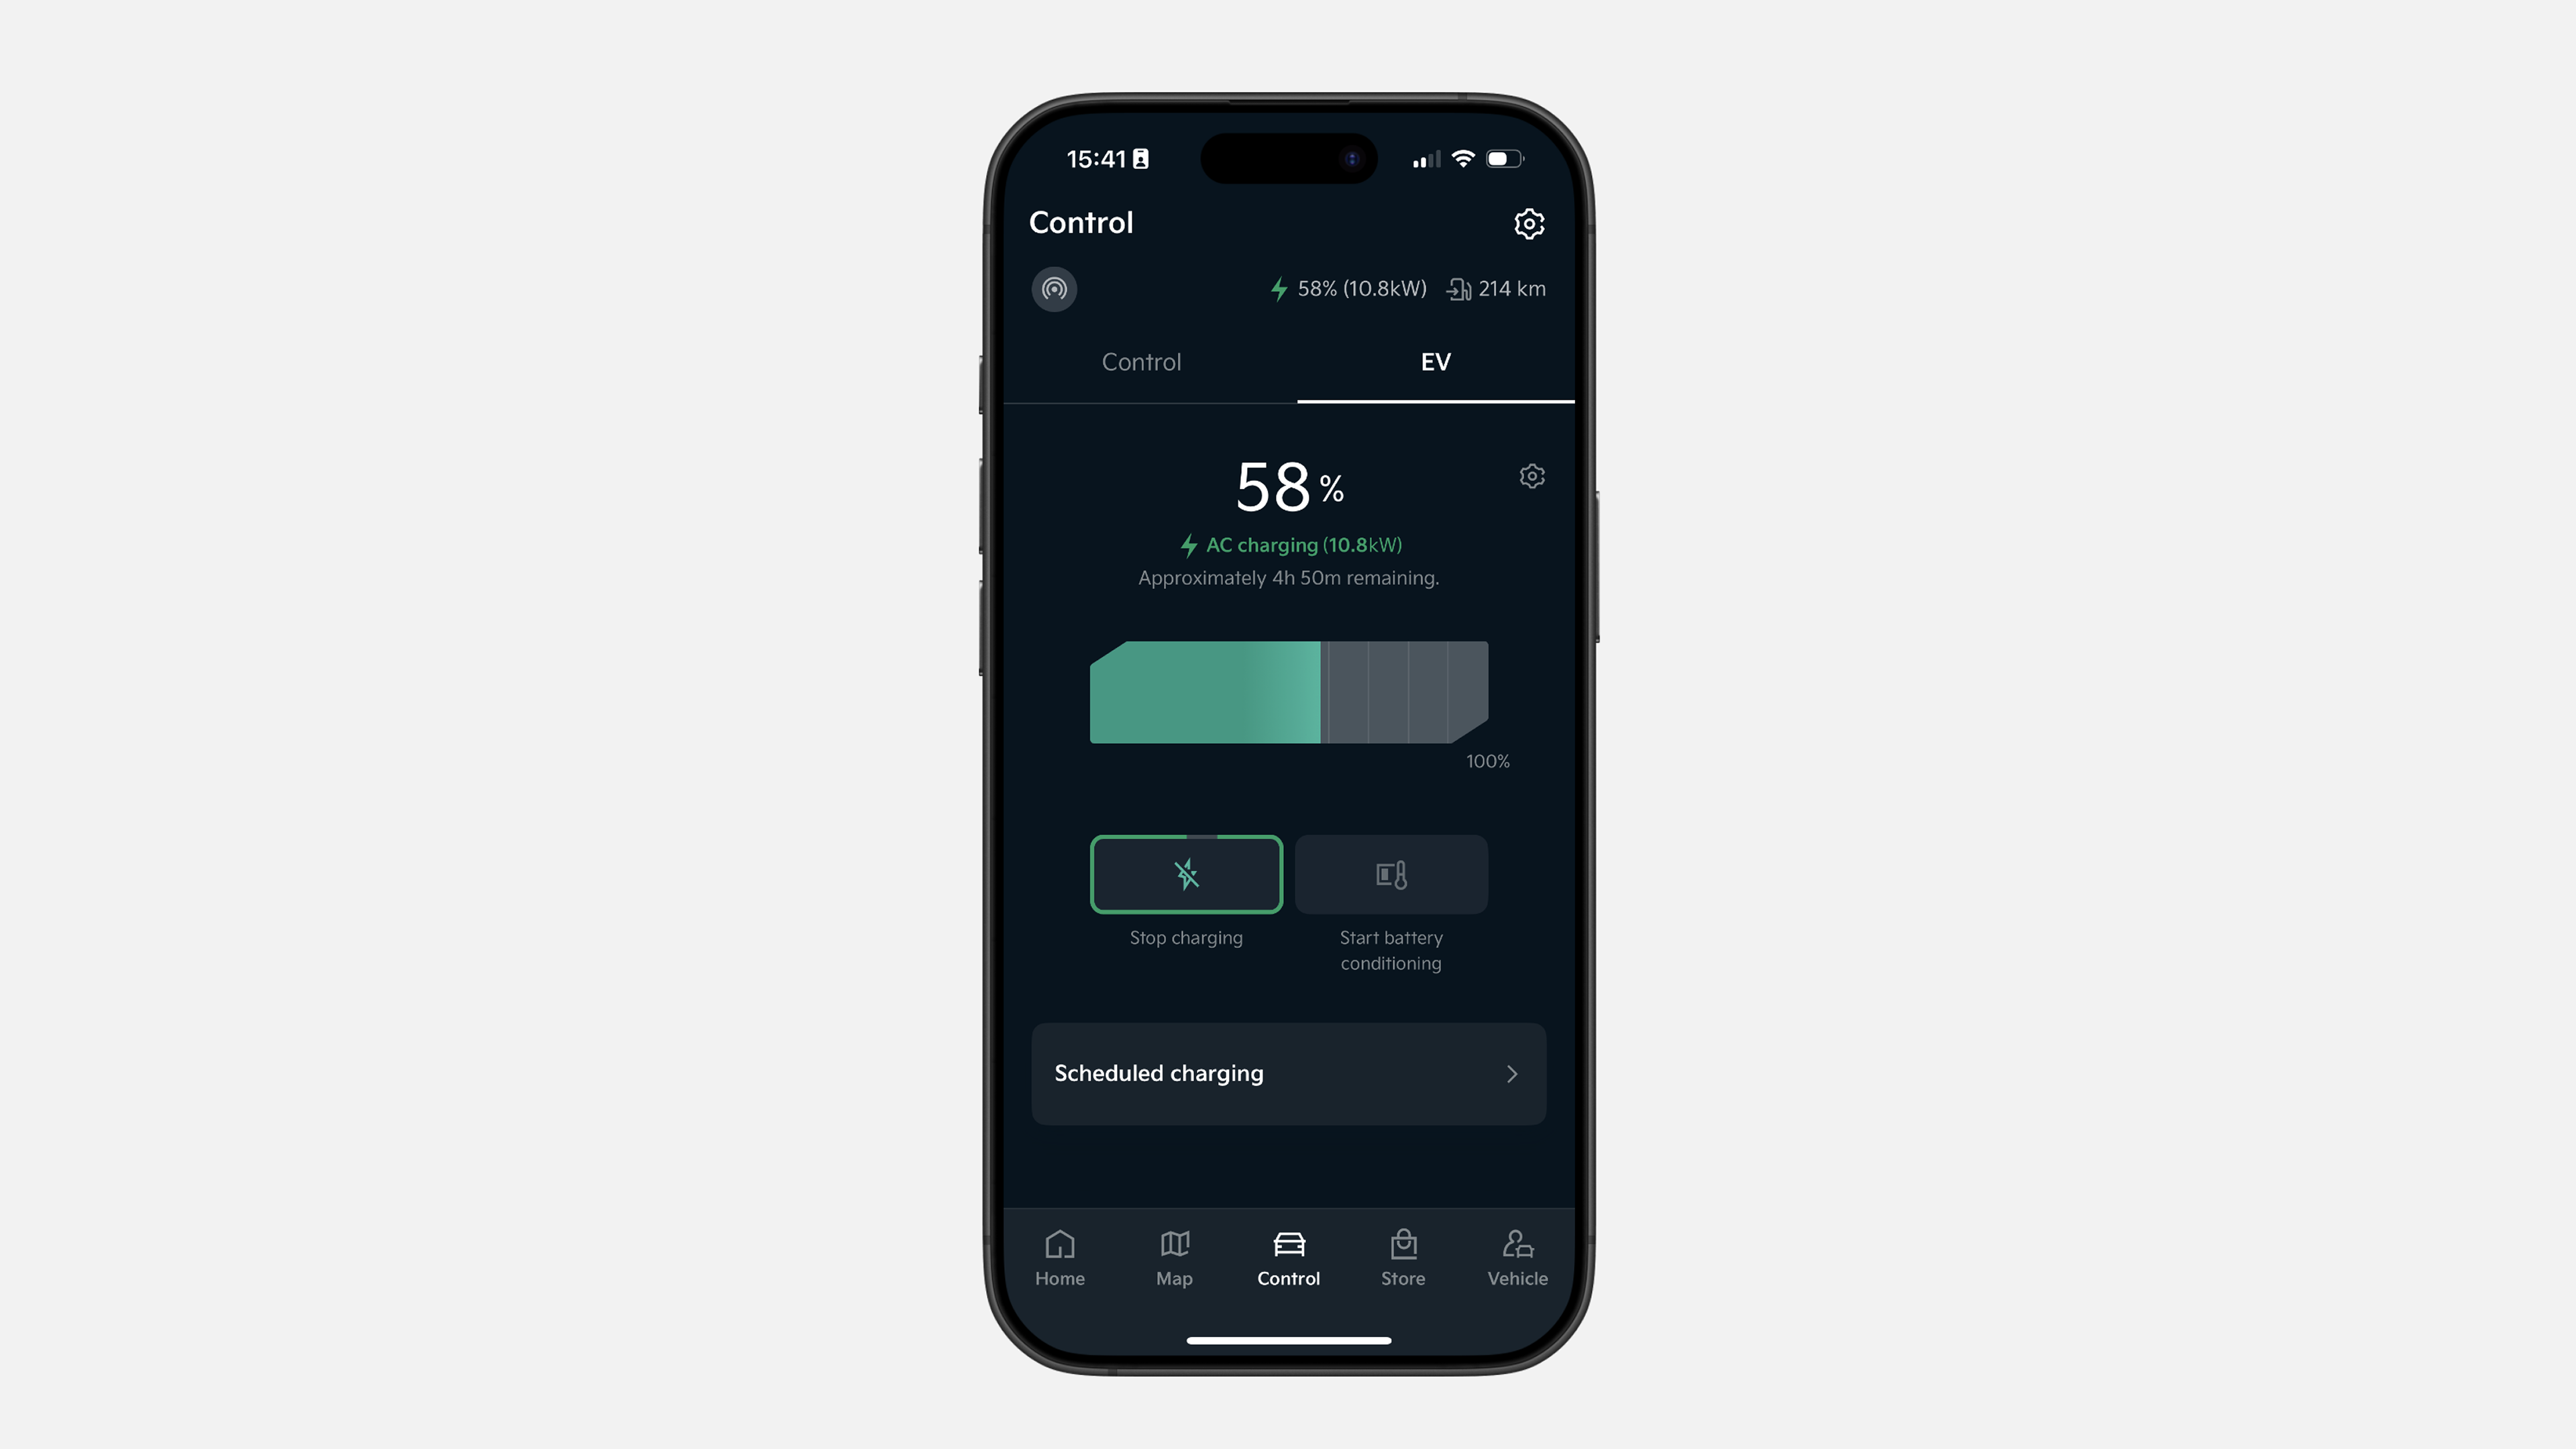
✔ In the lower menu bar, click Control
✔ Switch to the EV section. With the charging cable plugged in, press and hold the Start Charging button for 1 second.
✔ If you want to stop the charging process, go to the same EV section and press and hold the Stop Charging button for 1 second.
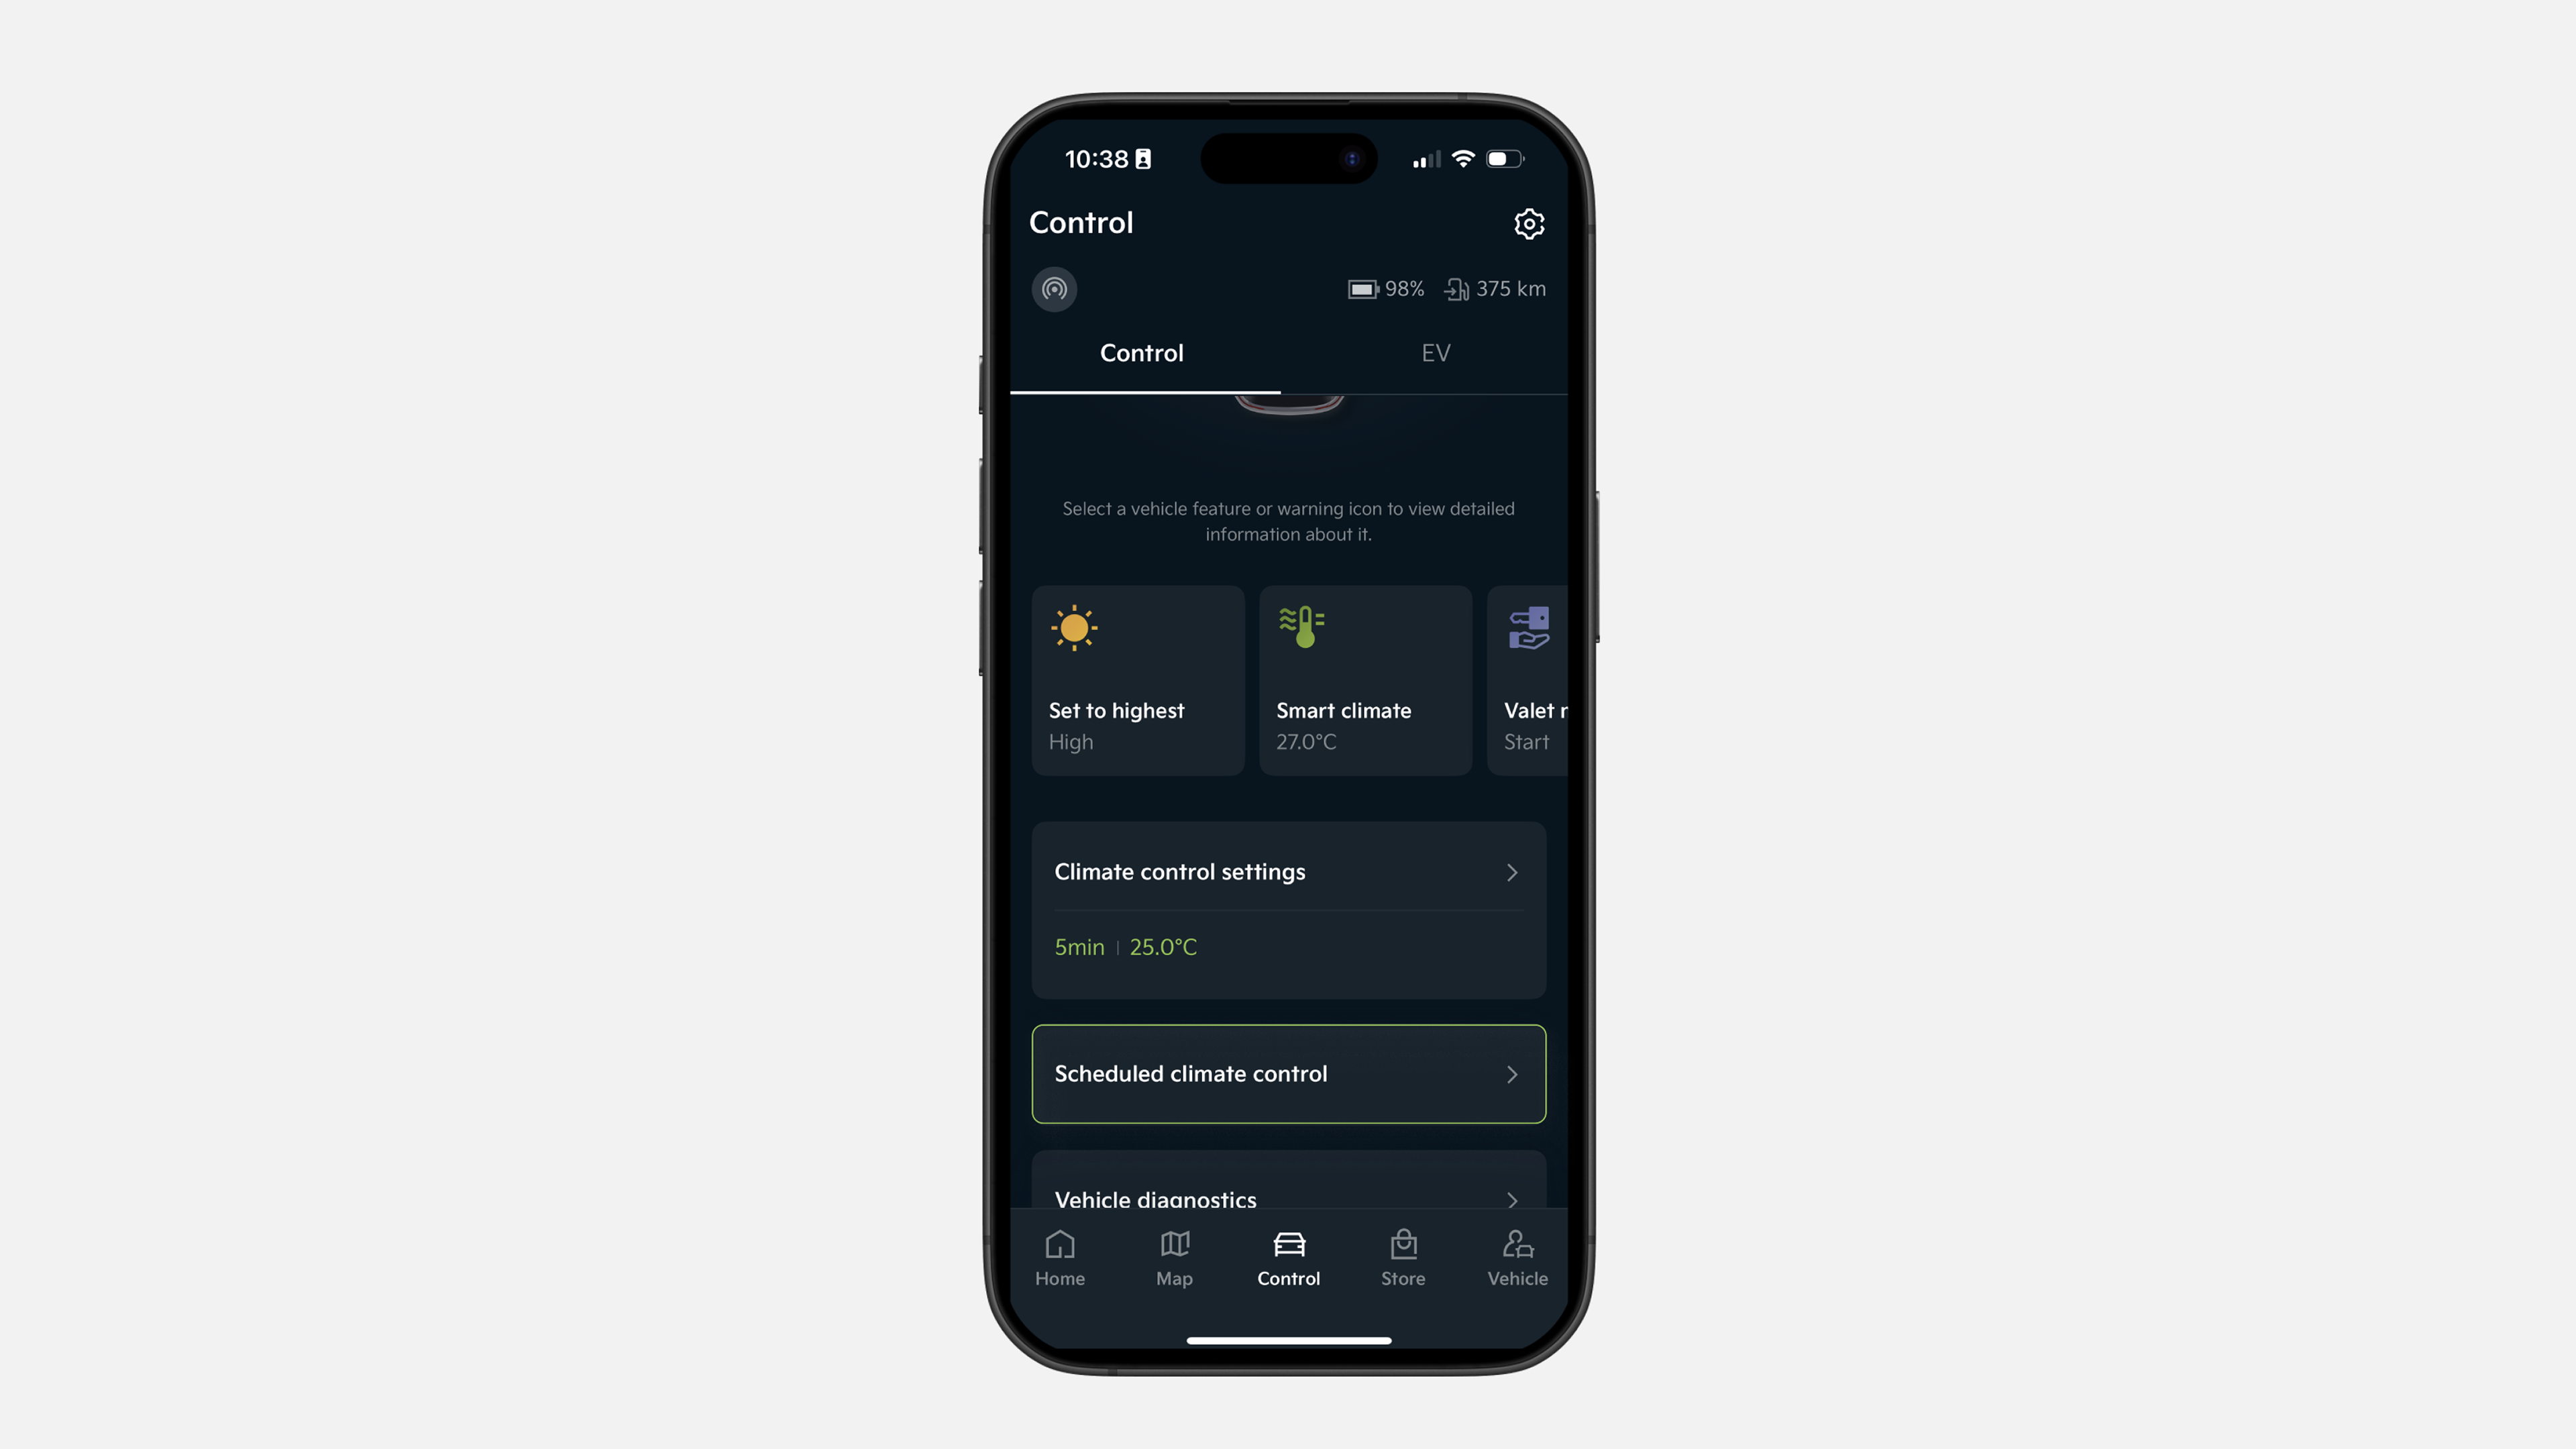
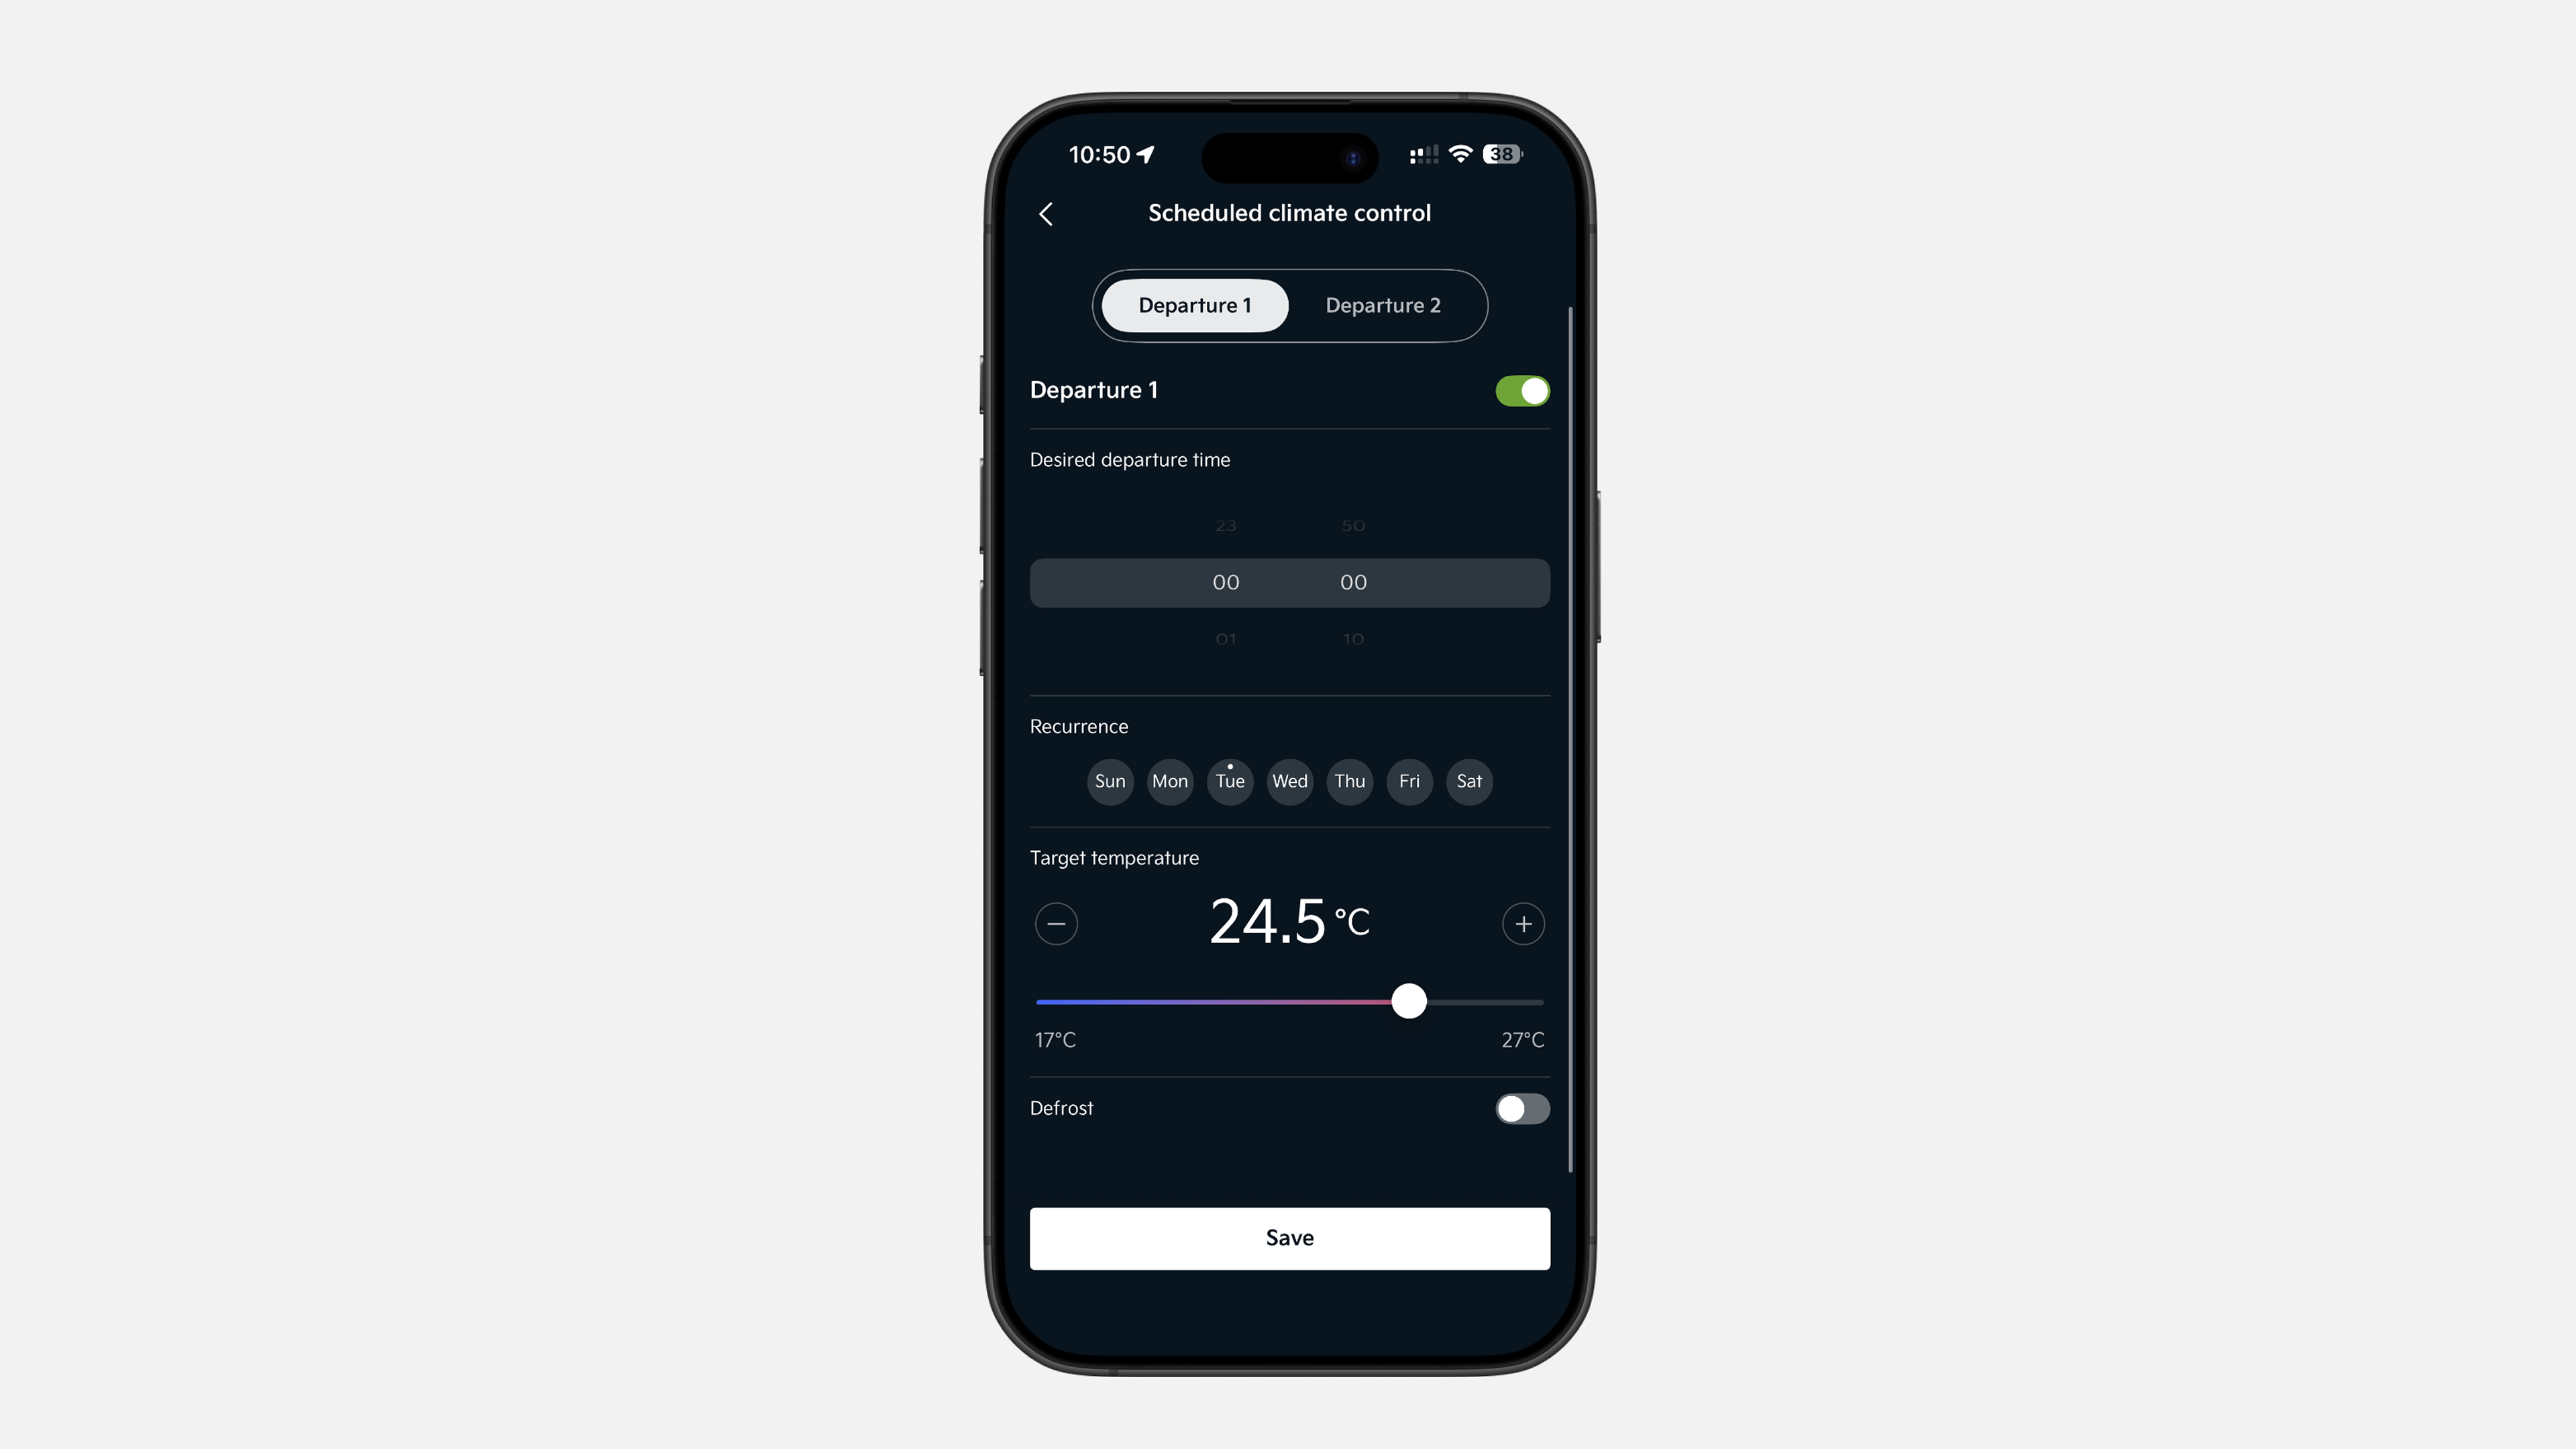
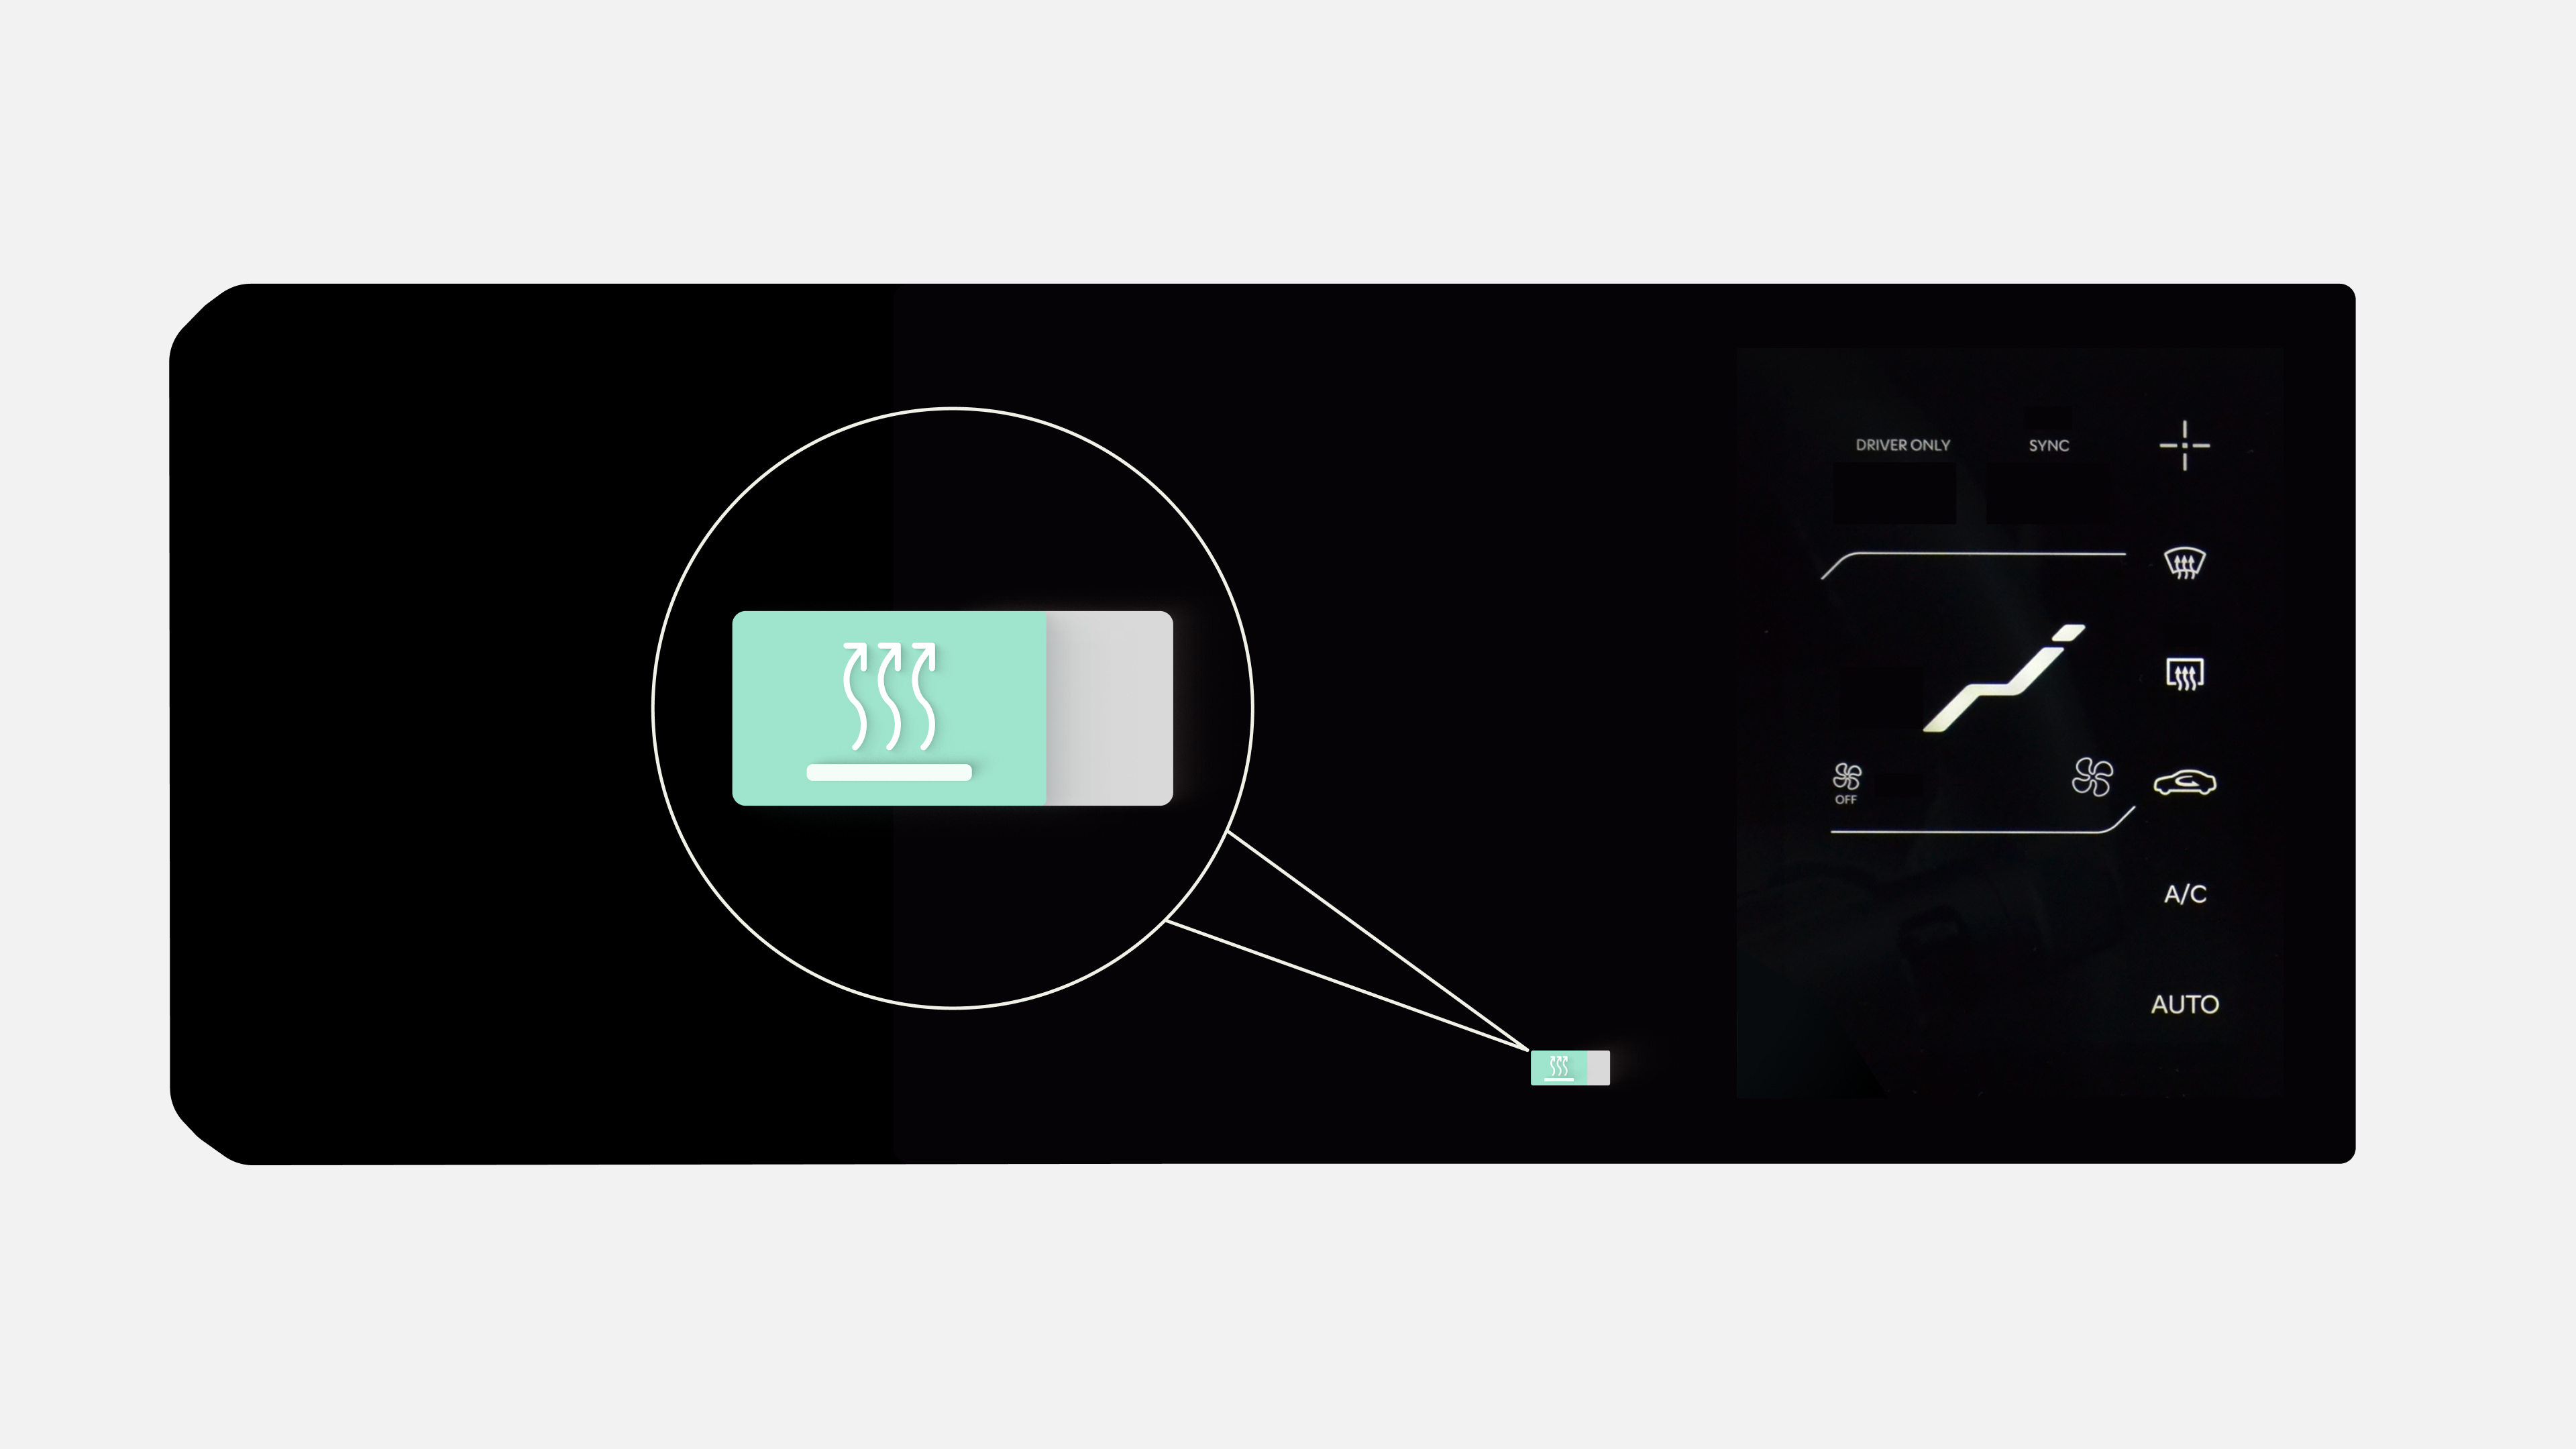
✔ Tap Control in the lower menu bar, then scroll down to Scheduled Climate Control
✔ Here you can either use climate control immediately or schedule it based on your driving routine. Choose the preferred option, select the days, time, and temperature, then tap Save.
✔ At the scheduled time, your vehicle will automatically adjust the selected cabin temperature.
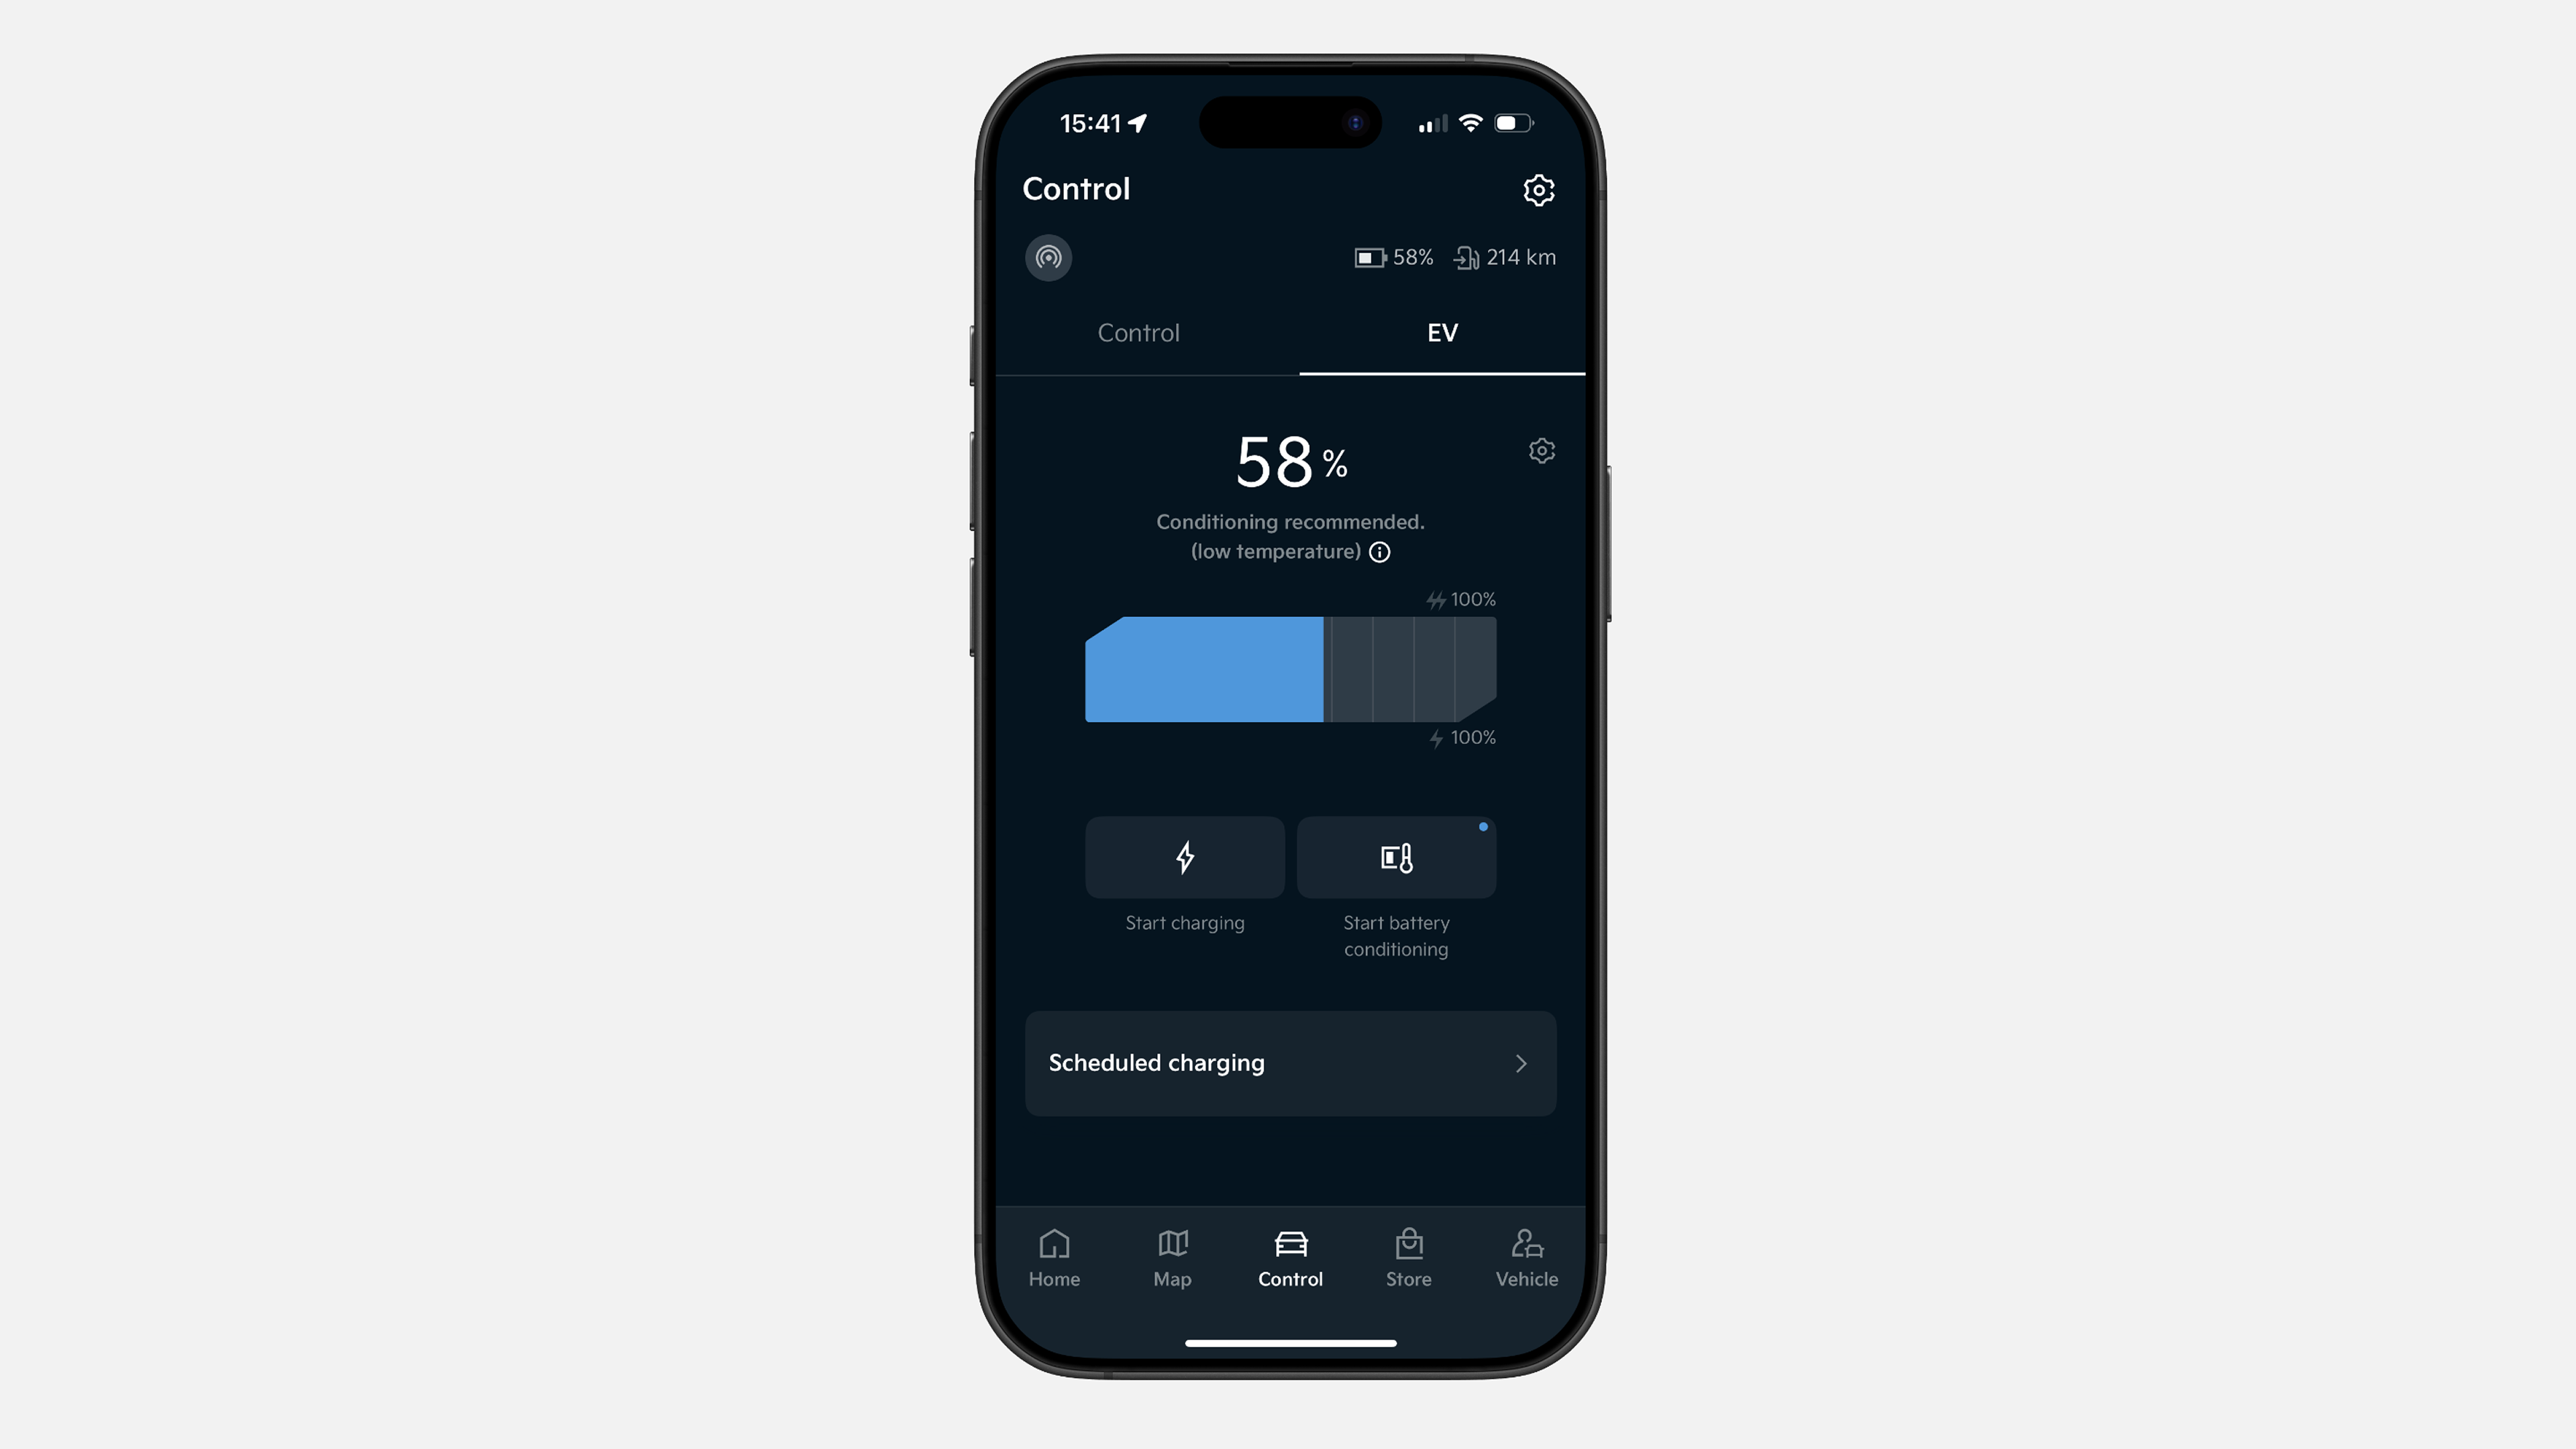
✔ Tap “Control” in the lower menu bar, select the “EV” section, and tap “Scheduled Charging”.
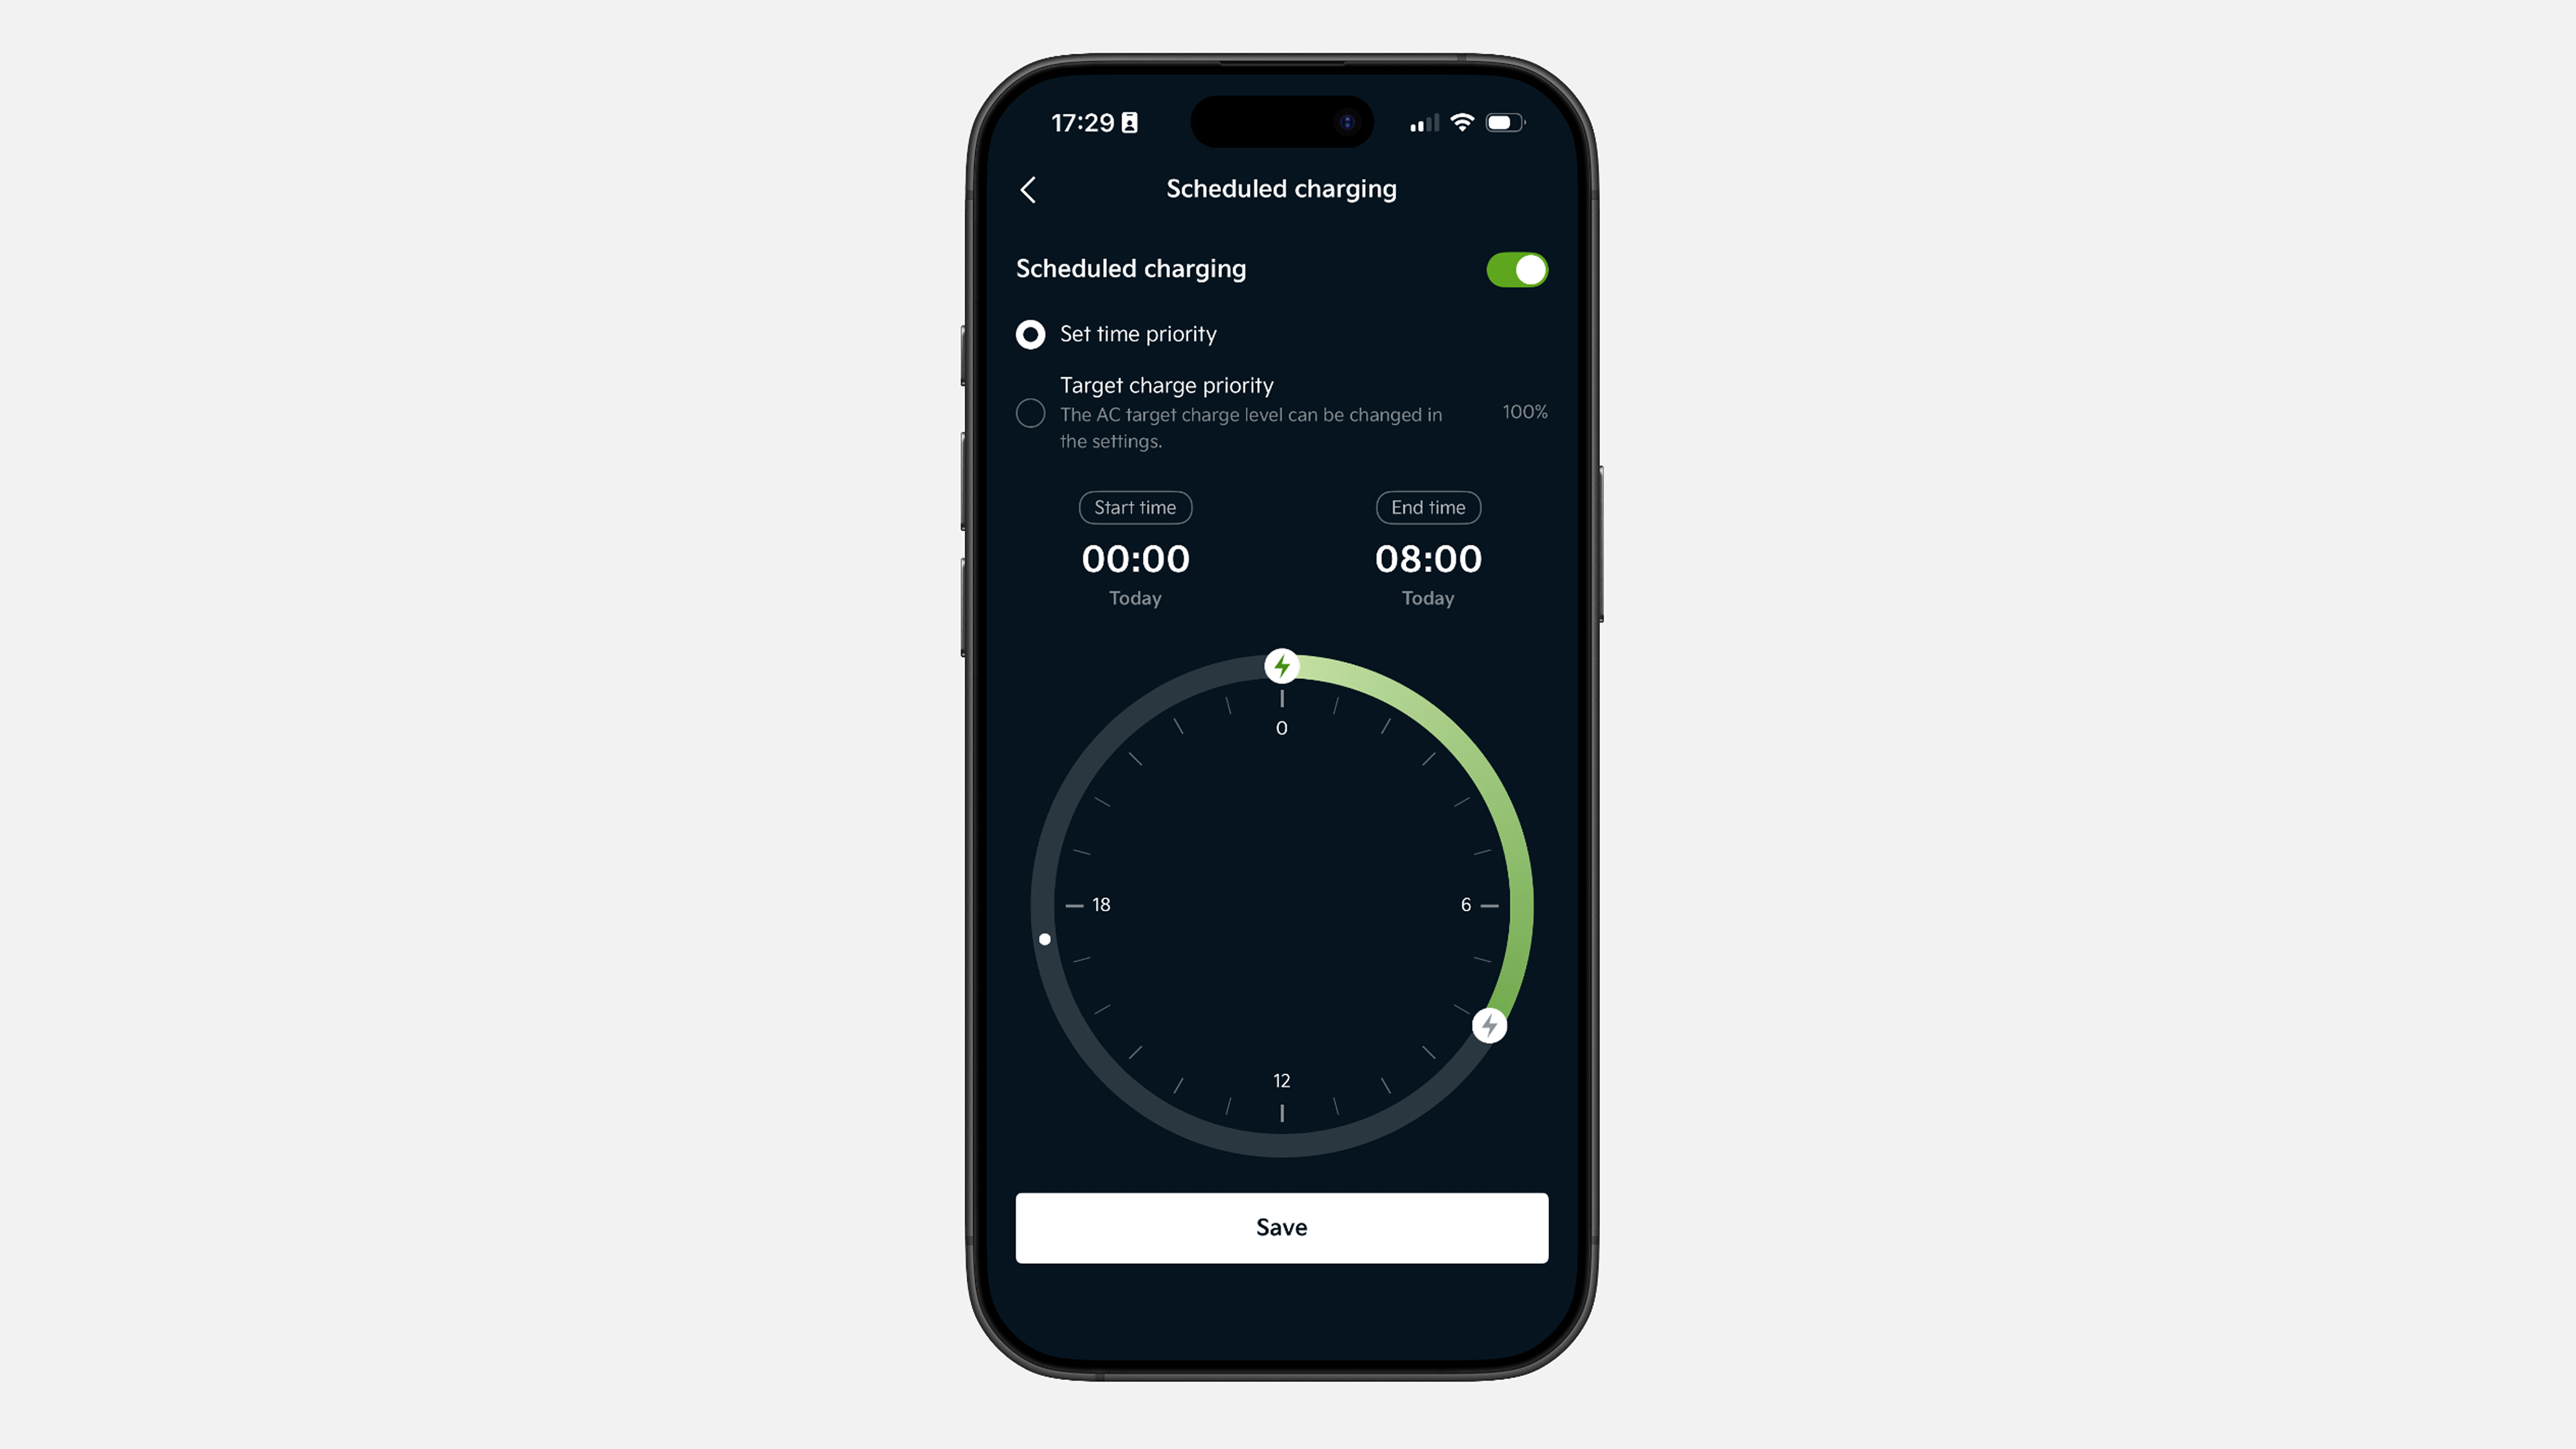
✔ In “Scheduled Charging”, you can set the time when charging should start and stop. You can also set a target charging level, so charging stops once this level is reached. Then tap “Save”.
✔ At the scheduled time, your vehicle will automatically start charging and stop either at the exact set time or when the selected charging is reached.
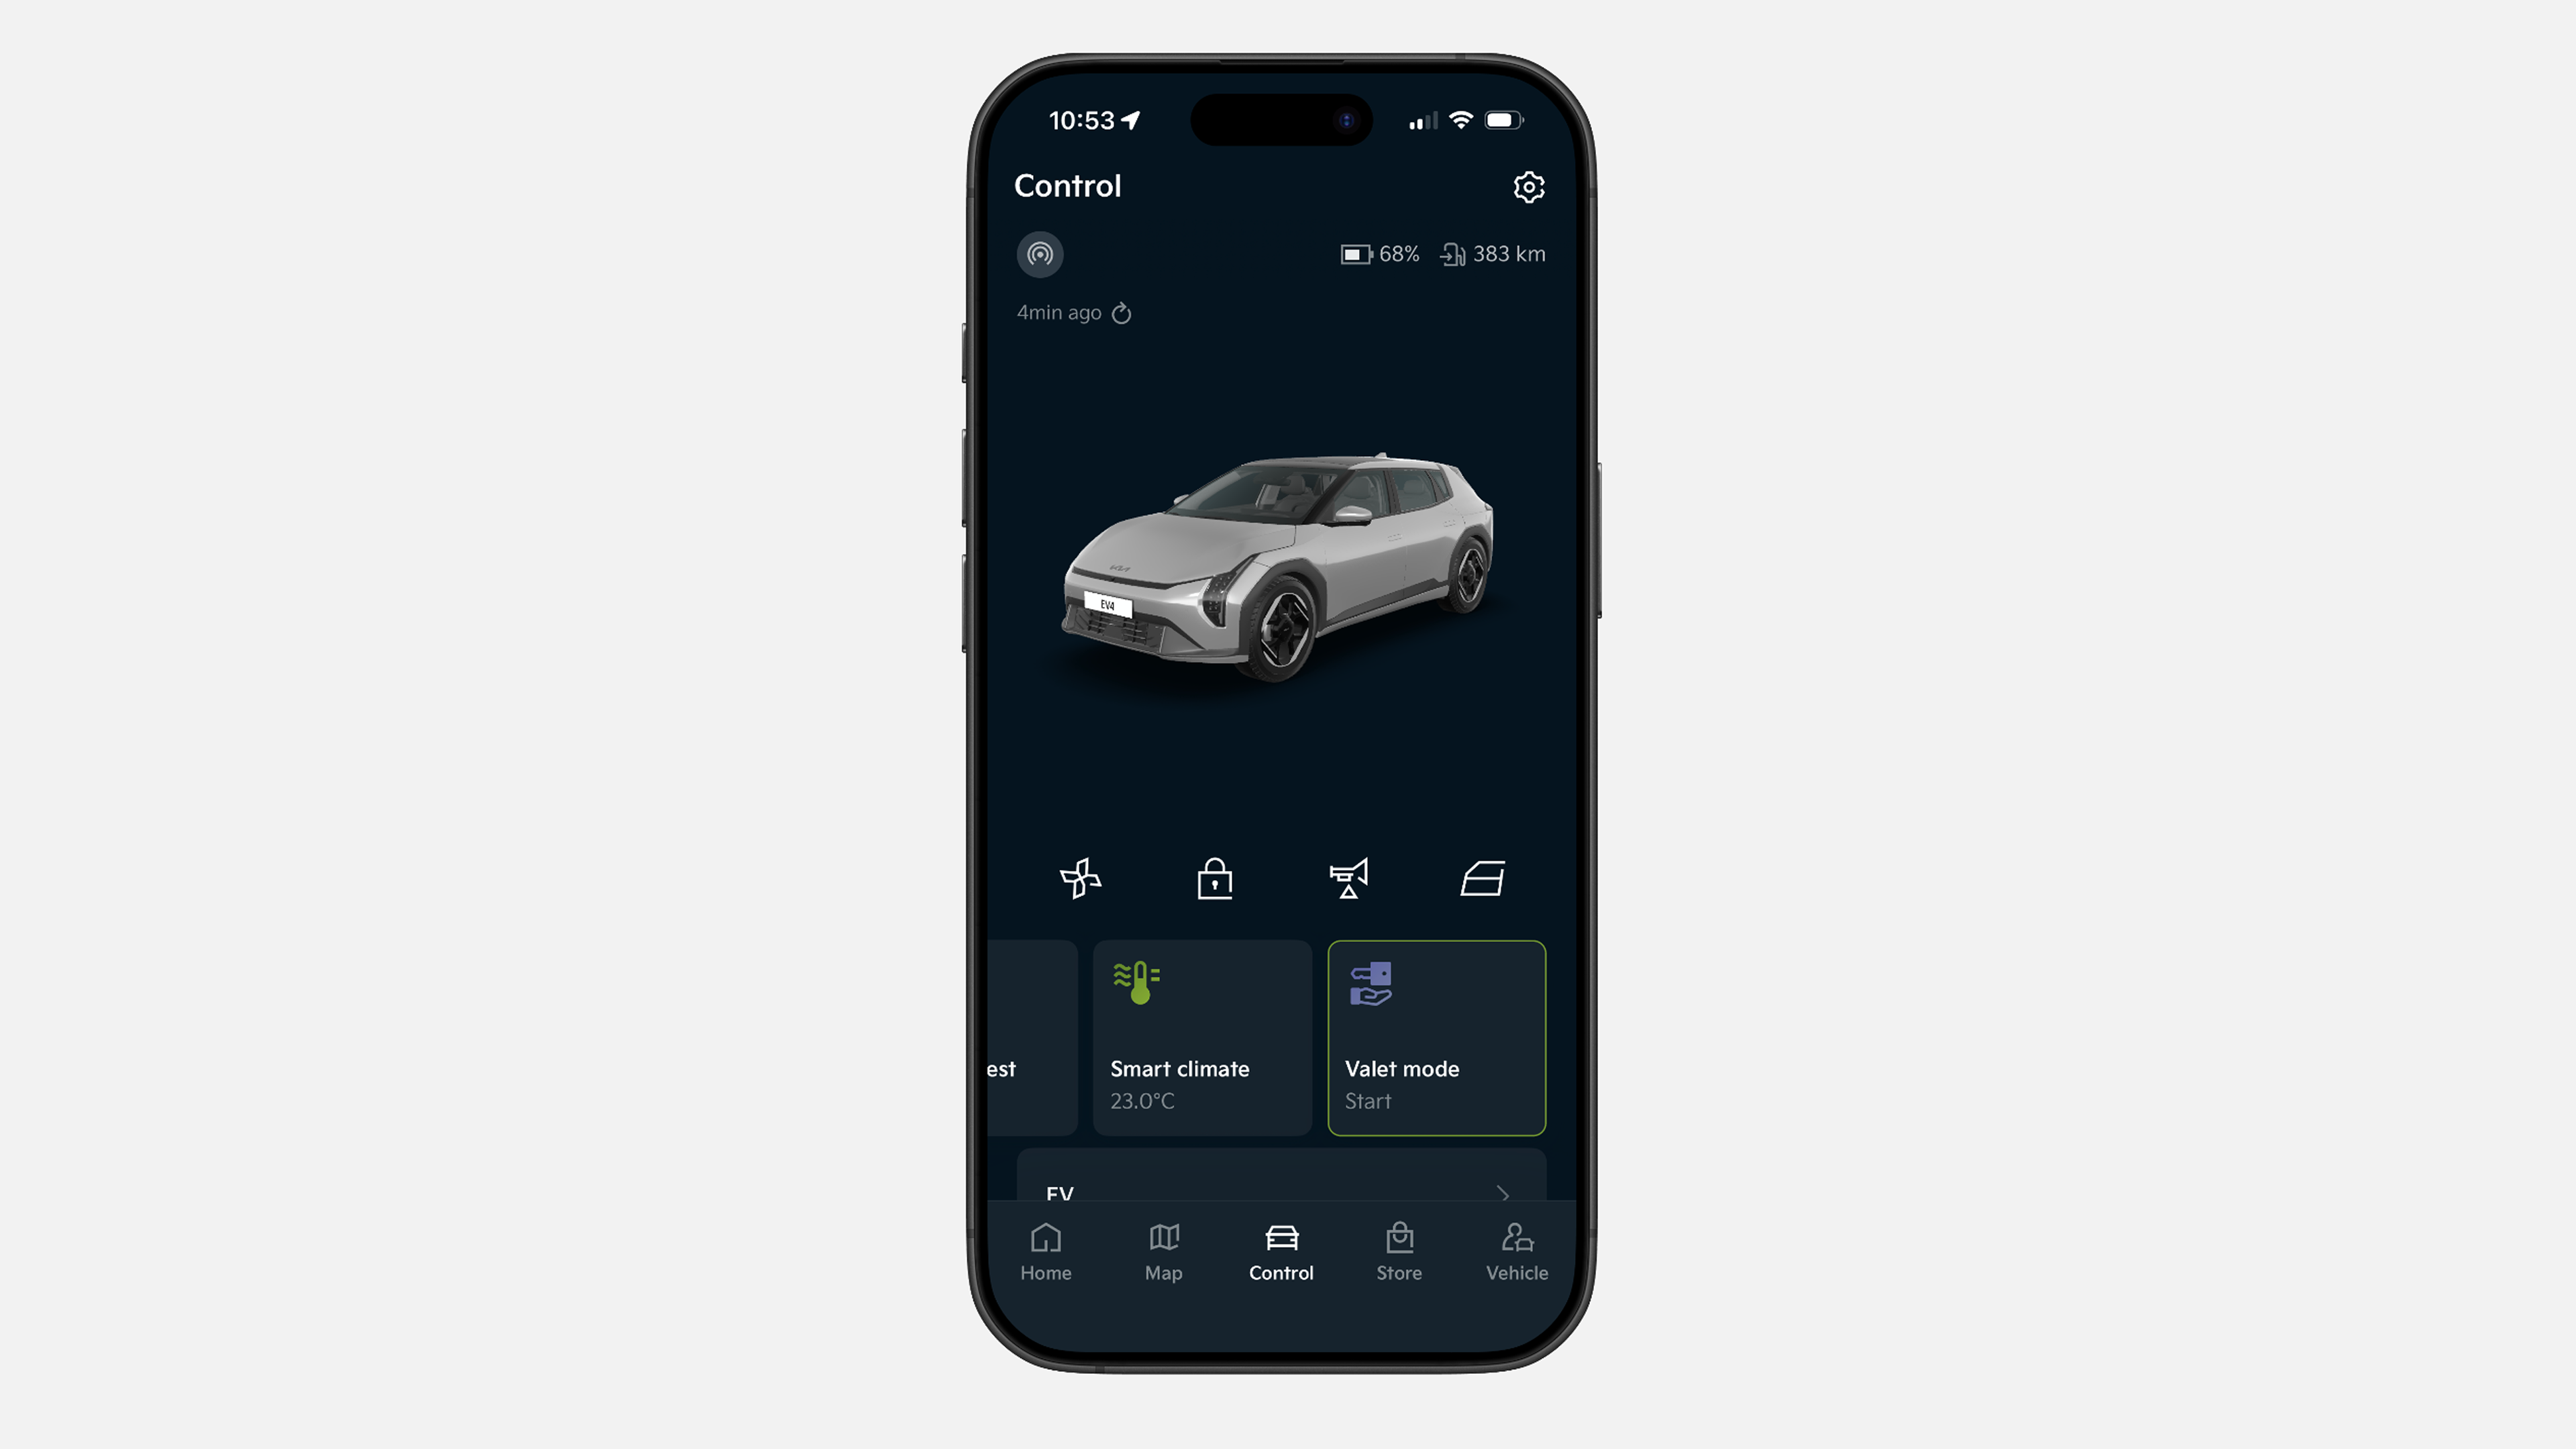
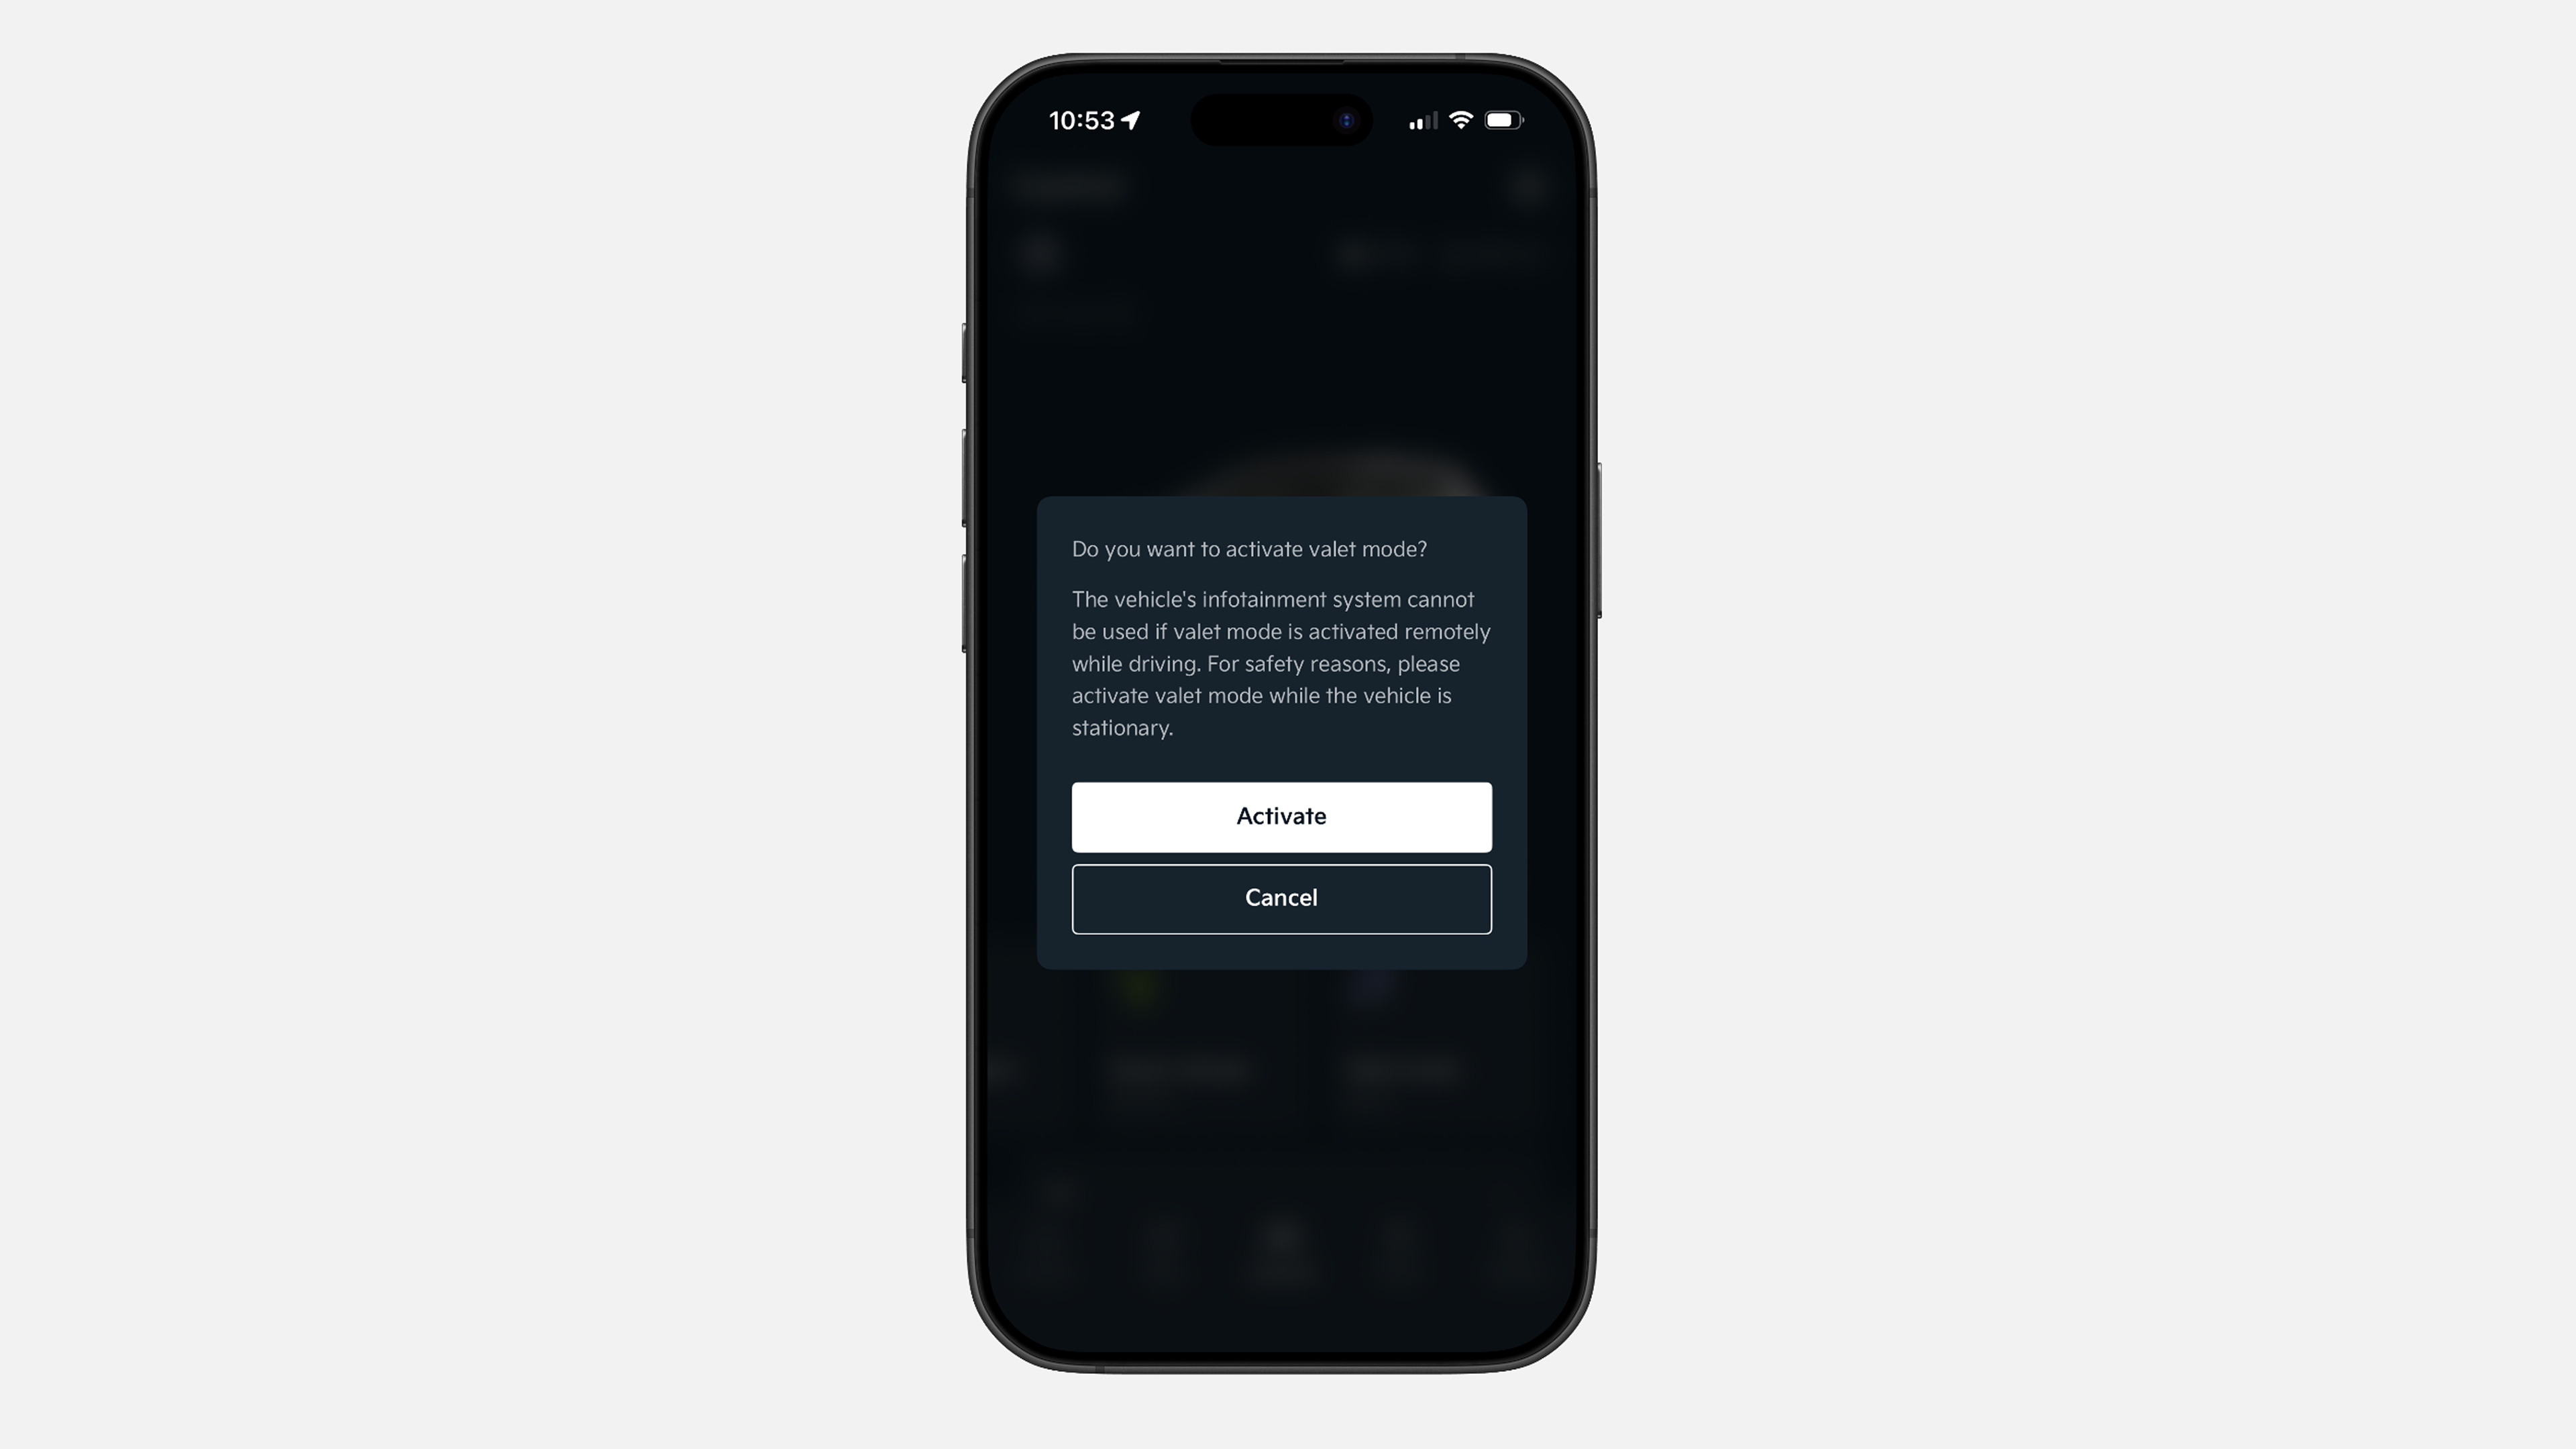
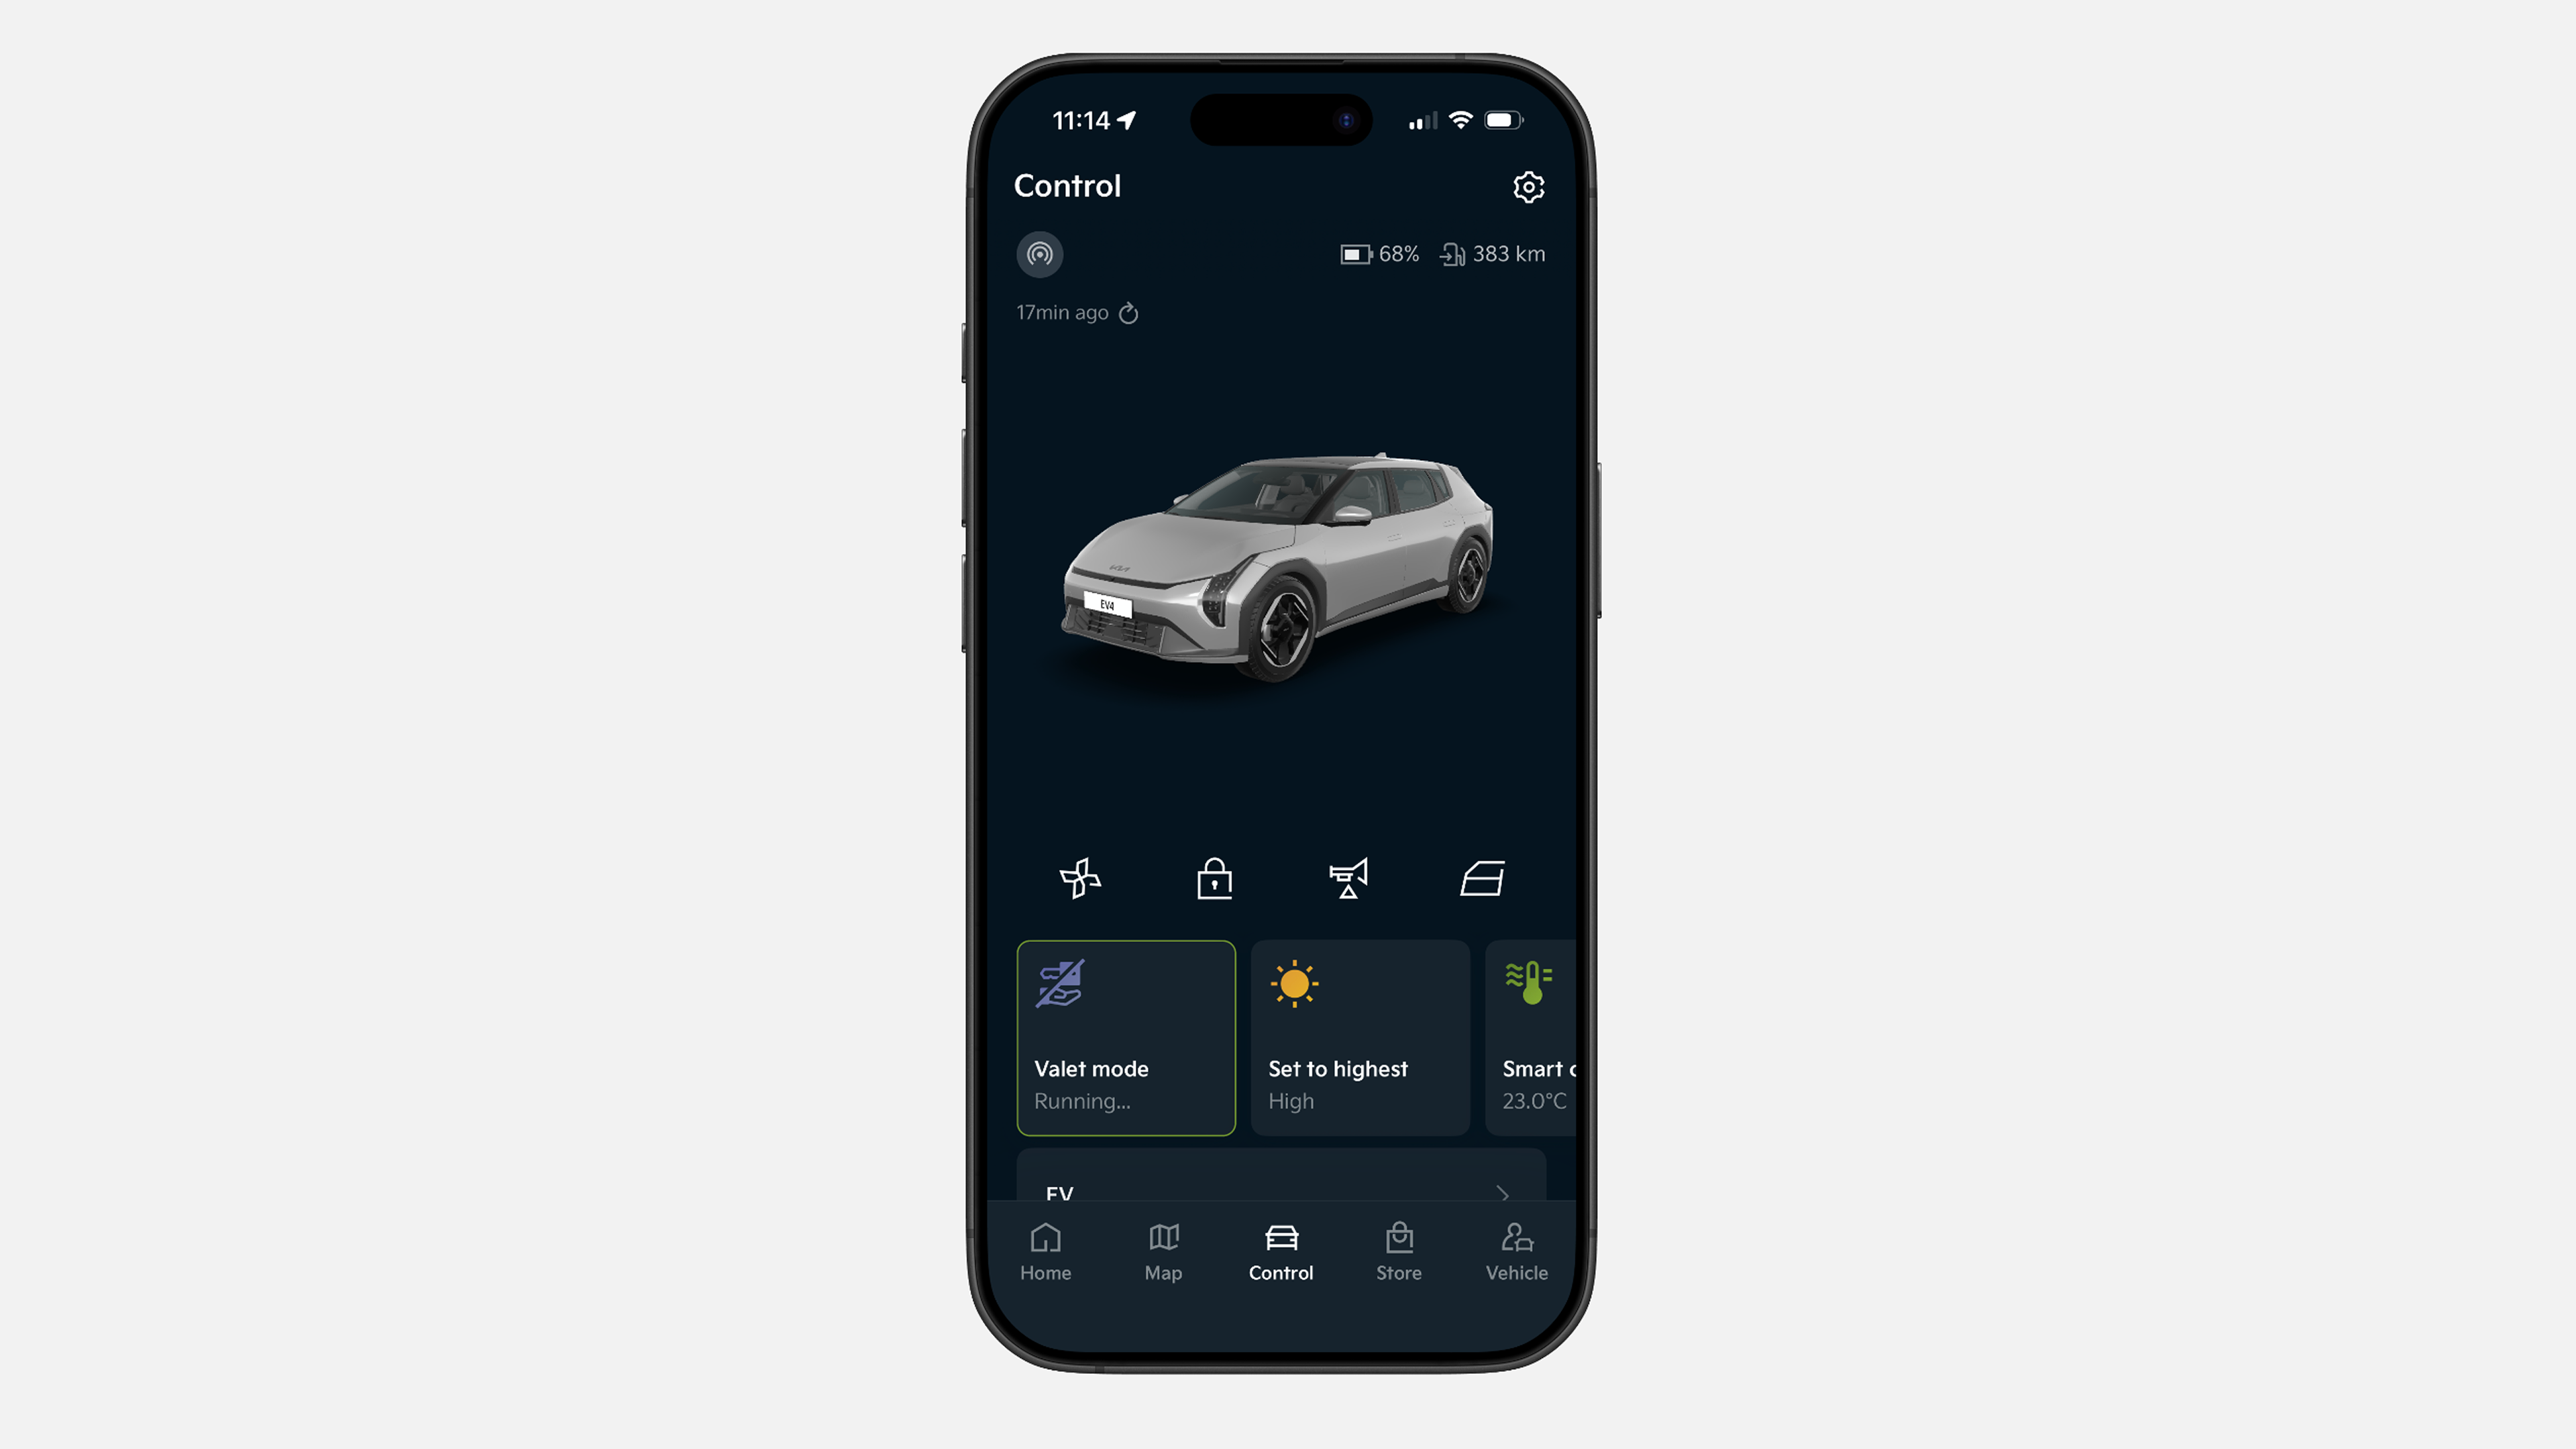
✔ Tap “Control” in the lower menu bar, then select “Valet mode”.
✔ Press “Activate”.
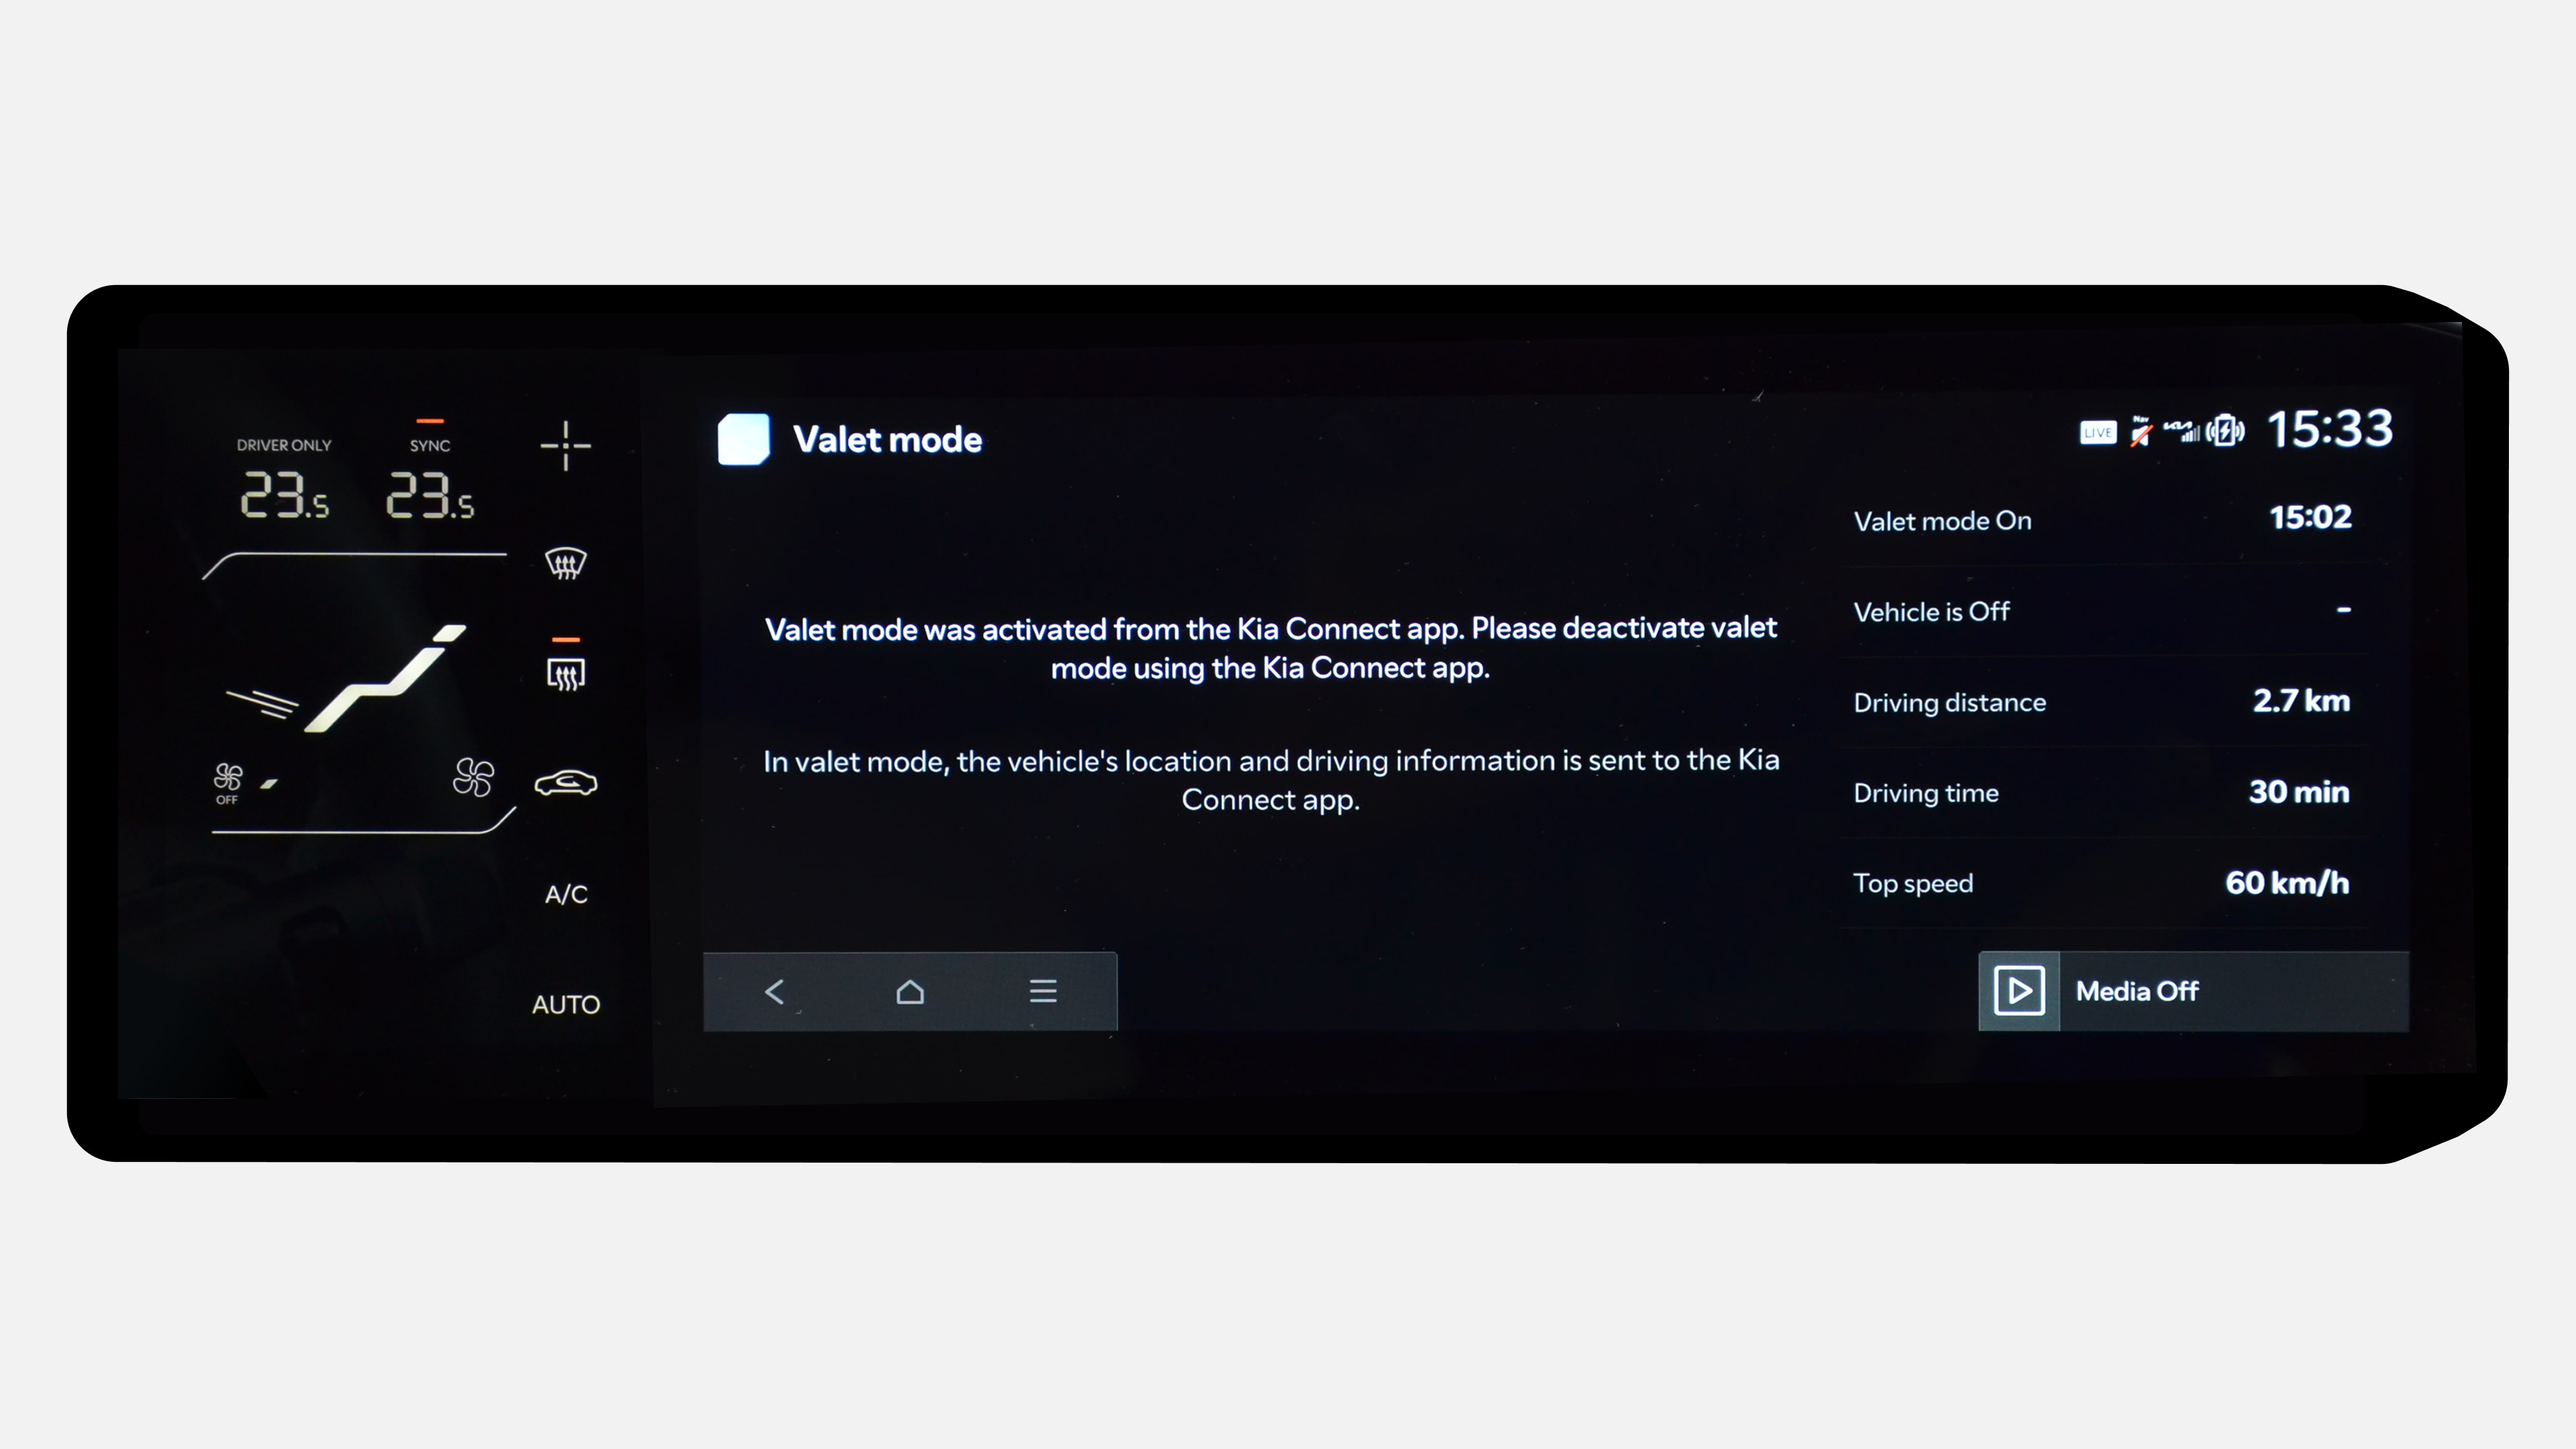
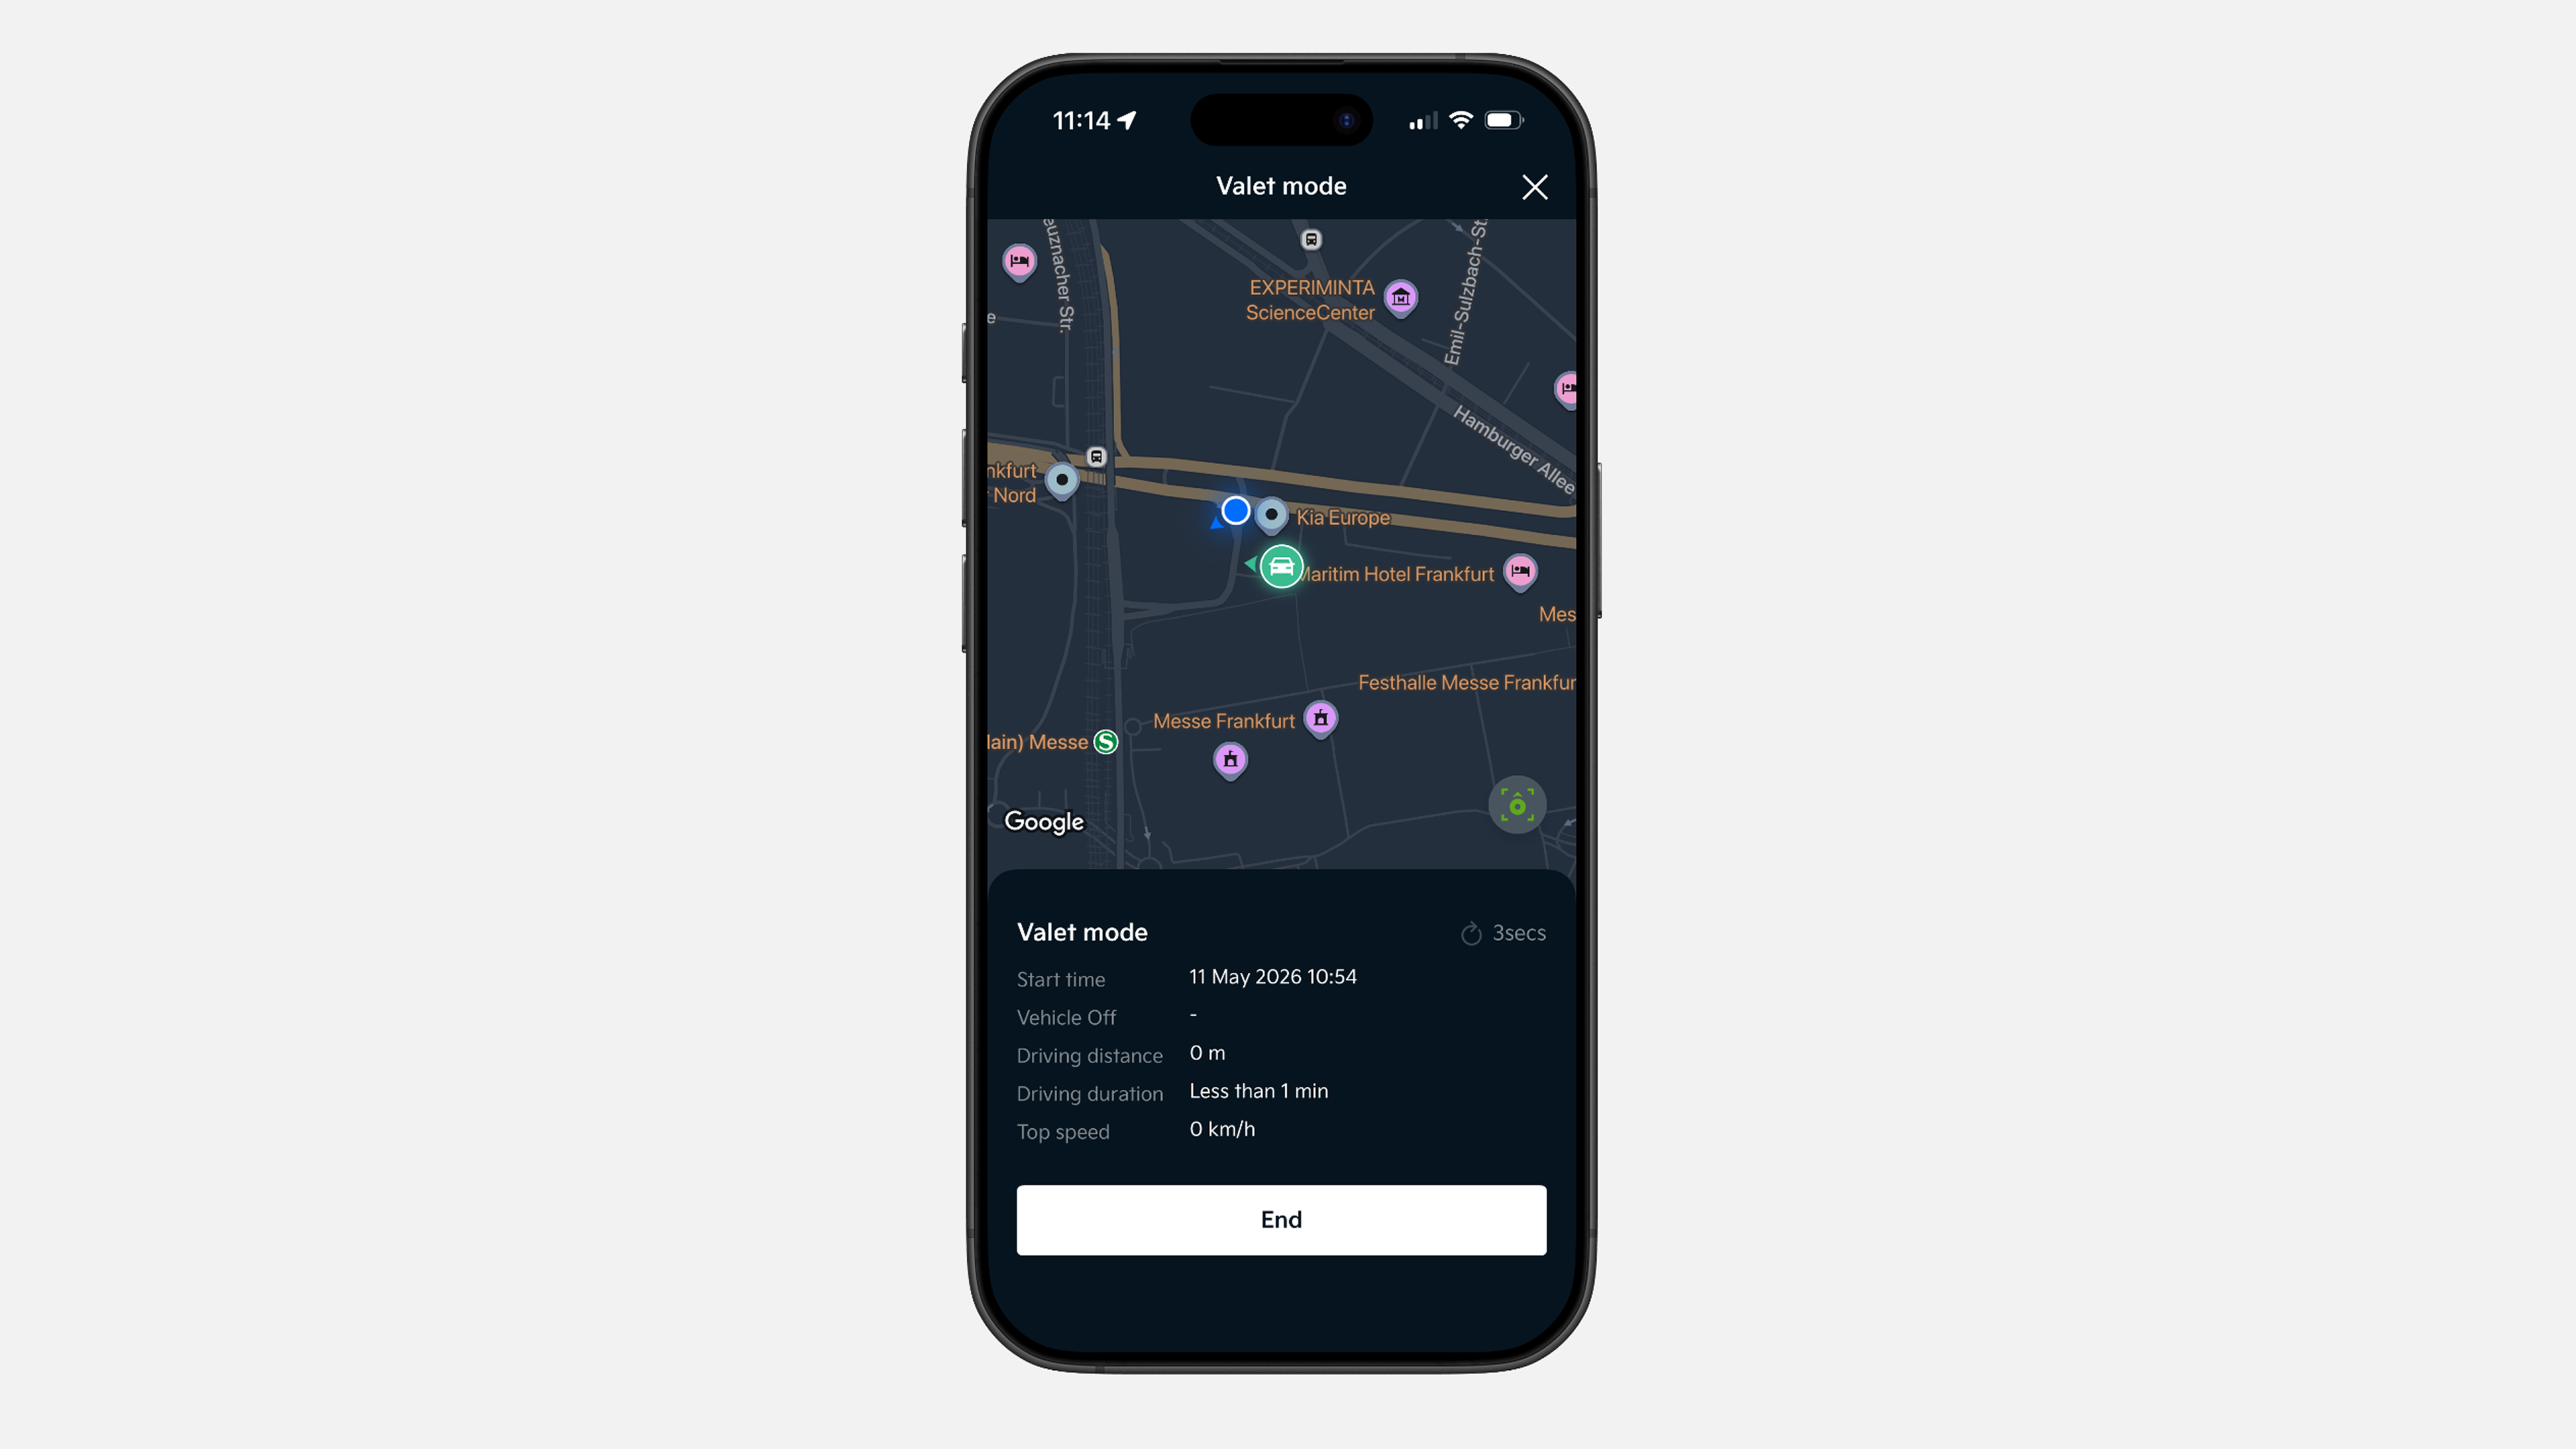
✔ The command is sent to your vehicle. While driving, the screen is locked and you can track vehicle status,location, driving distance, driving duration, and top speed.
✔ To deactivate Valet mode, tap “Control” in the lower menu bar and select “Valet mode”.
✔ Press “End” and confirm to deactivate the command.
✔ Tap “Control” in the lower menu bar, select the “EV” section.
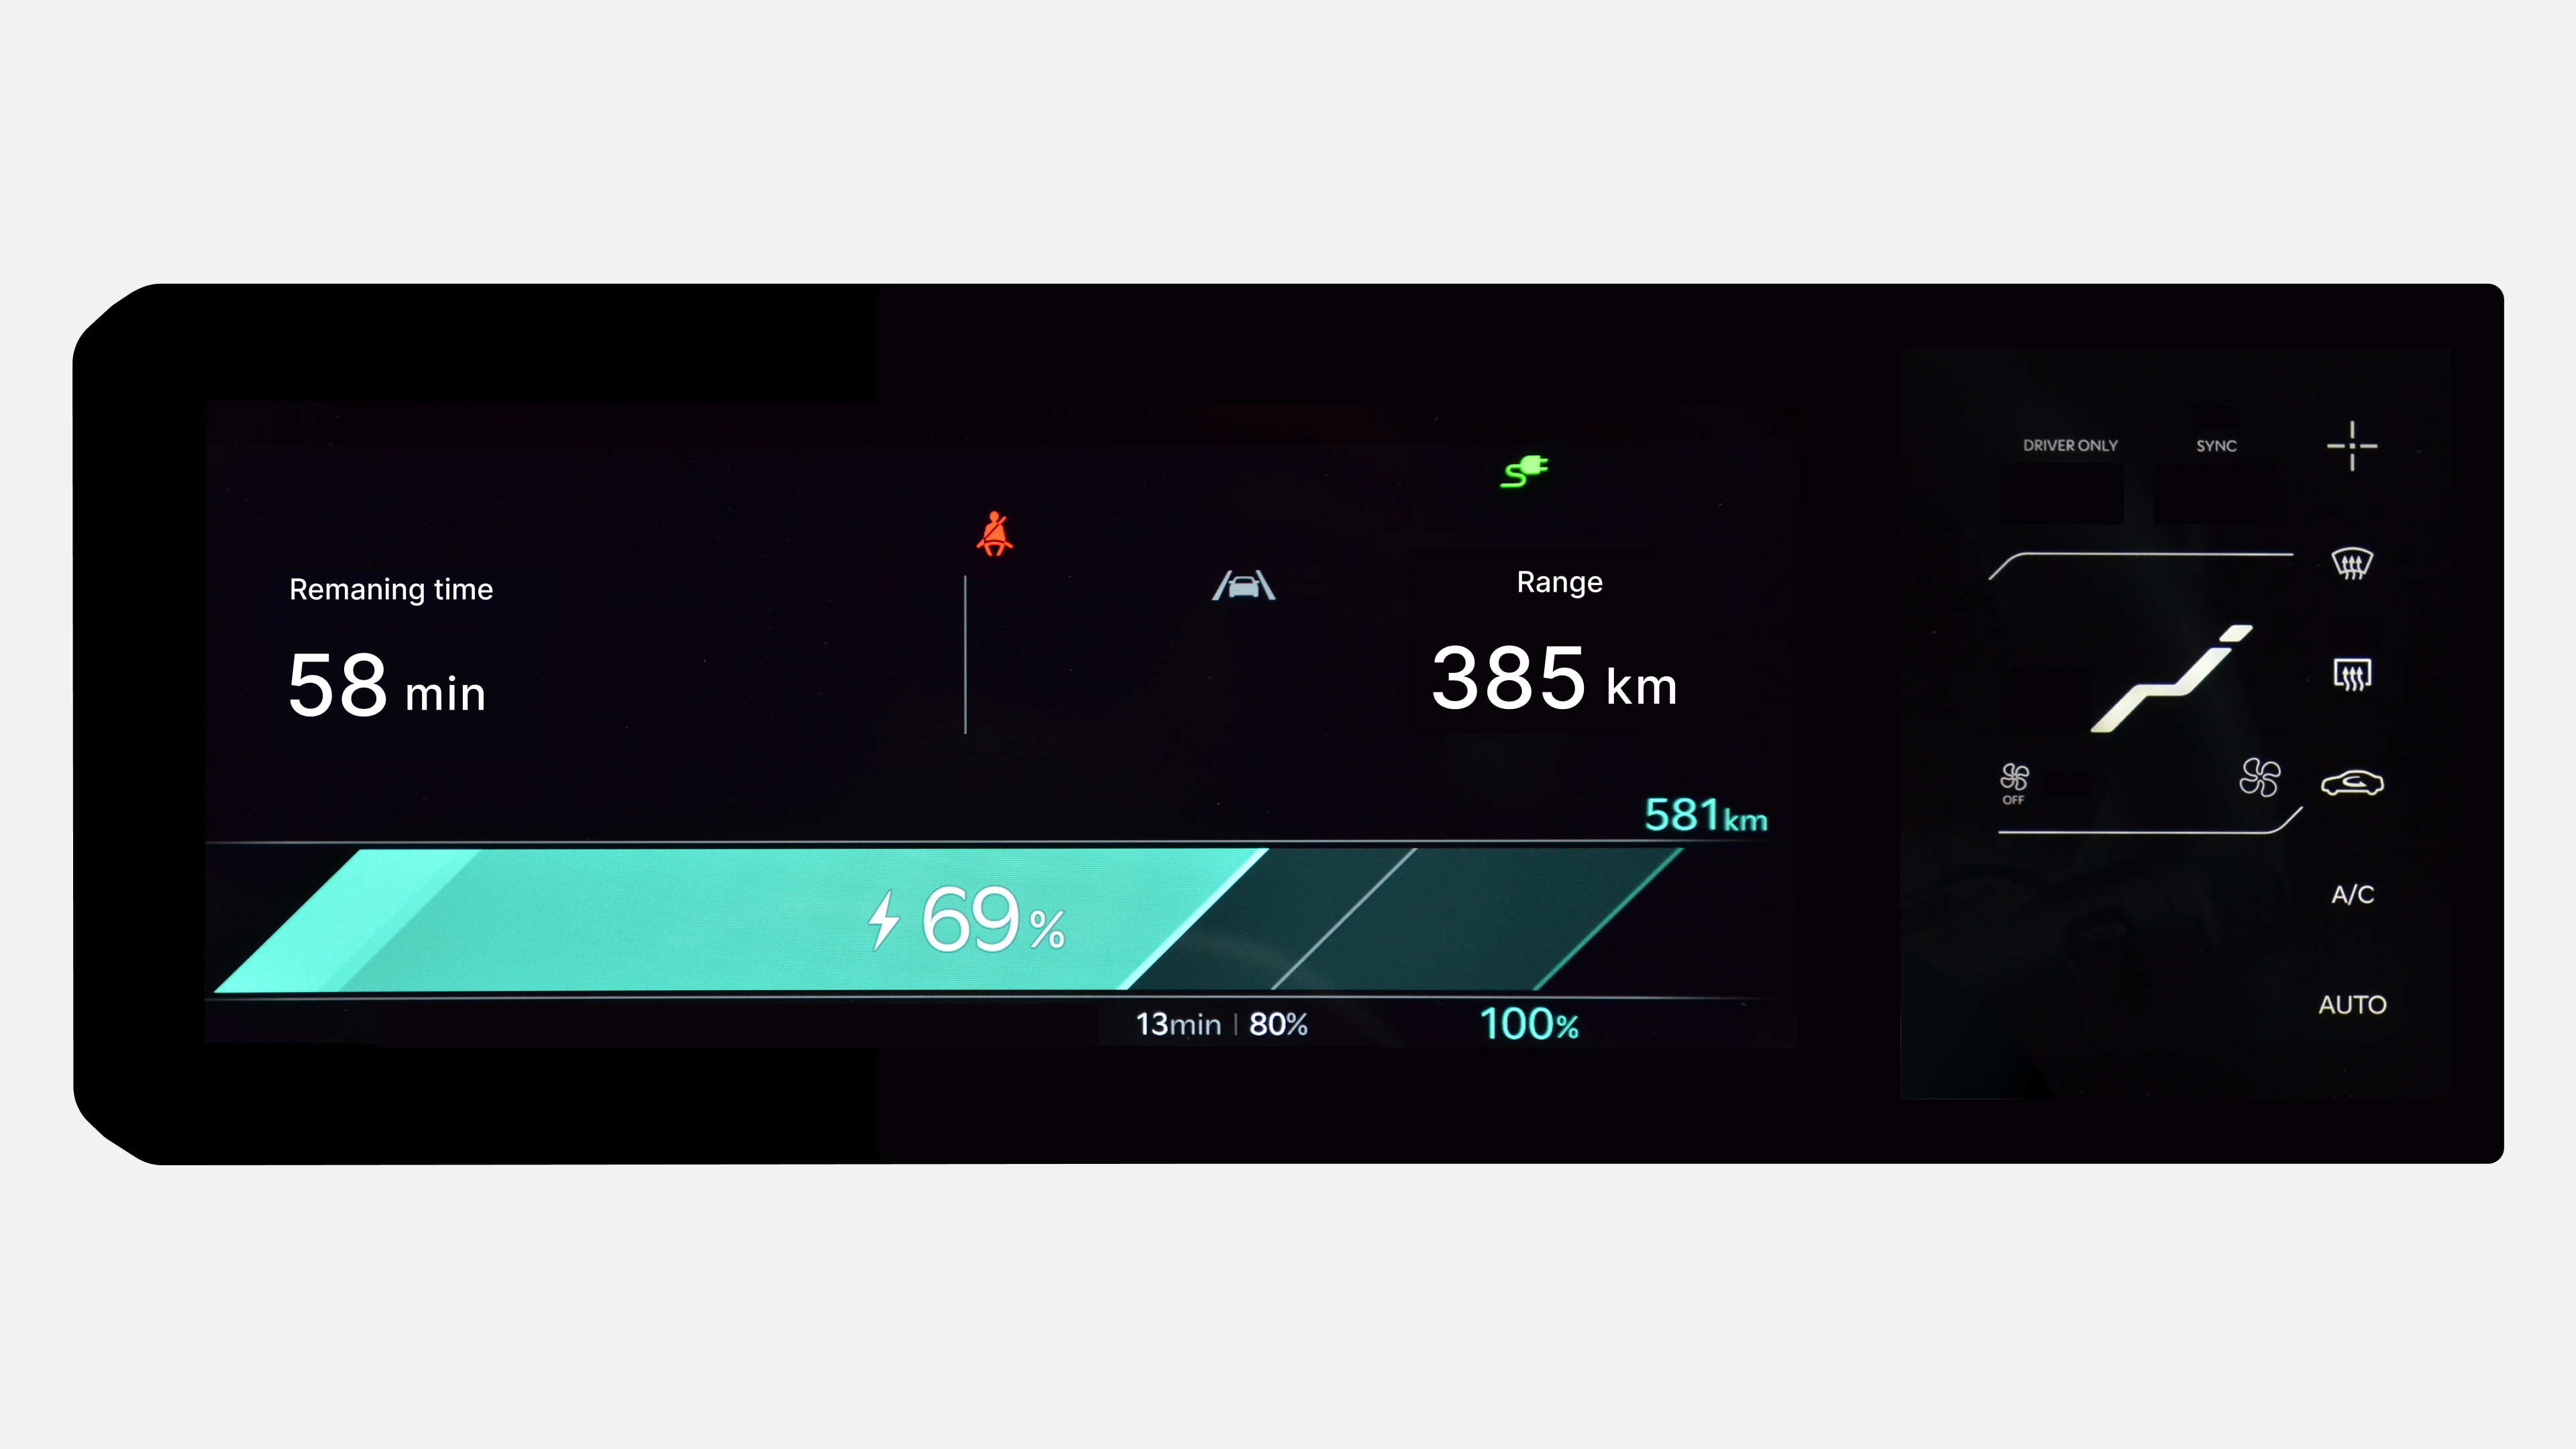
✔ In the “EV” section, press and hold “Start battery conditioning” to send the command.
✔ Your battery will start preconditioning and will stop automatically once it reaches the optimal temperature. This helps ensure the highest possible charging speed at a DC charger.
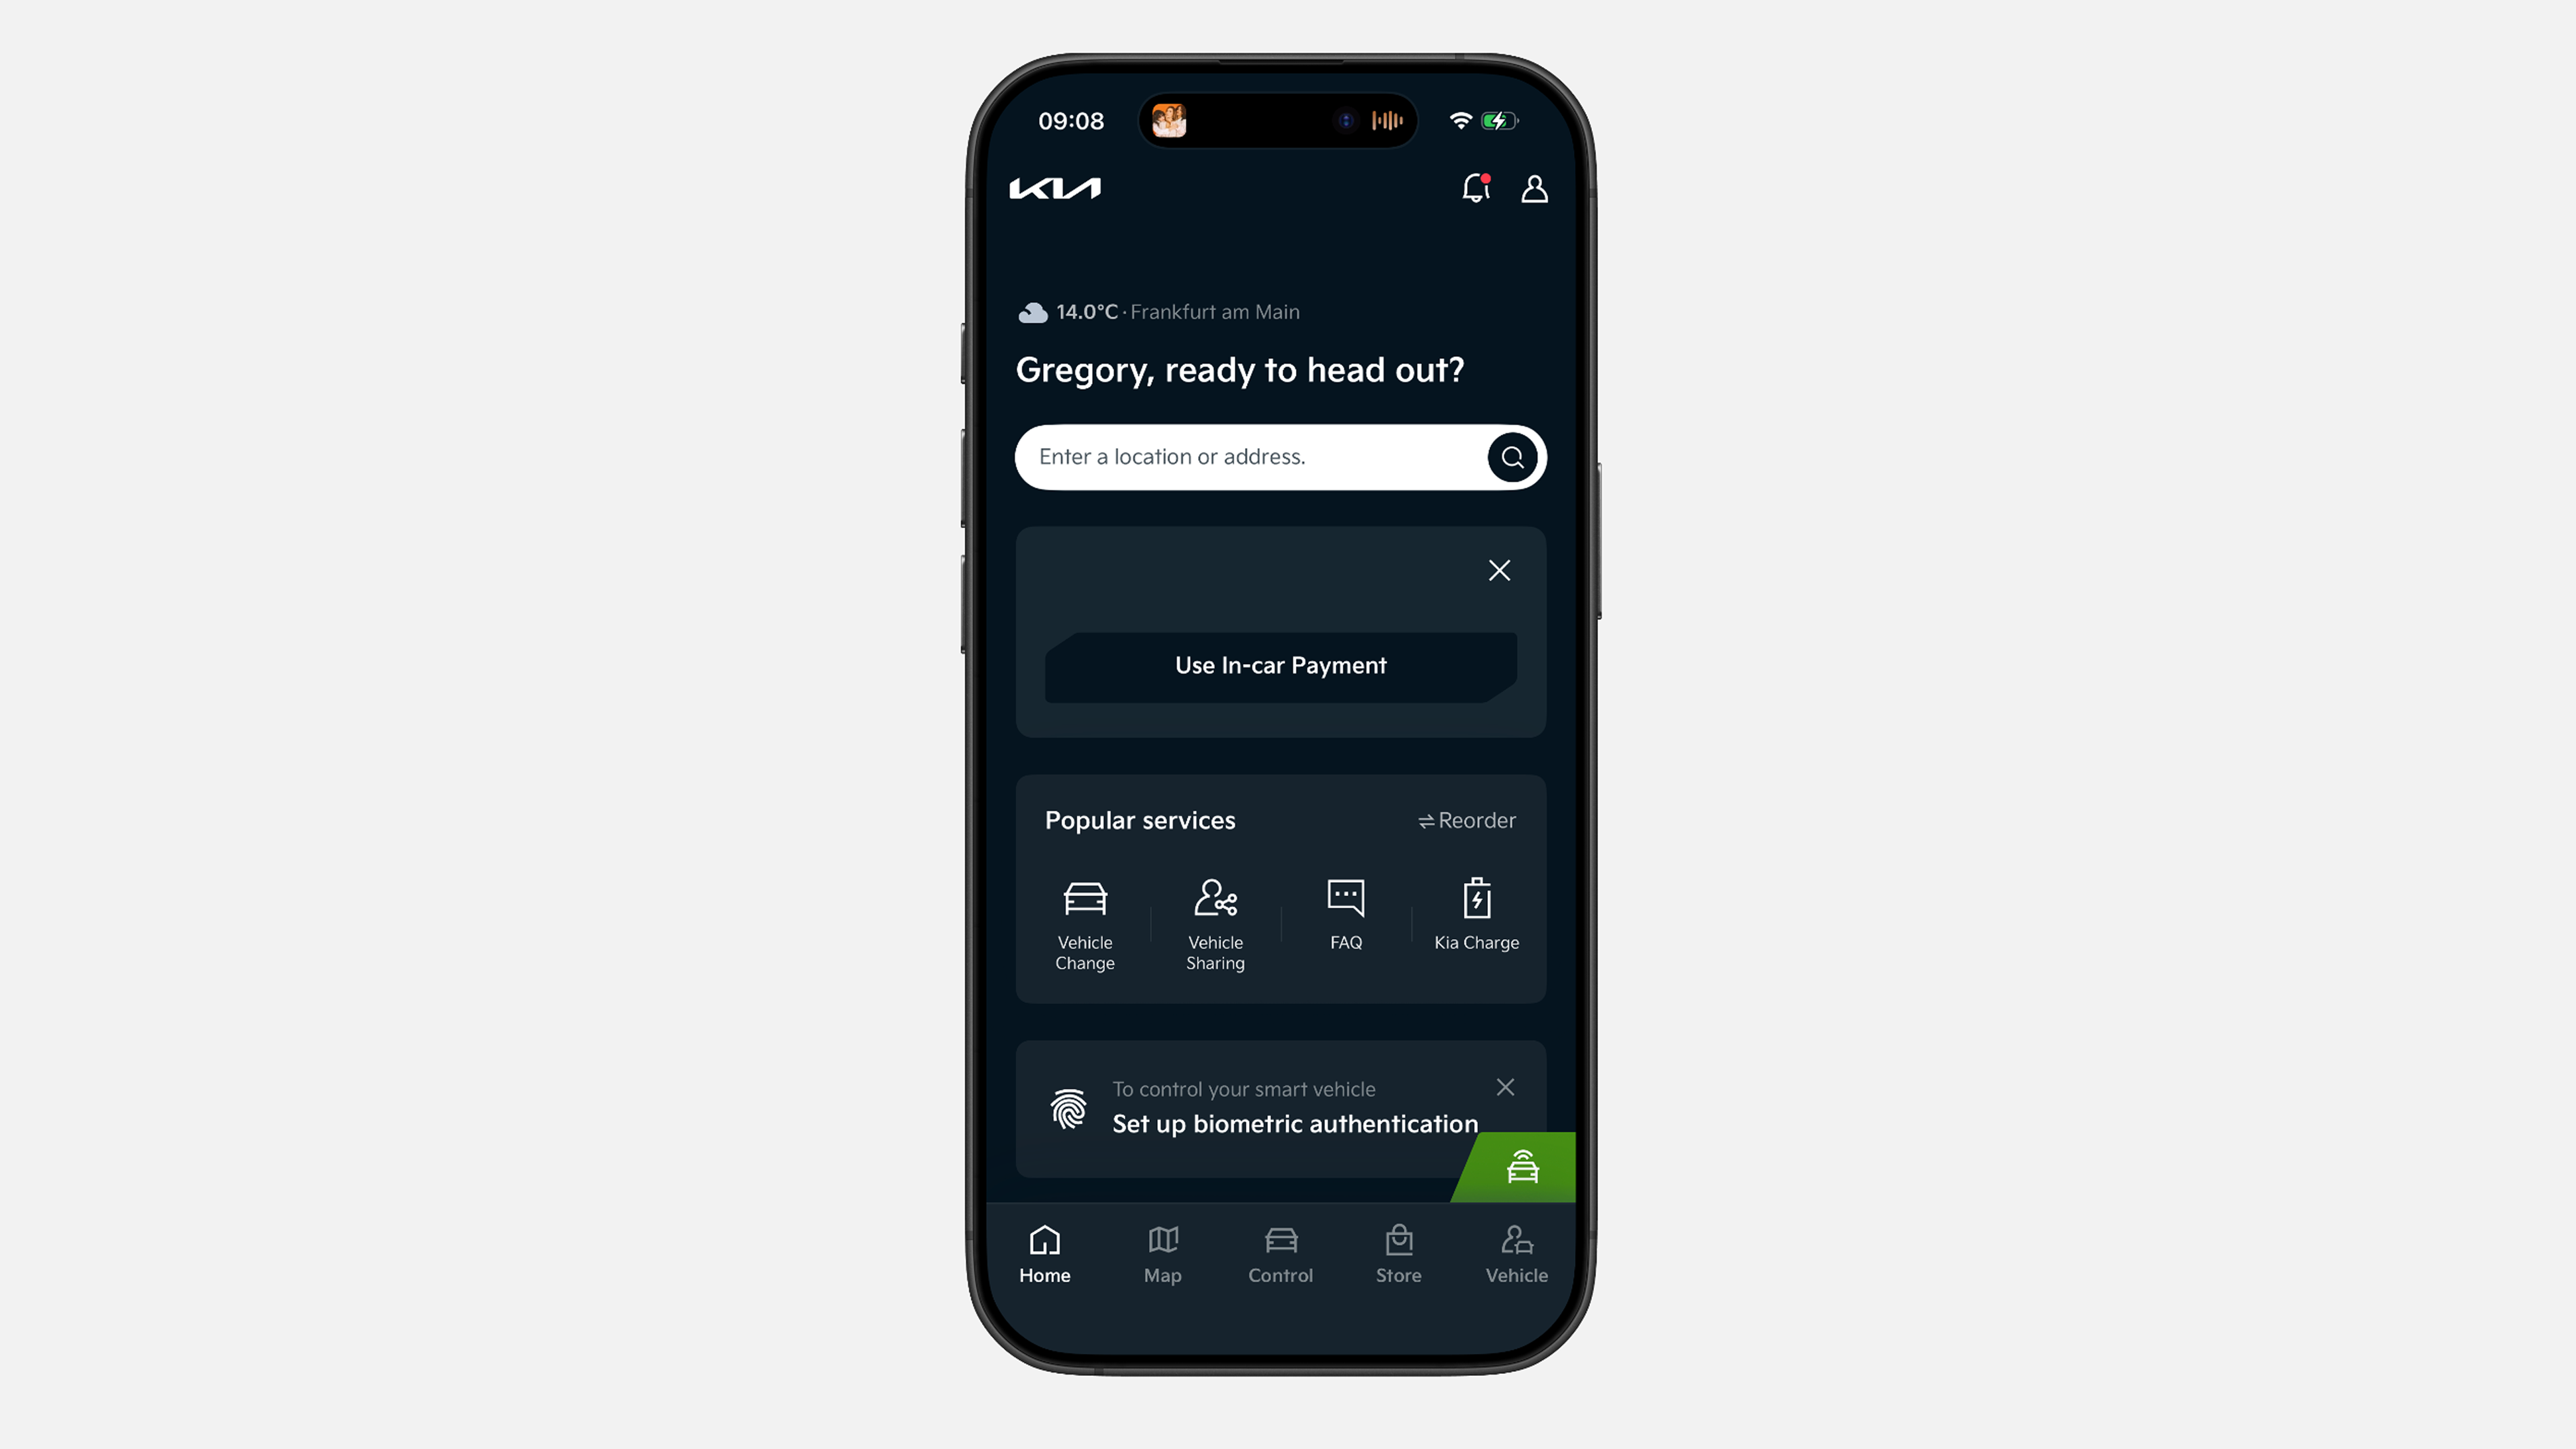
✔ Under the "Home" tab, tap the "Use In-car Payments" widget.
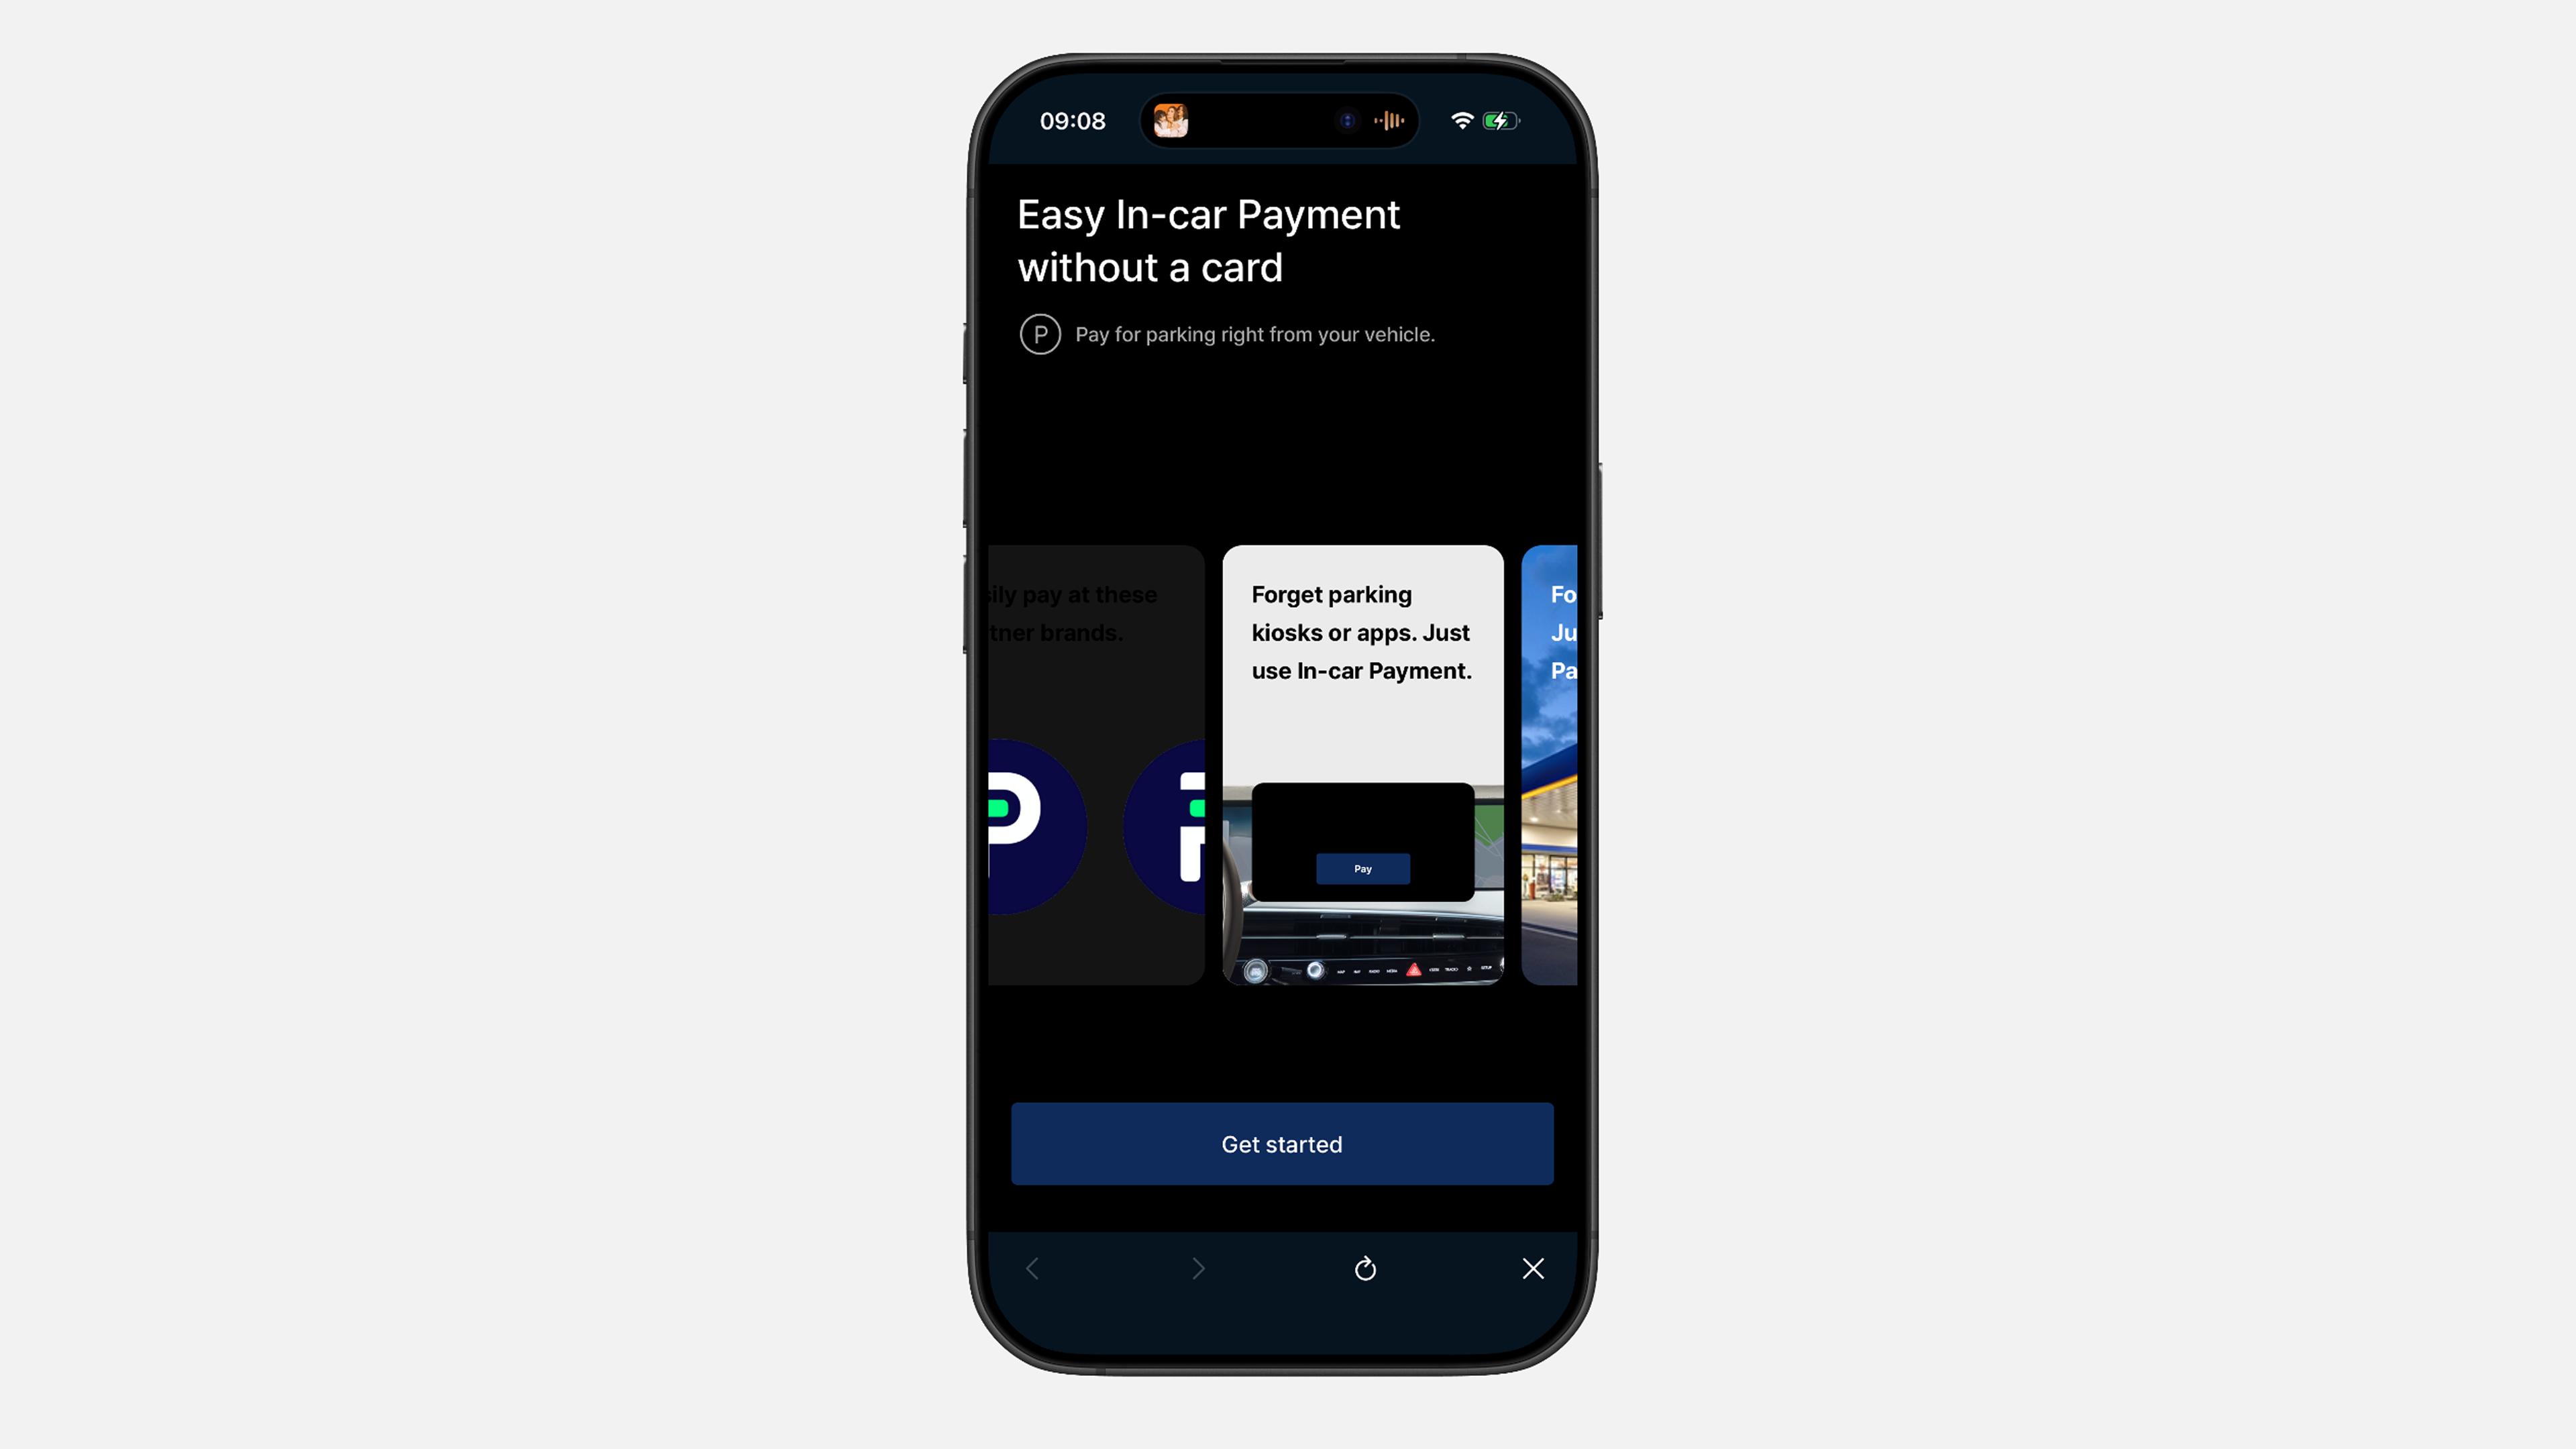
✔ Tap "Get Started" and accept the required "Terms of Use".
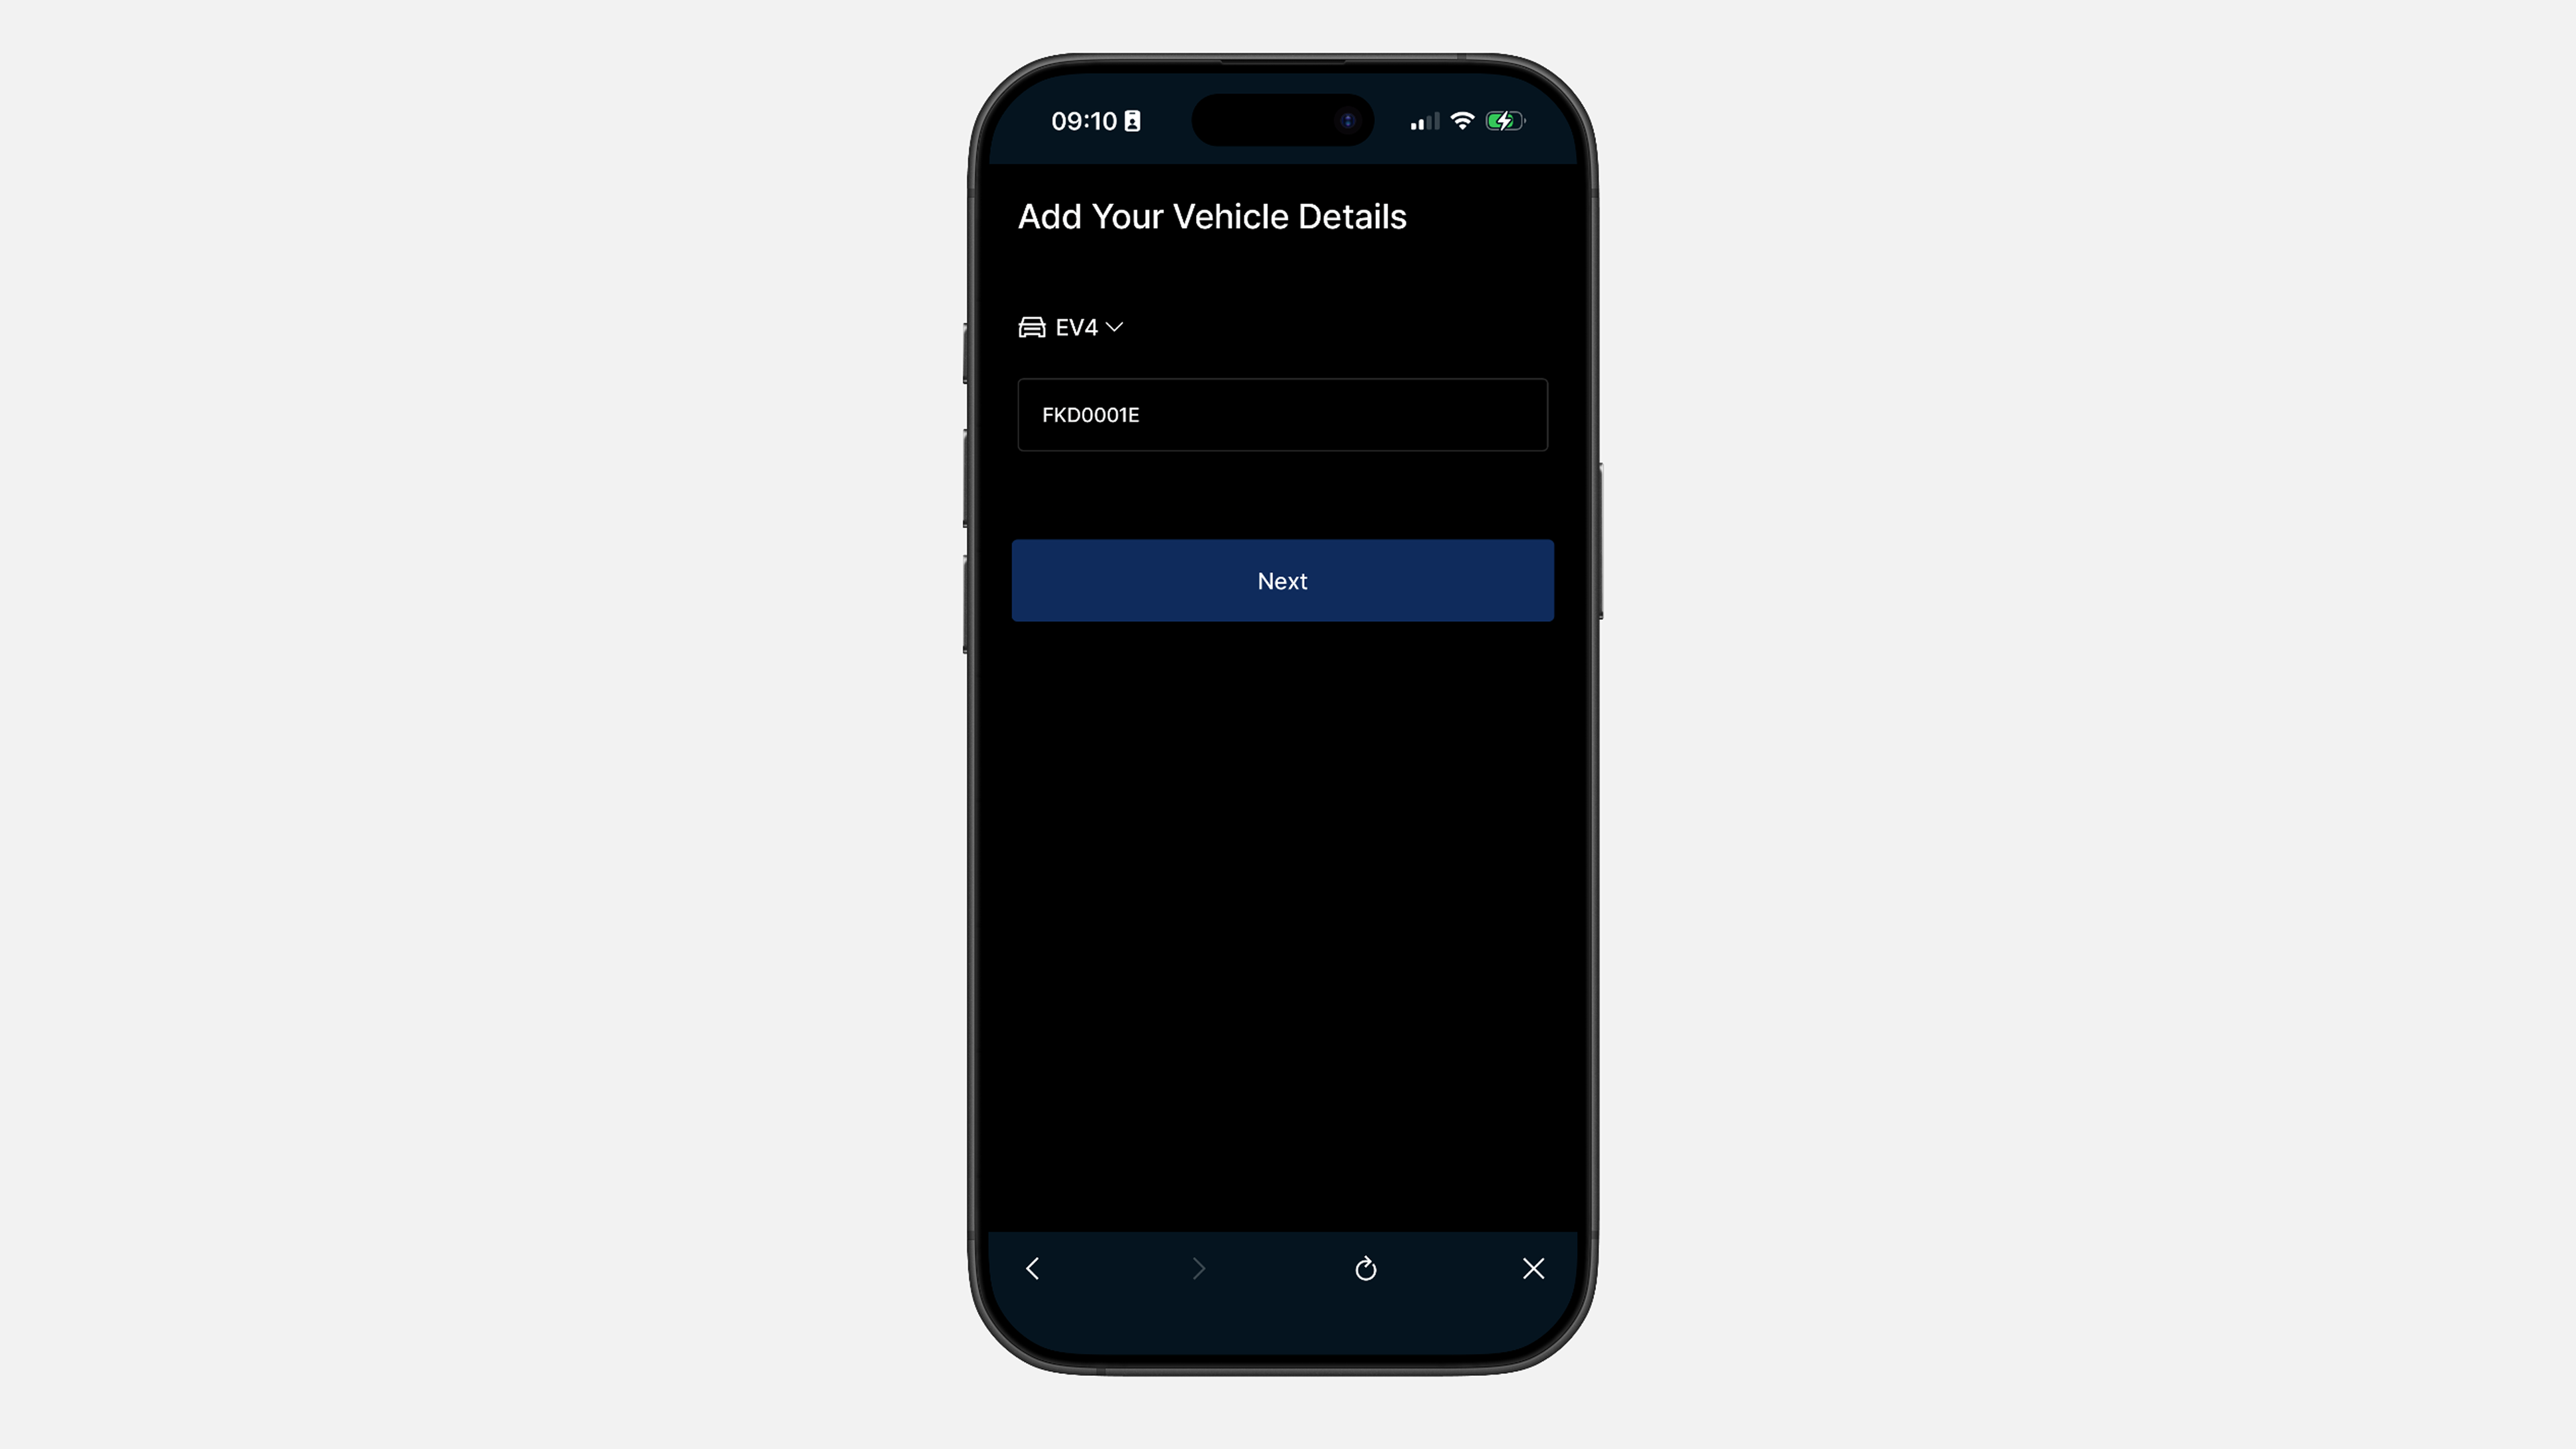
✔ The main vehicle is selected automatically. Enter the license plate number, without spaces or special characters.
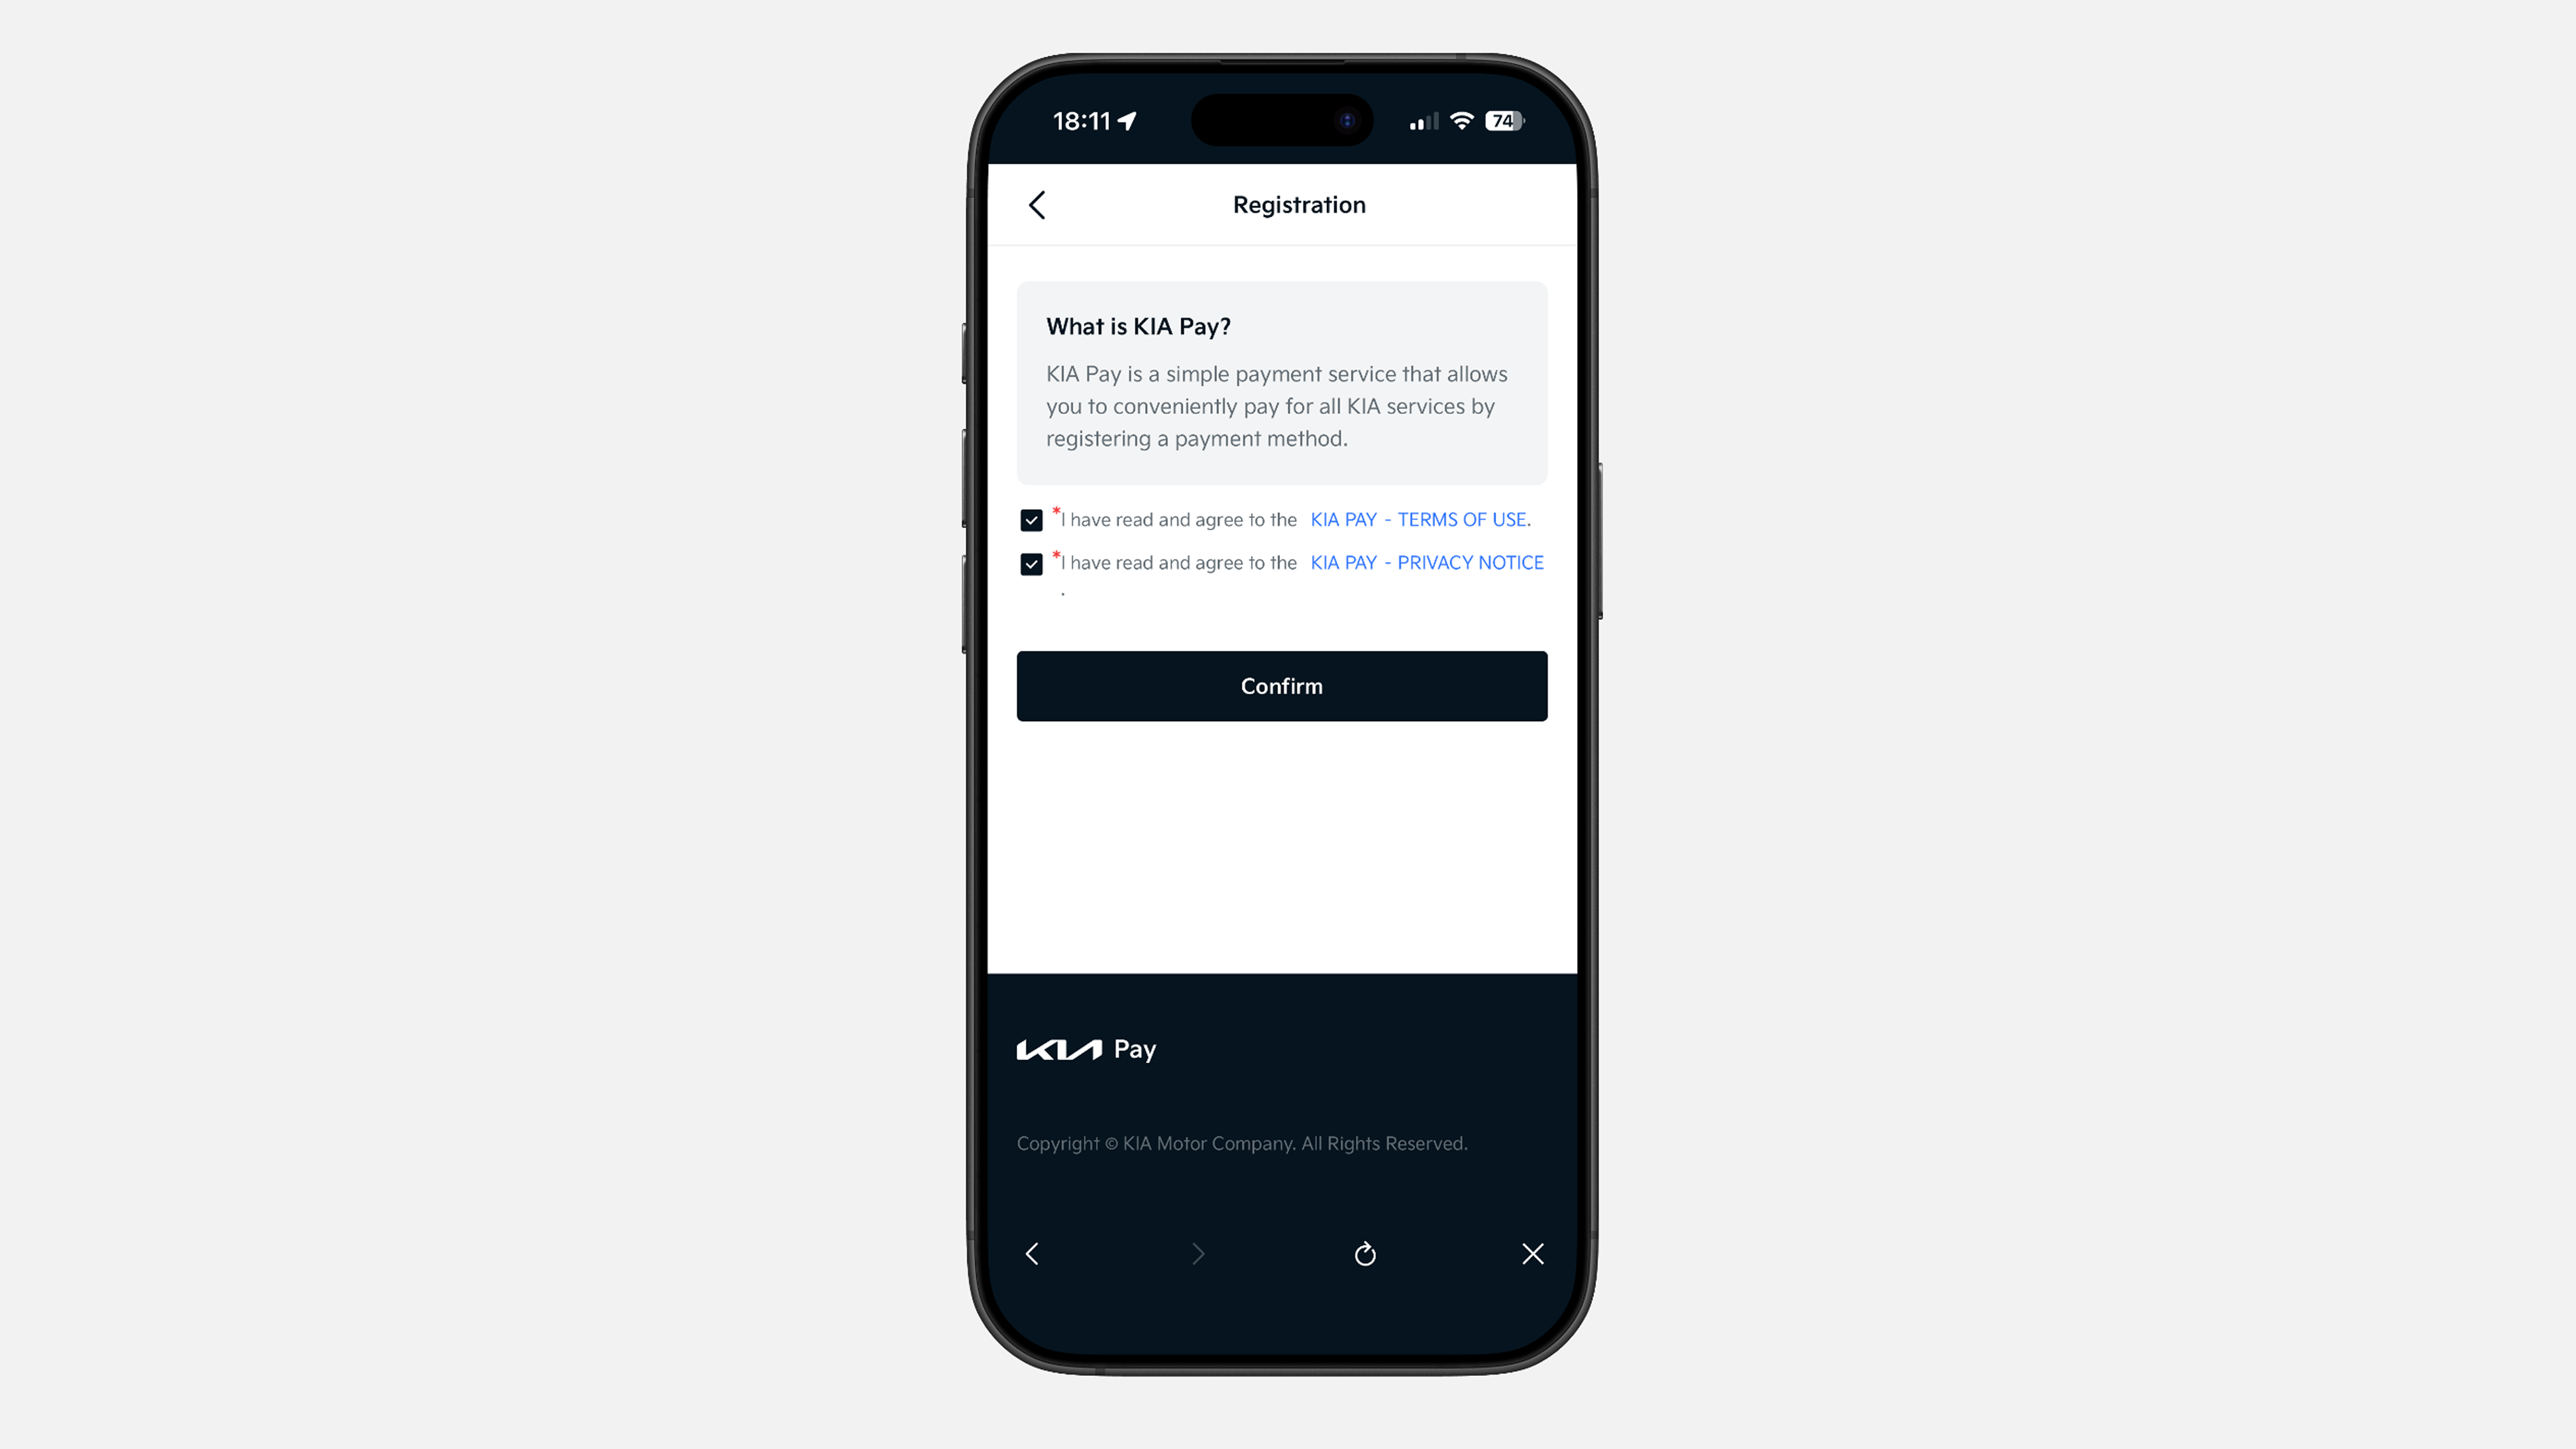
✔ Accept the Kia Pay Terms of Use and Privacy Notice.
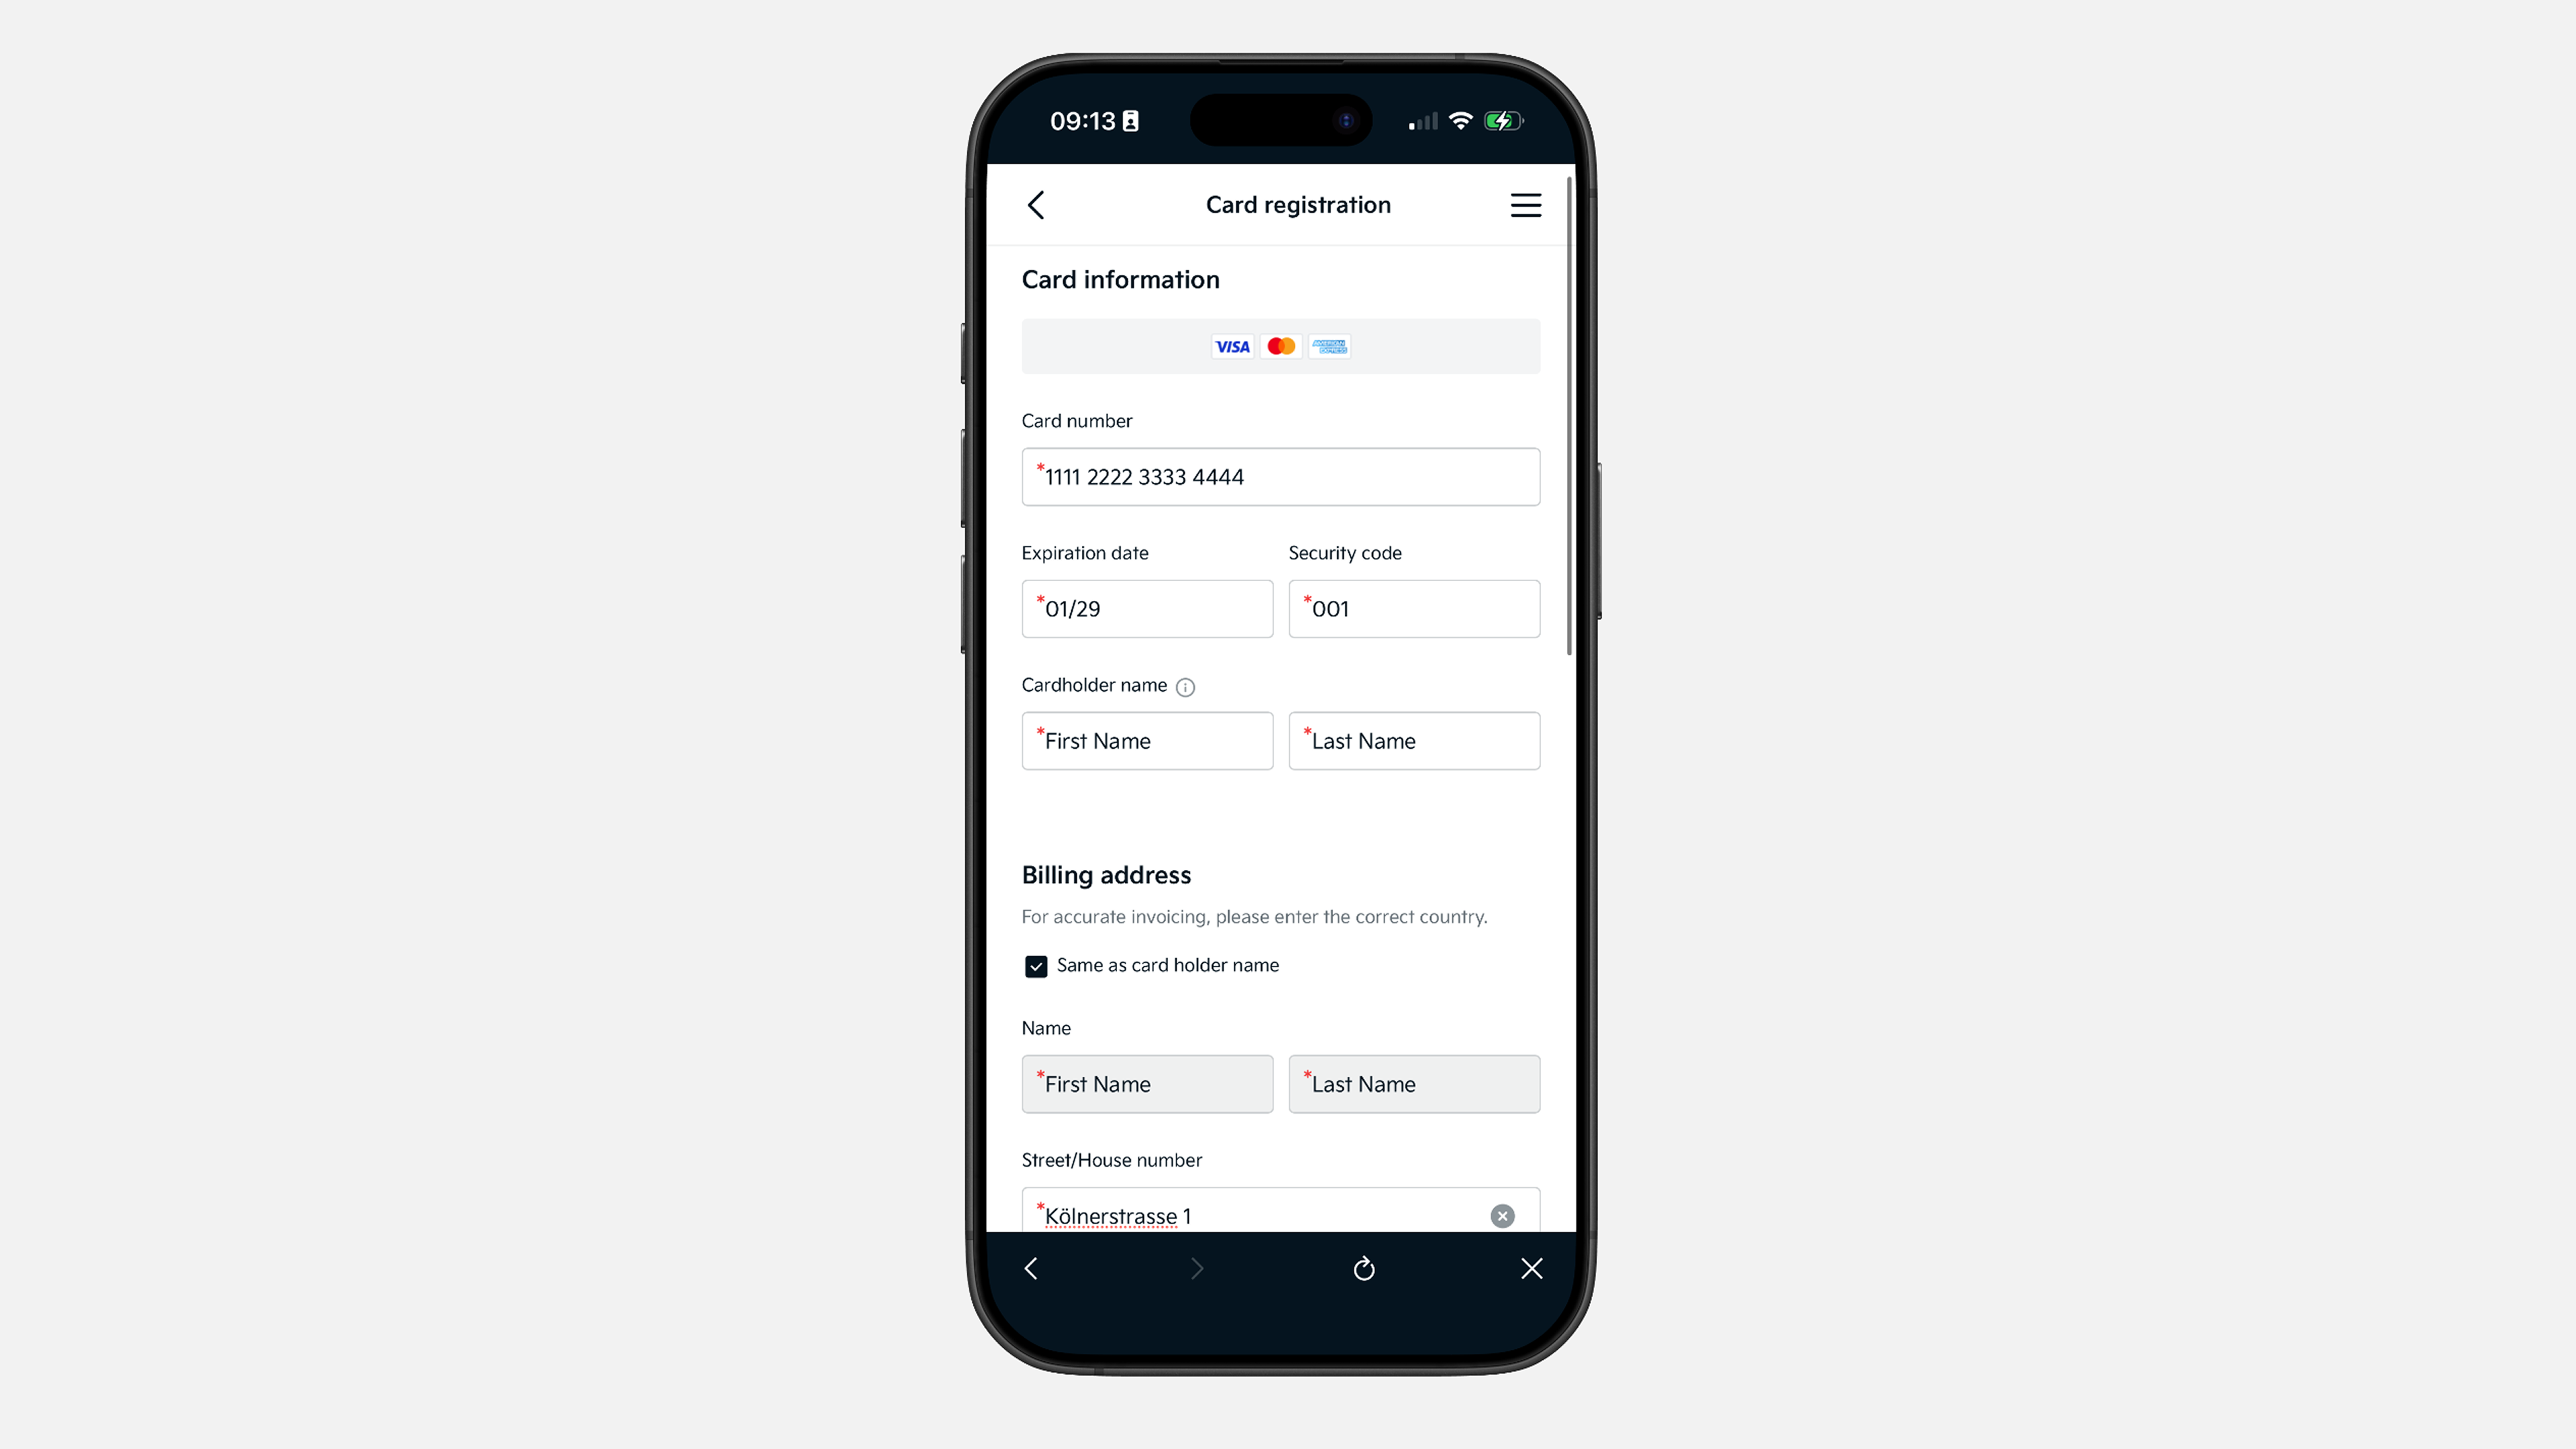
✔ Enter your payment card details. Confirm the 1€ verification transaction and confirm your selected card.
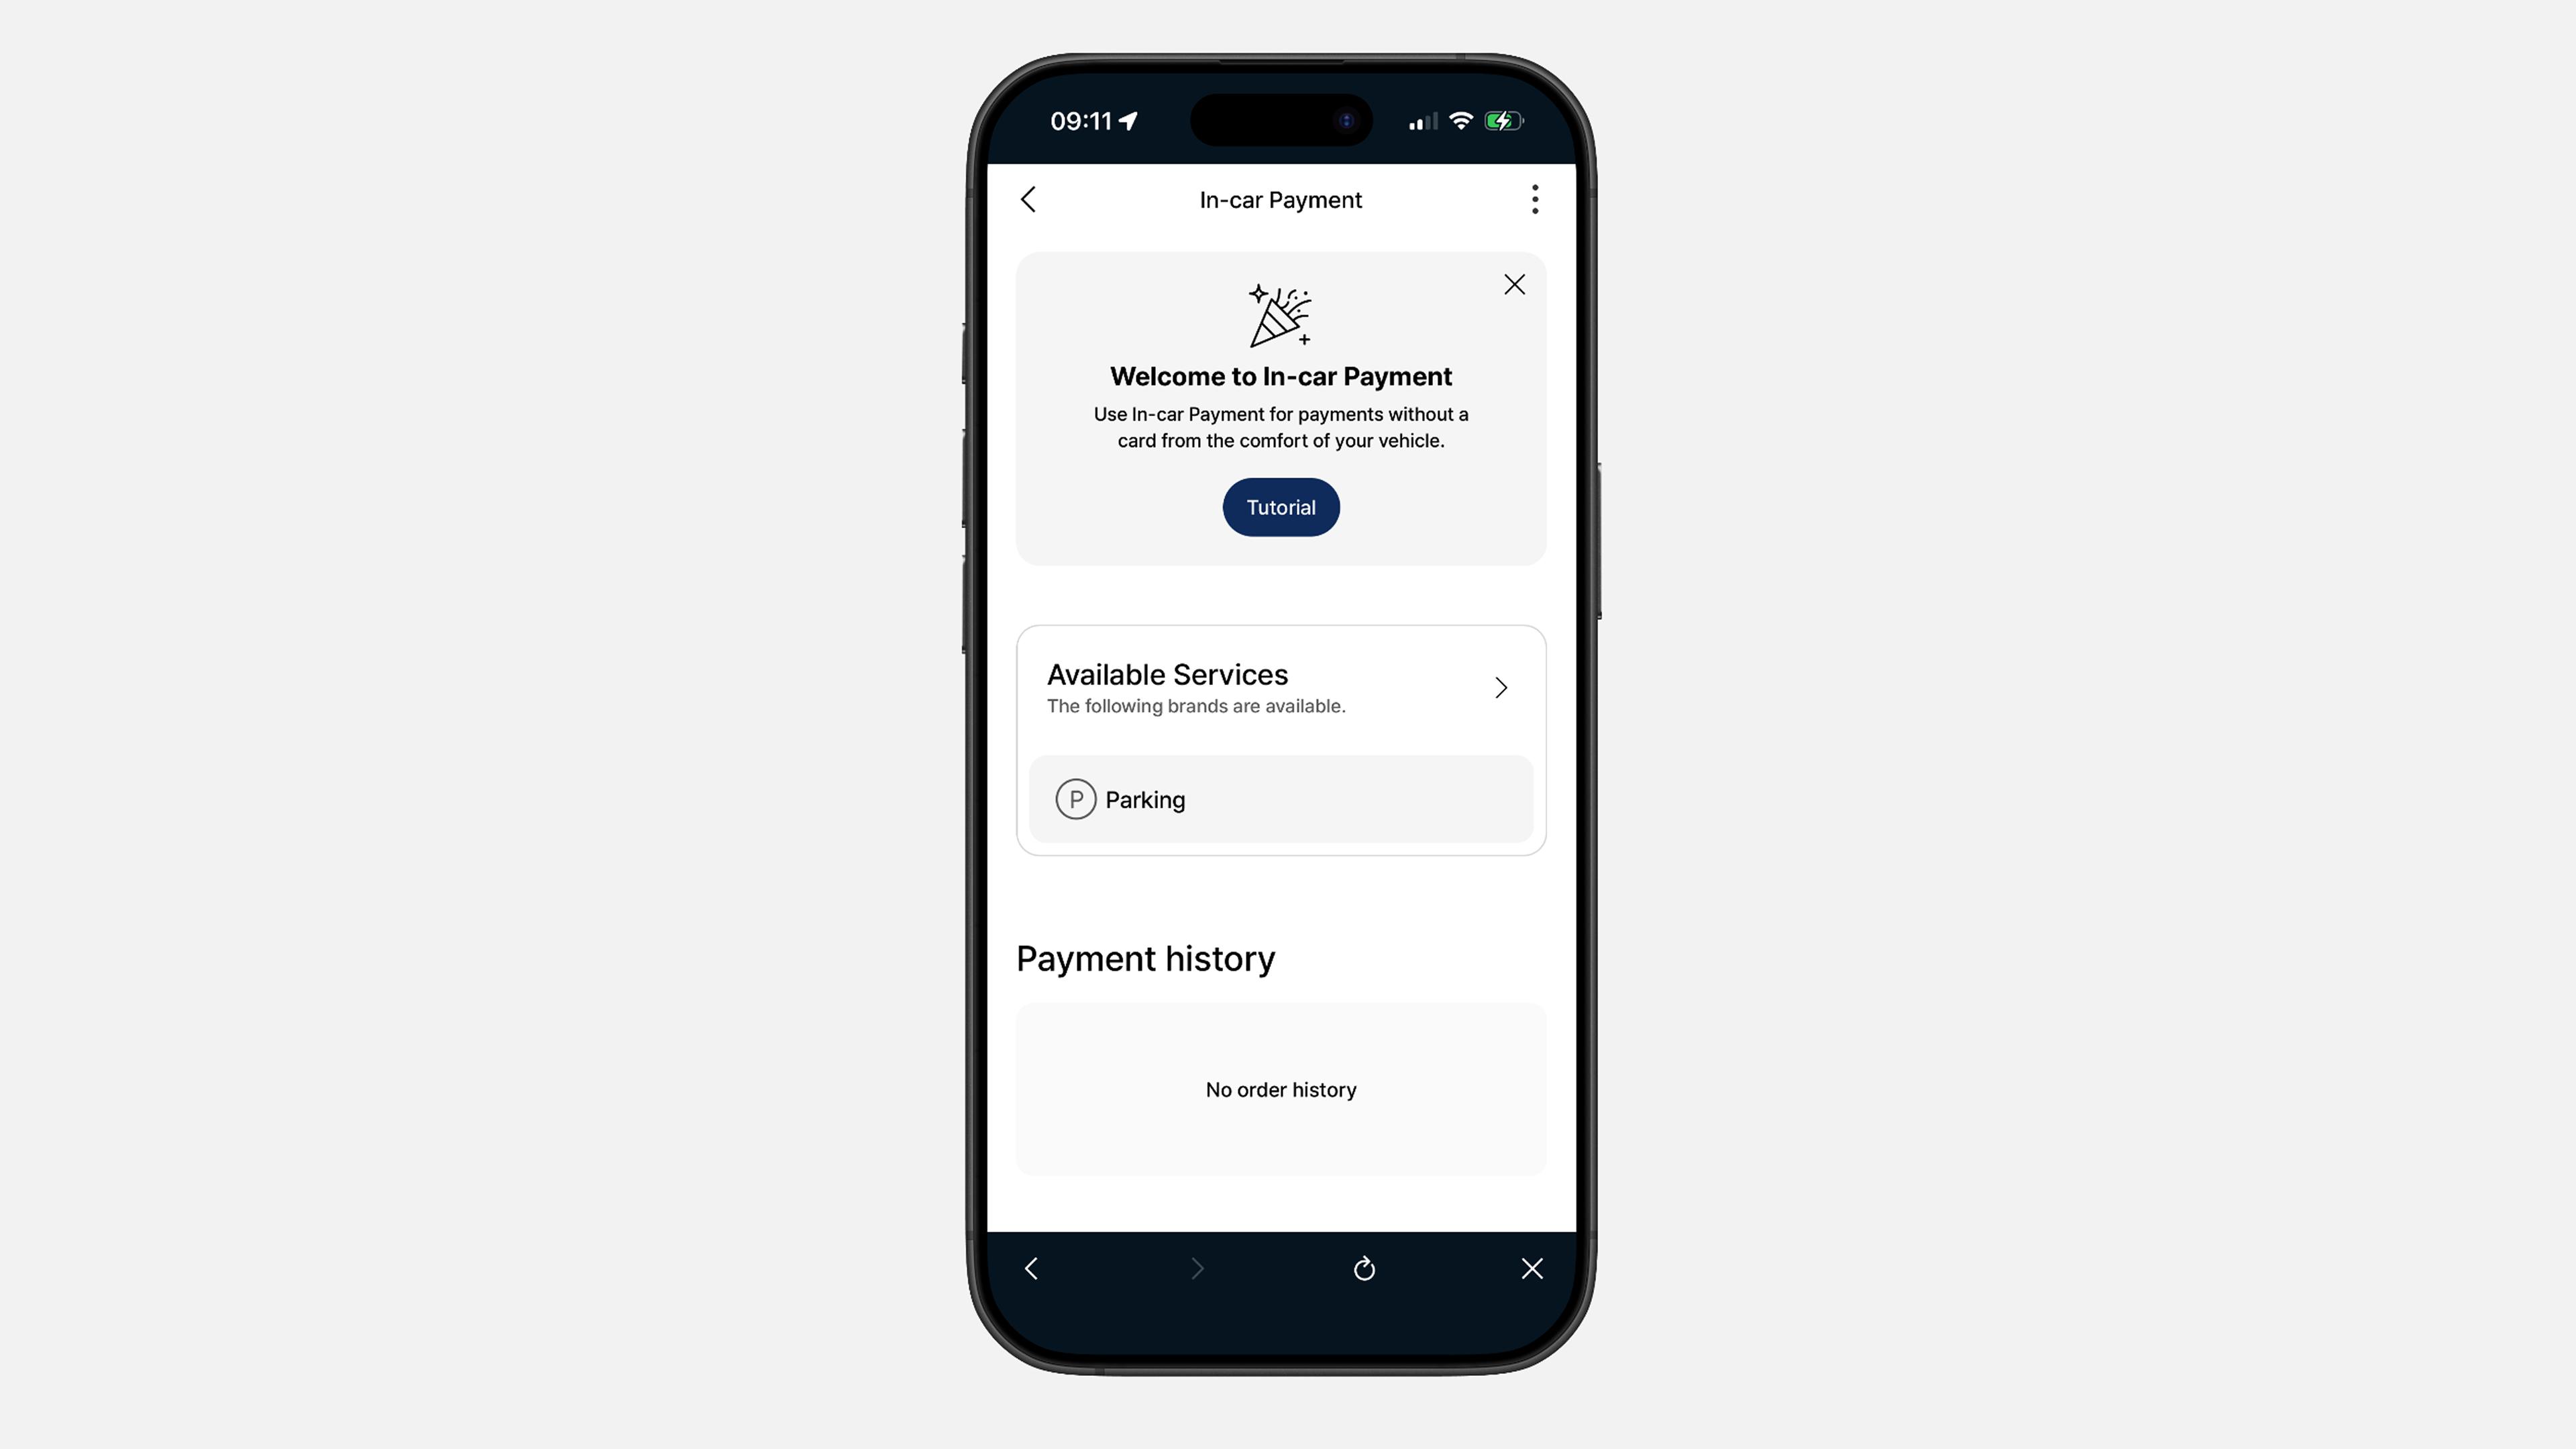
✔ All done. In this section, you can see all services currently available in your country.
✔ In the In-car Payment section in your vehicle, you can see available services, such as parking payment directly from your vehicle. You can view locations, prices, and availability.
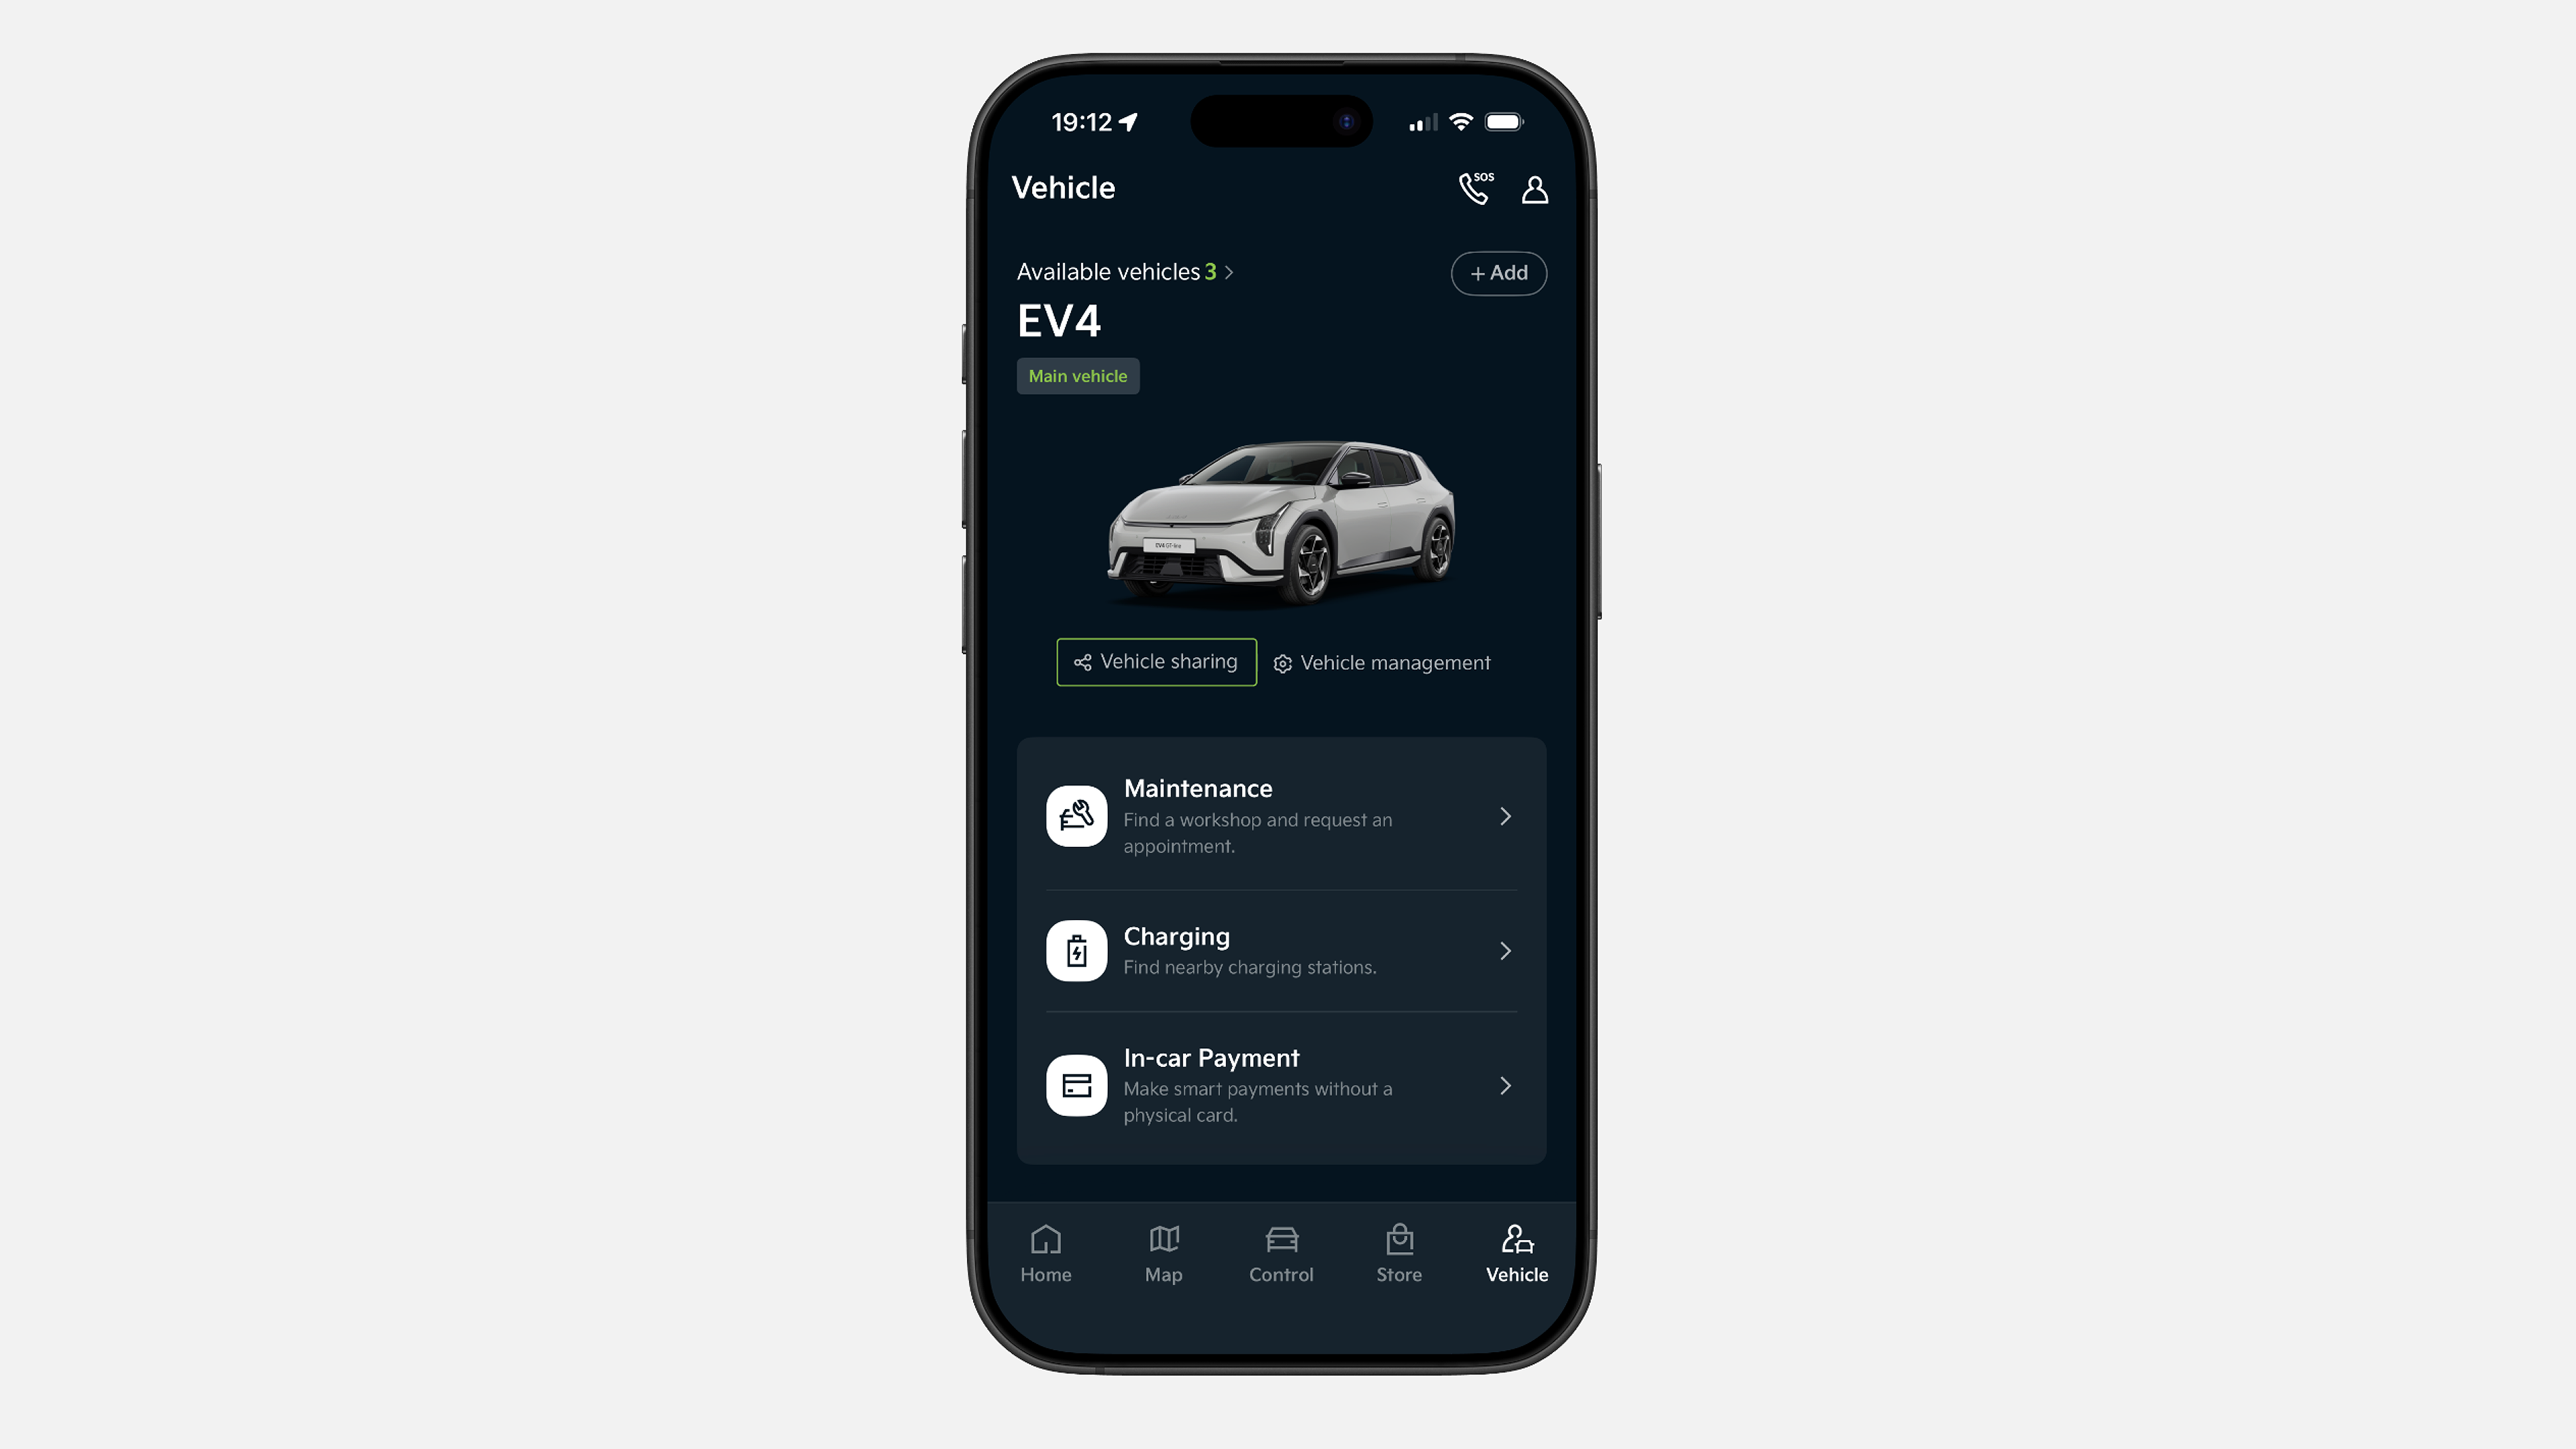
✔ In the lower menu bar, tap "Vehicle", then select "Vehicle sharing".
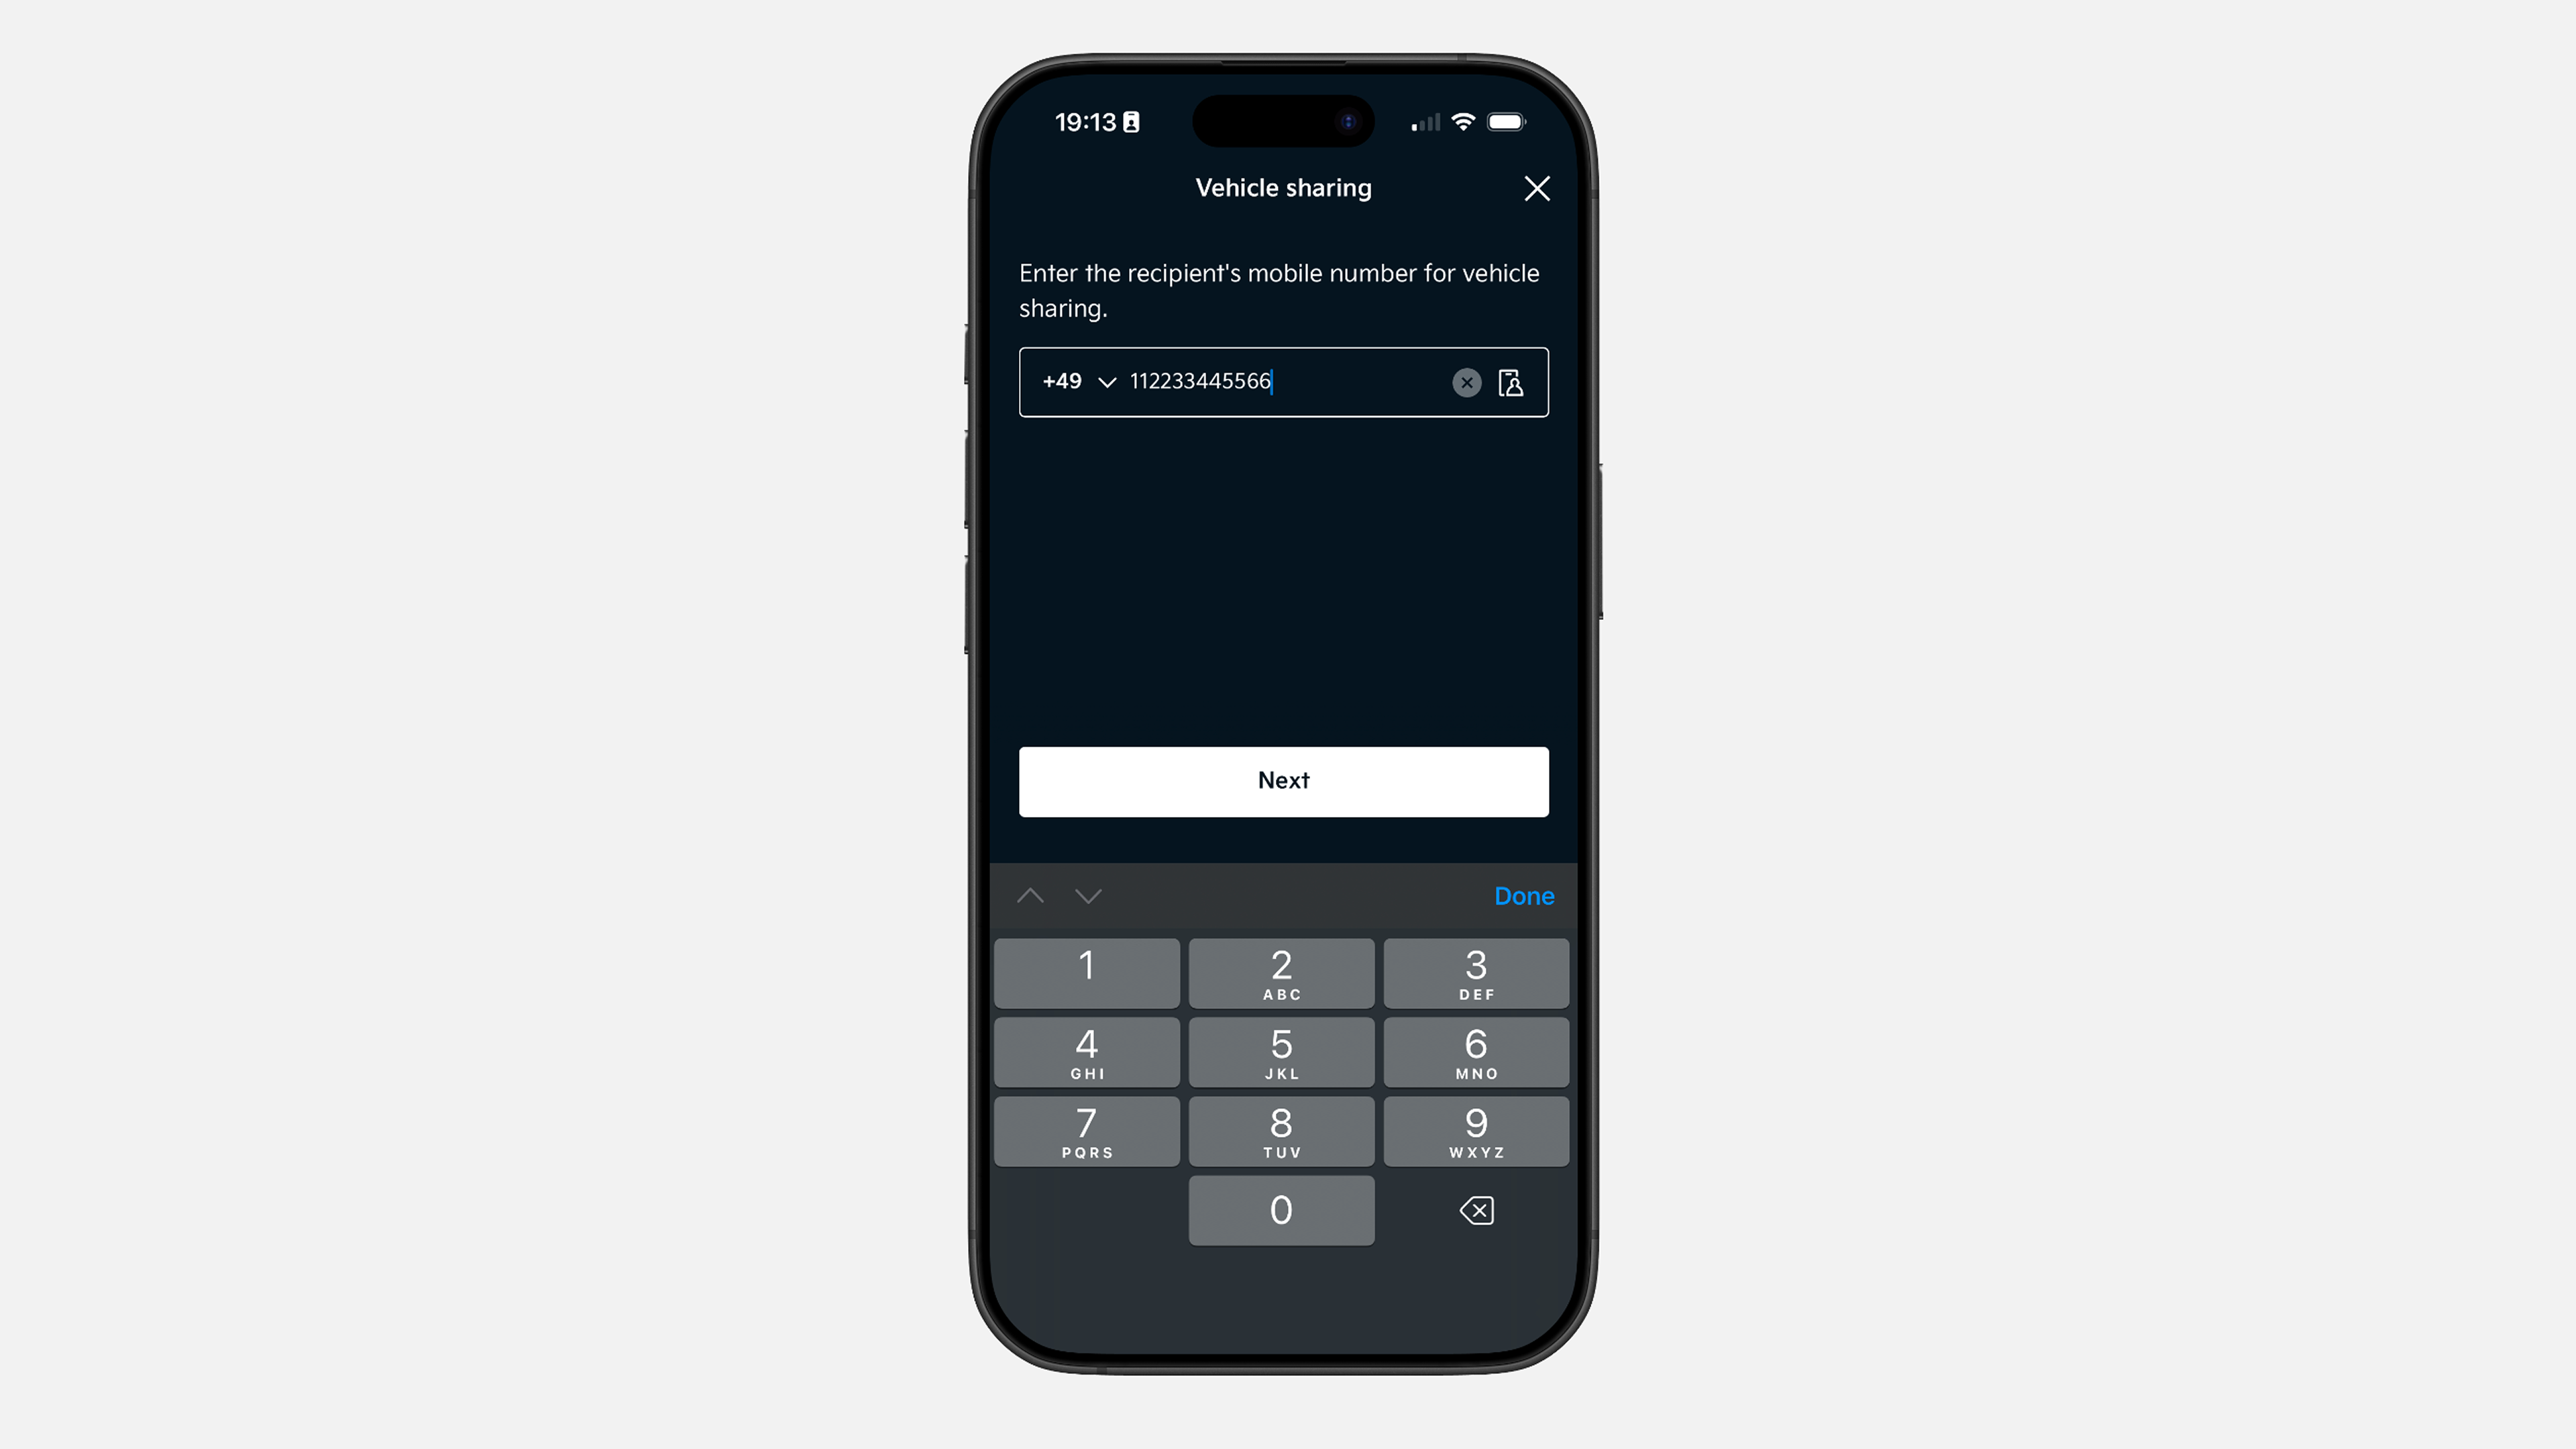
✔ Enter the recipient’s mobile number that is registered in Kia App.
Note: If the number is not yet registered, you can still send the invitation. The recipient will receive instructions to download and register.
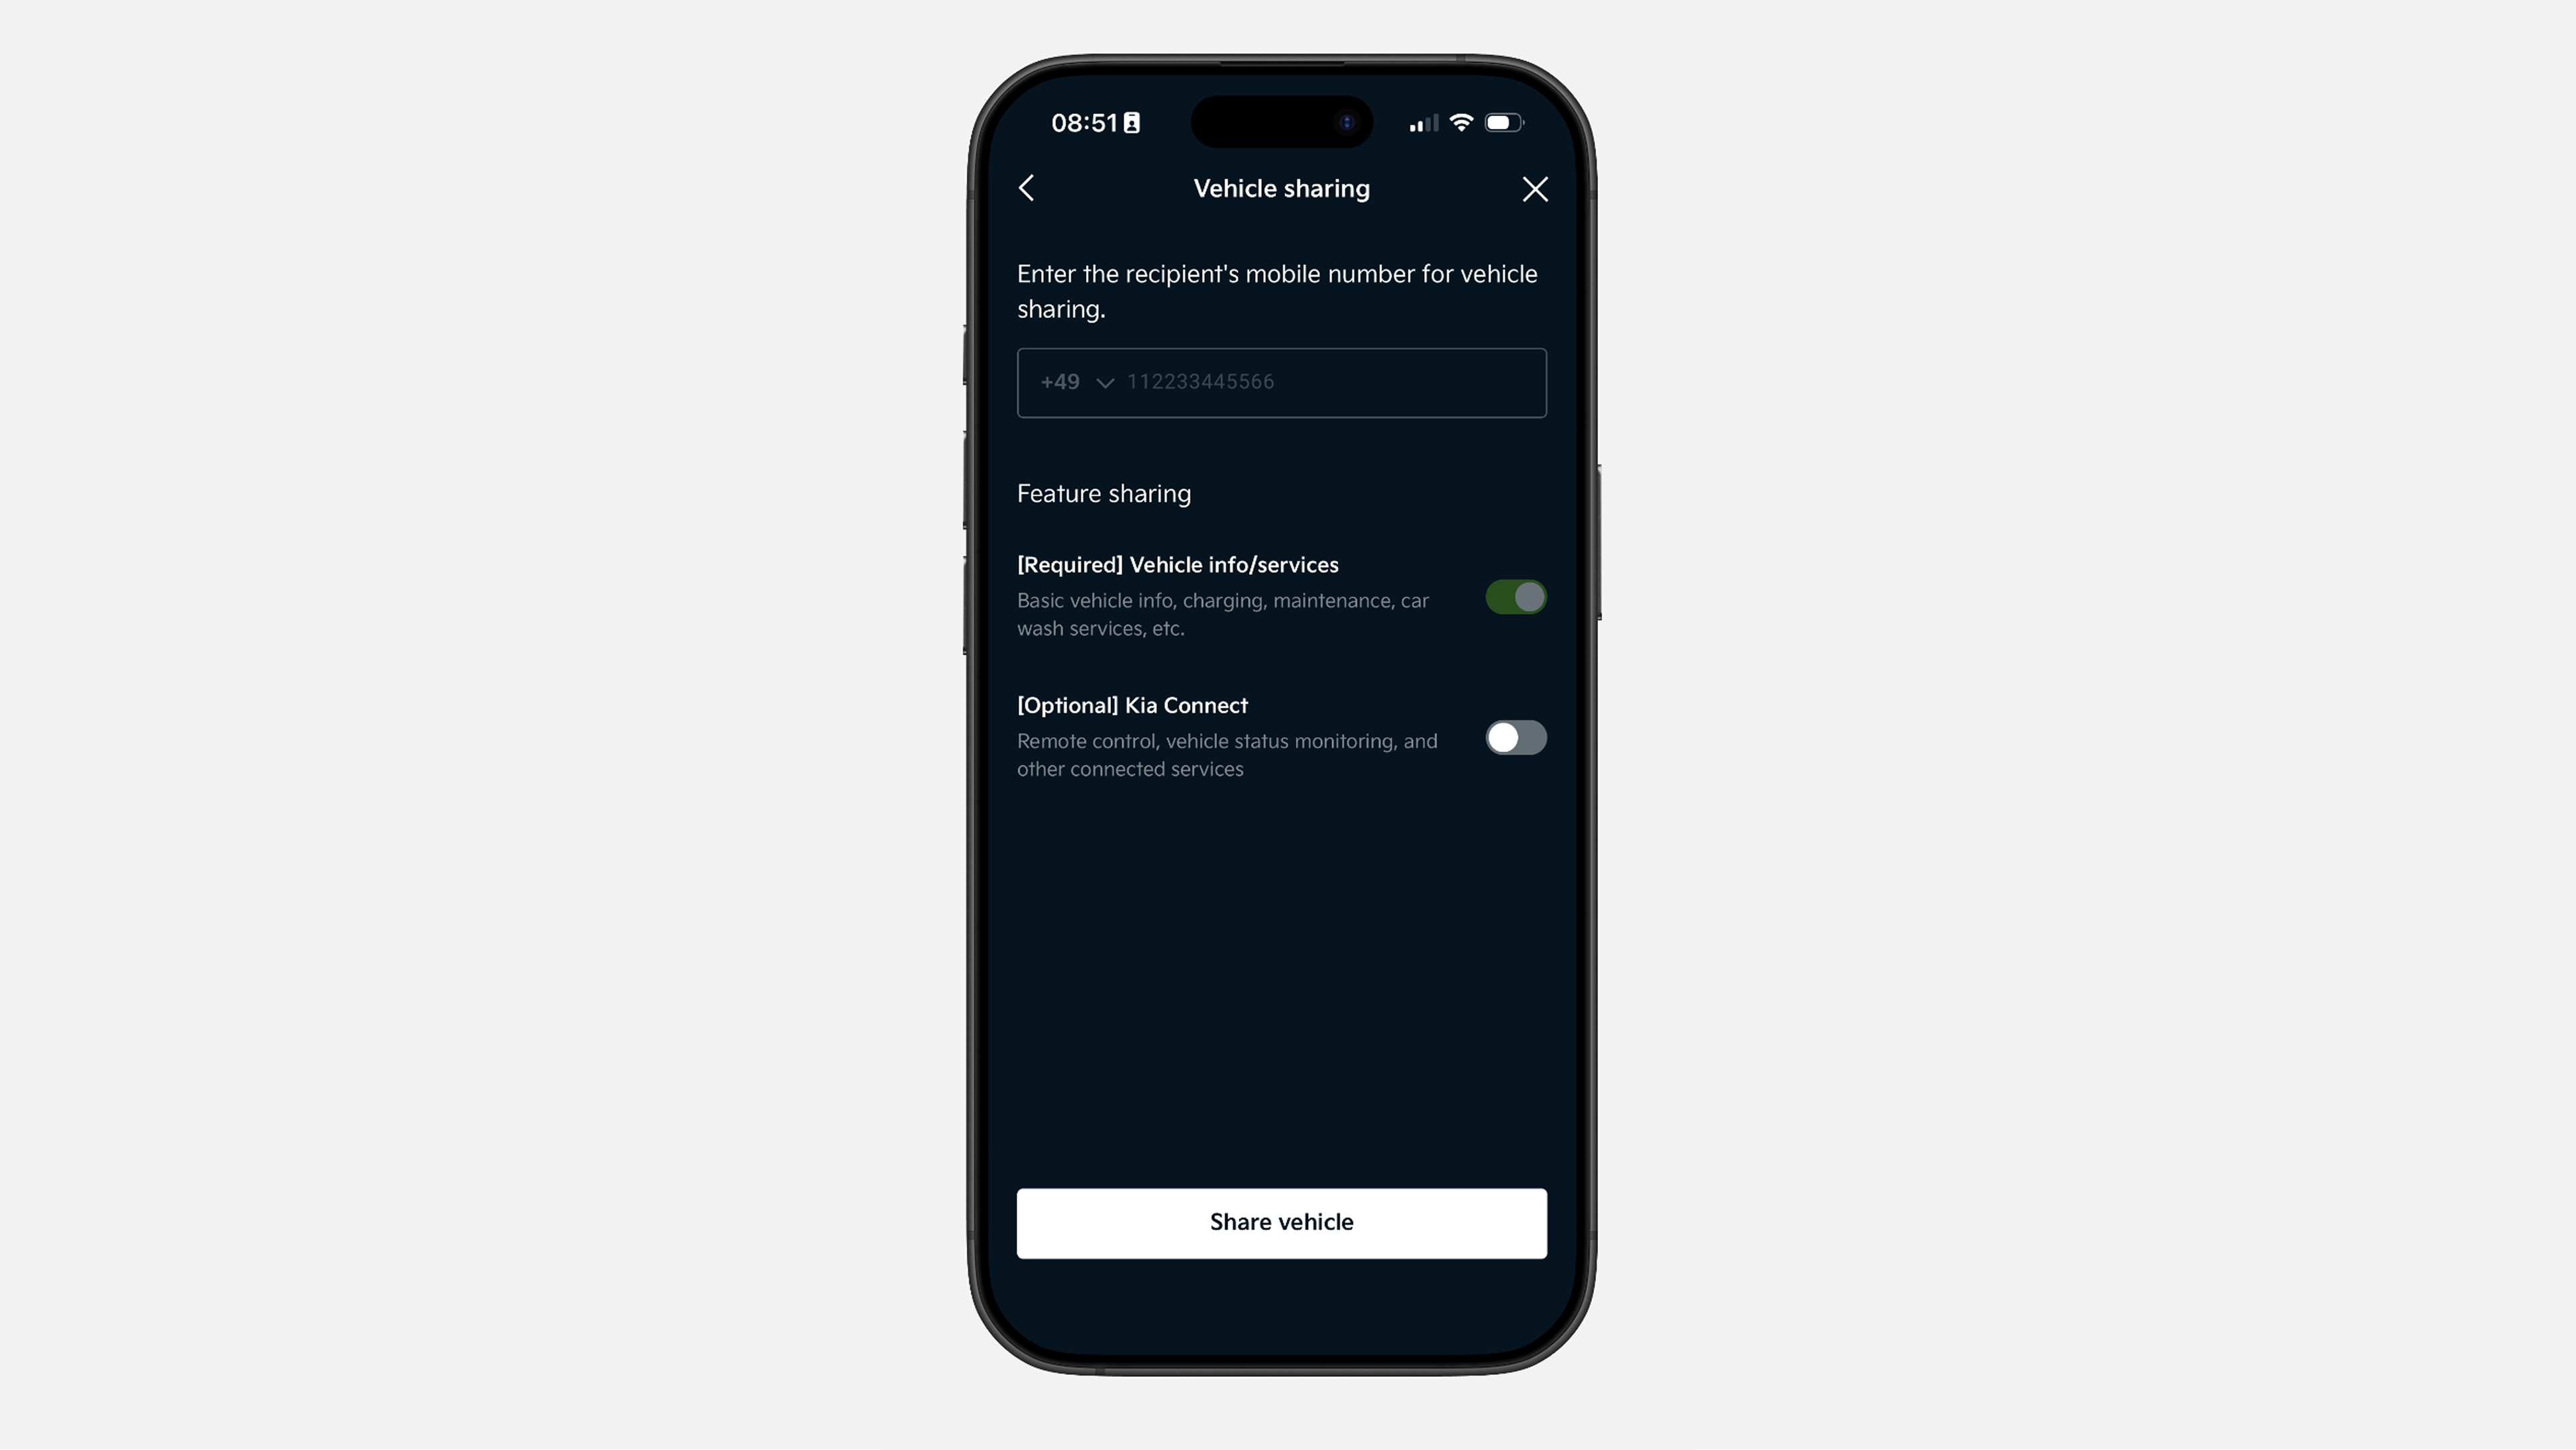
✔ Select which controls and information you want to share. If you share Kia Connect, all remote and online services available to the owner will be shared.
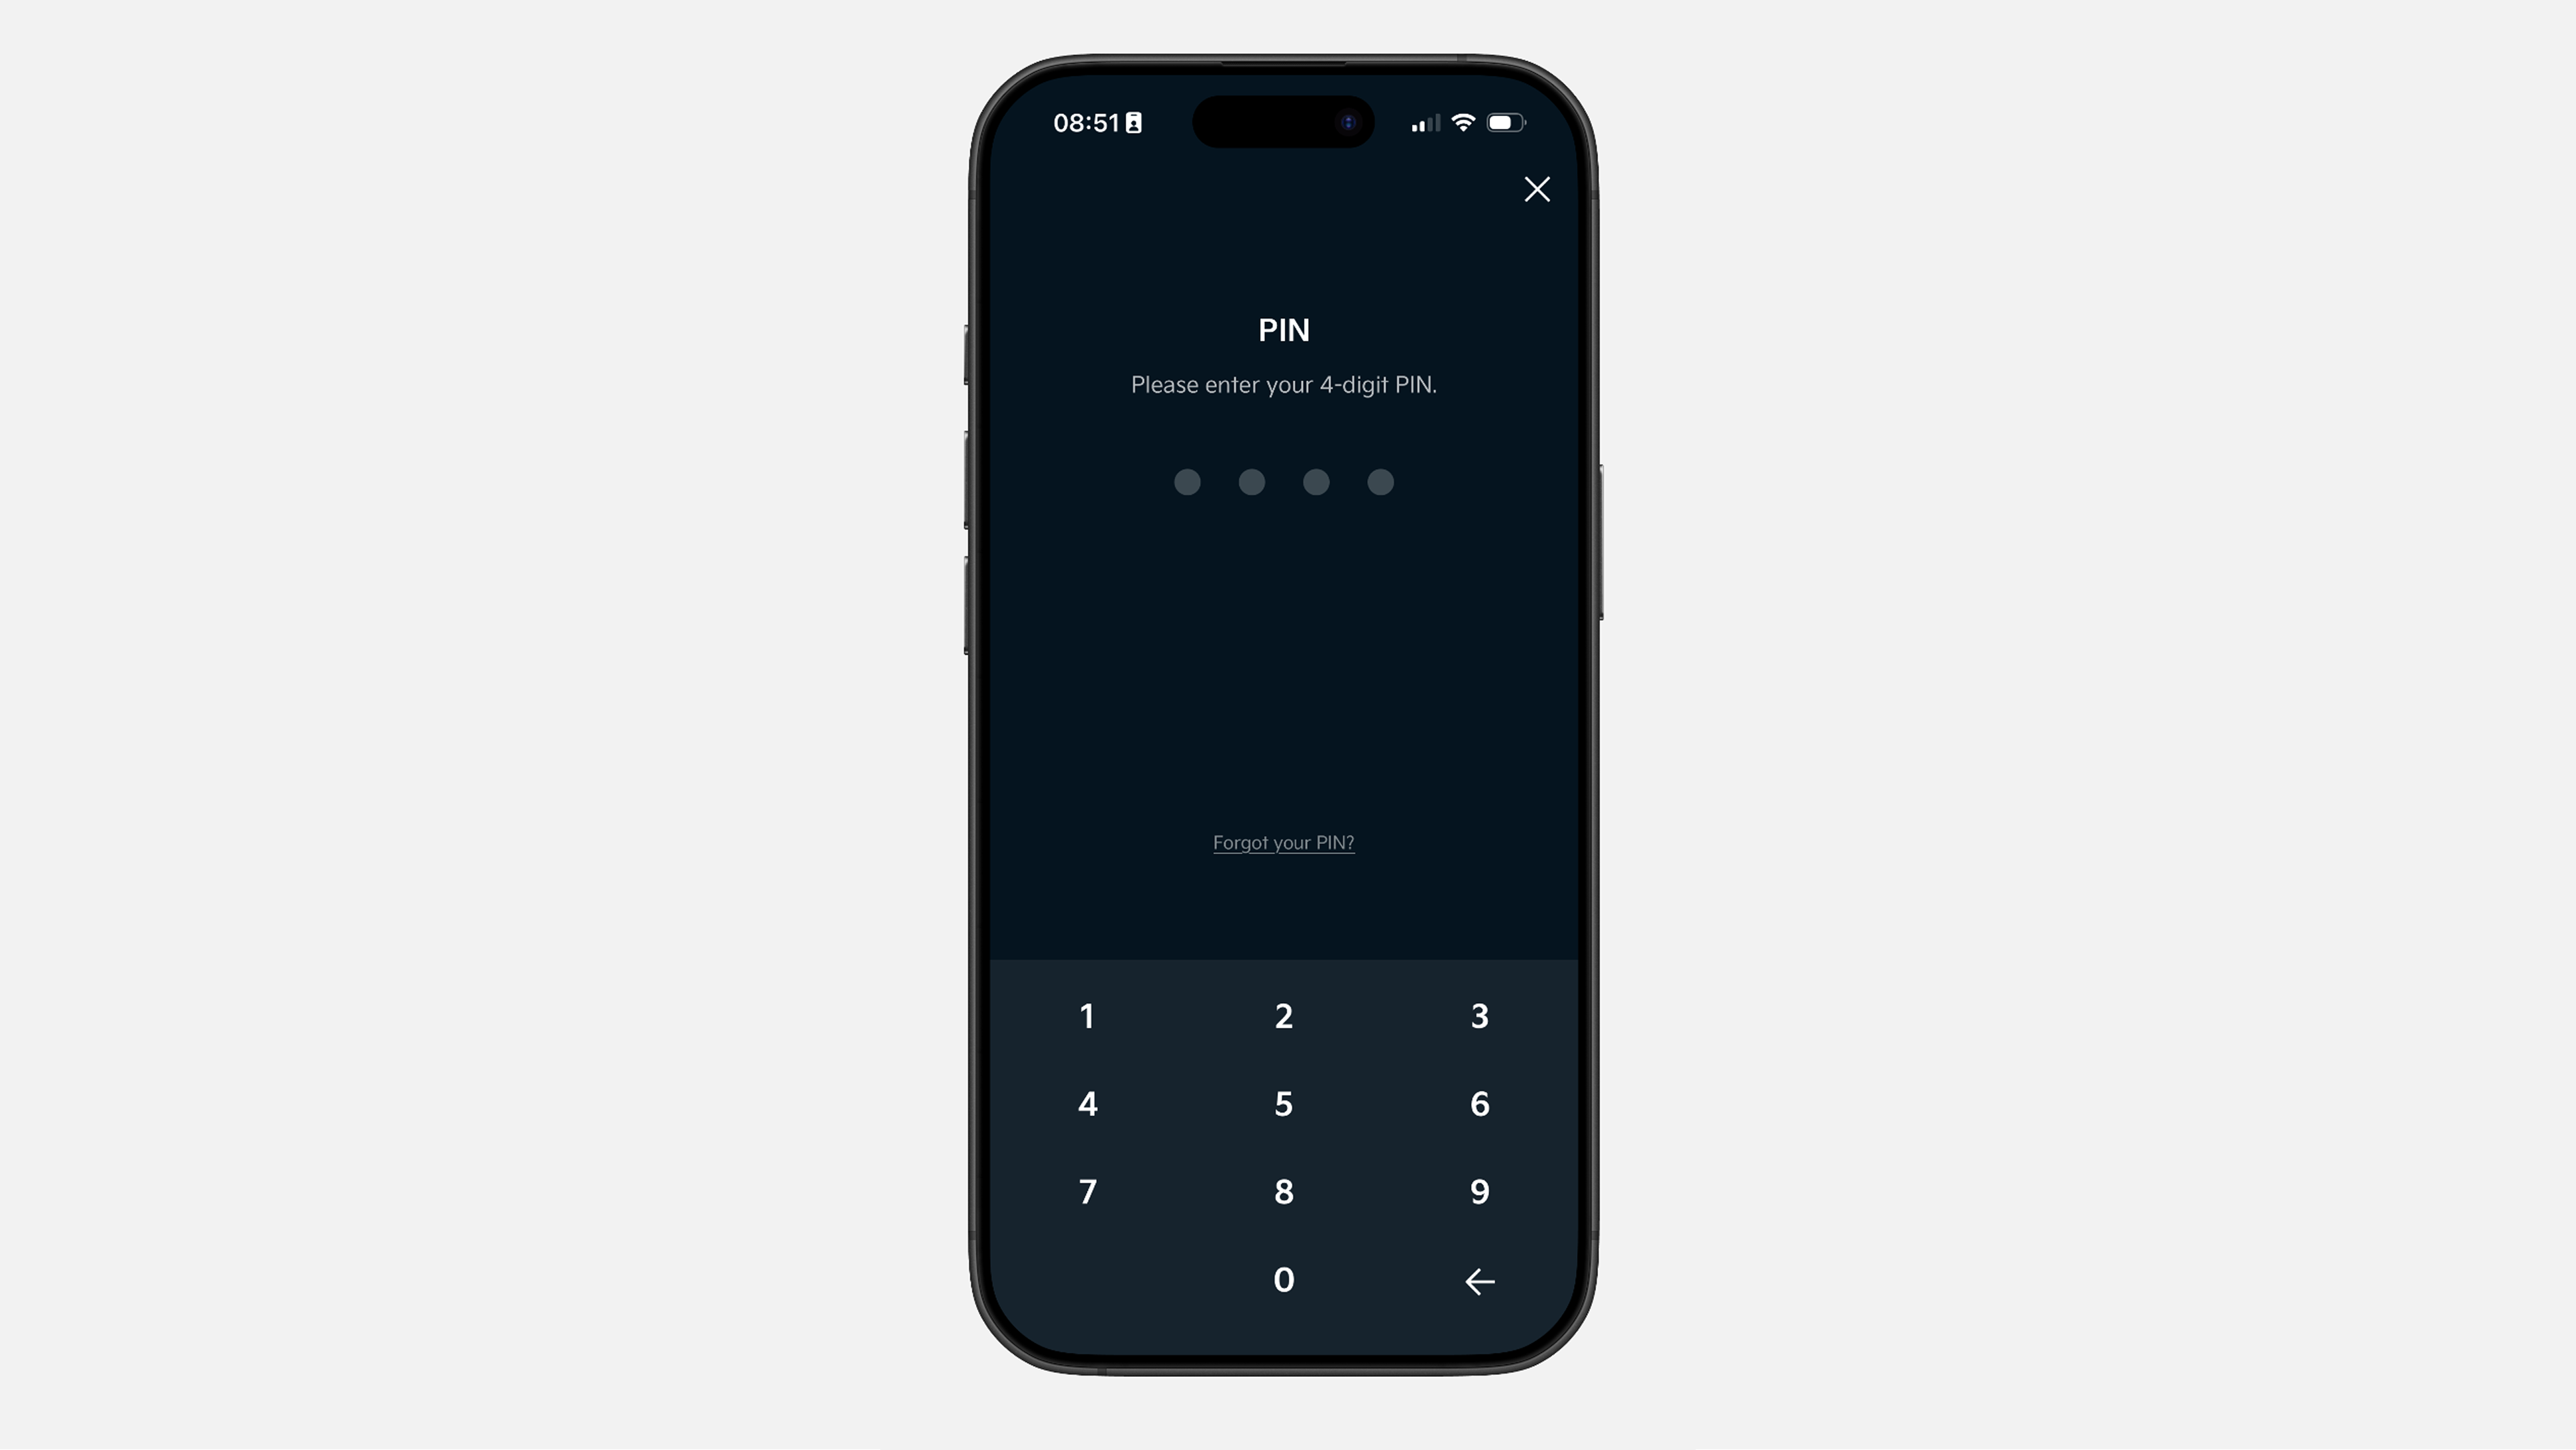
✔ Confirm the action with your Kia App PIN.
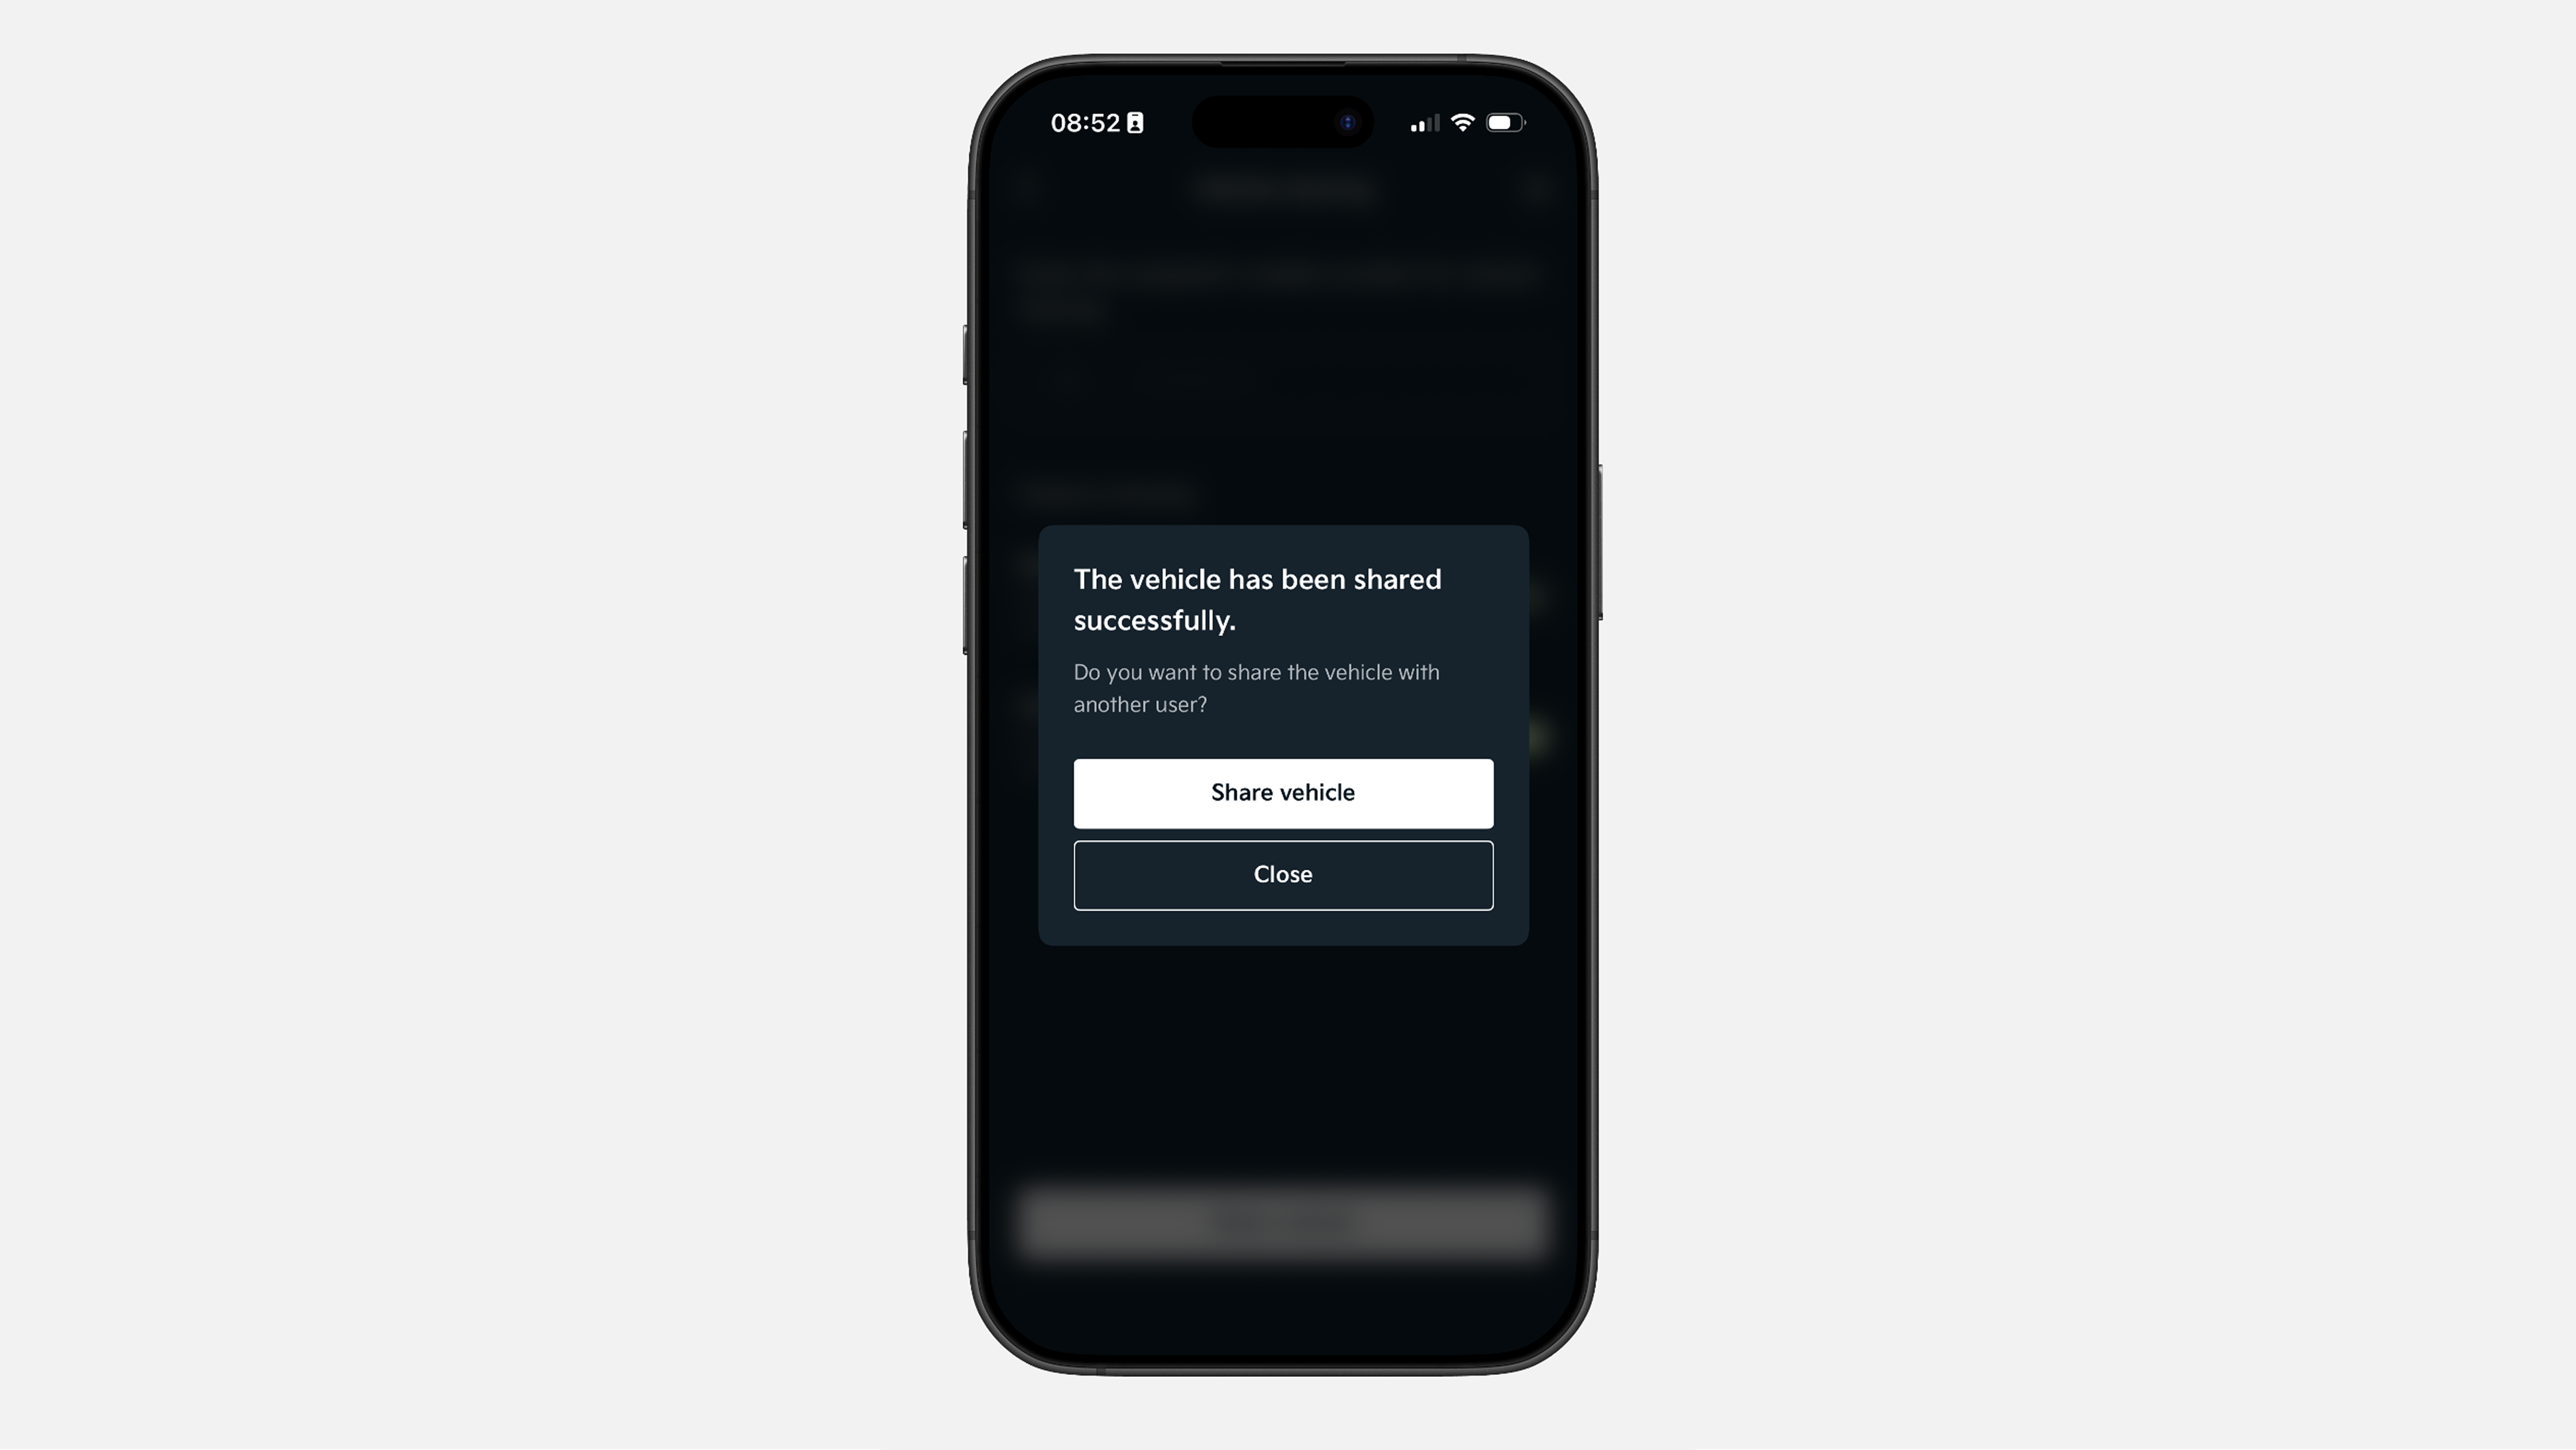
✔ This is the success page. You can close the tab or continue sharing the vehicle with other users.
We hope that our step-by-step guides have helped you with using Kia Connect, but for more information you can visit our FAQ website page.
If any questions are left, you can fill out our support forms and soon enough our team will directly answer you.
.jpg)